Post by dukemaddog on Jan 16, 2019 23:04:37 GMT
Hello everyone. Here is my Maddog Manufacturing Thread that will show all my progress on every model I'm working over the course of this year. I took that name because someone on the old League of Extraordinary Modelers gave me that name when describing my productivity. So now, every year in every Forum I frequent I will add a new Manufacturing Thread showing all my work for the year.
This year, here is where I was on January 1st....


Now at least one of those got done already, but here's the progress I made on everything first. I'll start with my aircraft...
On the C-118, I got the decal fixed that had been broken. This was then clearcoated with a gloss to protect it from being broken again. Here's what it looked like:

And here's the decal after the fix:

After that dried, I decided to remove all the window masking before moving on:

Once done there, I turned it over and installed the landing gear:

After that, I had to complete the propellers. I did that and added them to the model. It is now finished and can be seen in the Aircraft Forums...
Moving on to my armor, I decided to move on another of my armor shelf queens. This is the Russian BREM vehicle and I finished adding the tracks to the other side:

After they dried, I added the side skirts to this. They needed quiet a bit of filler between sections given how poorly this was molded:


Finally I added most of the remaining fiddly bits and the boom crane. This beastie is ready for paint now:


After all that, I was ready to start something newer and easier. I pulled out one of my Christmas presents and got started on it. This is the Russian T-28 tank that got started thus. They have a solid run of tracks molded with the wheels on. I just had to add the other side of the wheels:

After I got done with that, I snapped them onto the lower hull. What a great fit! This was so easy:

This tank comes with suspension covers so I snapped them on to see how they fit. This is gonna be a breeze to paint:

Next I started on the upper hull, adding most of the detail parts to it:

As that was drying, I started on the main turret, getting almost all of it done:

I then got half of the secondary turrets done and a few other little details and then snapped this whole thing together to see how it's gonna look. This is all of eleven minutes of work:


Wow, that went fast so I pulled out another Christmas present; the Japanese Chi Nu medium tank. I started with the wheels and tracks since this one also had a full run of tracks molded onto half the road wheels:

Then I added the suspension parts to the lower hull:

Next was to add most of the detail parts to the upper hull. I didn't even take it off the sprue; that made for easier handling:

After assembling the turret, I snapped this whole thing together to see how it's gonna look. Here's another six or seven minutes of work:


Finally, I started a model for the Cauldron of War Campaign here on the Alliance. This is a resin hull and turret conversion set that is enhanced by parts from the Dragon kit. I decided to skip the running gear and go straight to adding most of the parts to the upper hull. You can see one of the hatches got lost so I added one from the Dragon kit:

Next I added that big honking gun to the turret. What a nose:

Now there is the whole thing sitting together so far. I haven't got the engine deck glued down yet. I'm trying to find out if it is the right one:

That's all I have so far. There's no instruction sheet with this conversion set for me to determine where some of the extra resin parts go so I'll have to start looking at more pics of this tank. This build might take awhile.
Well, that's all I got done on my first day of the New Year.
And this is what I managed to get done last week....
I'll start with a couple shelf queens I've had sitting for six months to five years. This first one is my Israeli F-16I Sufa. I finally painted the pilots, closed up the fuselage and added the wings and horizontal stabilizers:

After that, I added the vertical stabilizer with the spine and then went to close up the cockpit with the canopy so I could mask it and have it ready for paint. That's when I found this: numb nuts in the rear seat was sitting too high!

Hasegawa is notorious for molding seats that are too tall for the cockpits they go in. So, I pulled out the pilot and seat and cut 1/8" off the bottom of the seat:

Once I replaced the seat and pilot, I test fit the canopy again:

Success!
Here is the plane with the wings, tail, conformal fuel tanks and canopy on:

I then turned it over and added the underwing pylons:

Once I sand smooth that goubash on the intake, this bird will be ready for paint.
Moving on to the next Shelf Queen (and yes, it is capitalized because this beastie has been sitting on my bench for three years!) I finally did what I've been needing to do for awhile. The booster rockets needed to be masked so the stripes on them could be painted. I also needed to paint the tail, so that got masked too:

I used up all my Tamiya 1/2" tape on that.
Using my trusty Sotar 20/20 airbrush, I painted all the black, red and yellow stripes and the yellow boxes at the top of the boosters:

While that was drying, I decided to assemble all the possible payloads for the shuttle. I am hoping to put down a full display with labels showing everything the shuttle can carry in front of the model itself. Here they are all assembled. Gotta look them up to see how they should be painted:

While that was drying, I also painted the grey on the leading edge of the shuttle wings and then removed all the masking on the shuttle itself and snapped the tail in place. You can also see a preview of the lower sections of the boosters with their masks removed:

Here are the boosters all unmasked:

But wait, I still needed to paint the vertical channels as well, so I masked off the channels for paint:

...and then painted them, removing the masks when they were dry:

Then I finished the boosters; assembling them fully. These things are tall!

Finally I cemented both booster assemblies to the main fuel tank, completing that whole portion of the model:

That box fan behind this assembly is a 24" box fan so you can get a general idea of how huge this beastie is. Now all I have to do is decal the shuttle and then it will be ready for mounting on the fuel tank.
Only one problem though: the forward bracket that holds the front part of the shuttle to the fuel tank broke off and went missing. It is a V-shaped part that I need to find. If however, anyone has a 1/72 scale Monogram Space Shuttle they don't intend to mount on the boosters and fuel tank, I'll be willing to buy that part from you. Please let me know.
Moving on, I managed to get some painting done on a couple of my armor models. I did this in between assemblies and painting on the Space Shuttle to give myself a break on it. First I painted the Russian BREM so that godawful white is now all covered up:


Just gotta detail paint that and then add clearcoat so I can attach the decals to it. Meanwhile, since I had the green out, I also sprayed the T-28:


Finally, I started adding the wheels and tracks to the SG-122 gun. I got one side done and even started the other side with the tracks added to the drive sprocket for the other side, but I decided to stop here:

Yeah, those tracks were tough, I'd had enough that day. I might get the other side on later this week.
After all that struggle with those tracks, I wanted something easy to build. So, I pulled out one of my three Trumpeter SA-6 Gainfuls and got started on it. This is after five minutes of work:


I found out later that the elevated piece on the back should be flat. I found that out when I finished building the launching assembly and missiles and added the whole assembly to the hull:

Once I paint this, I'll be marking it in West German markings to signify a vehicle that was added to the Bundeswehr after the unification. The other two I will make Russian and either Syrian or Egyptian.
The last update I have is out at the shipyards. I painted all the detail parts that I had added to the Izumo earlier:

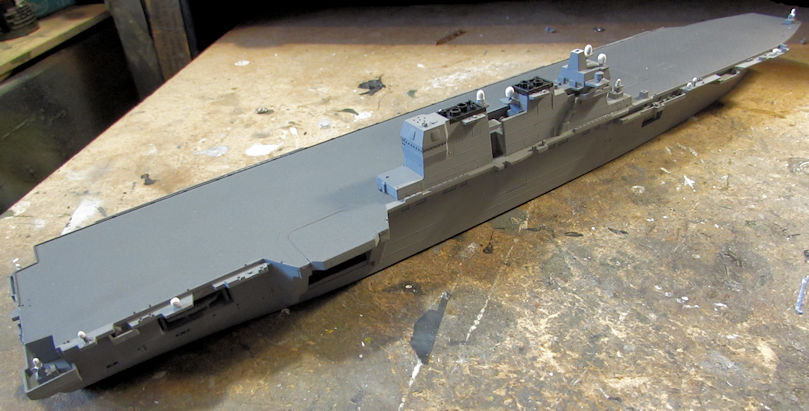
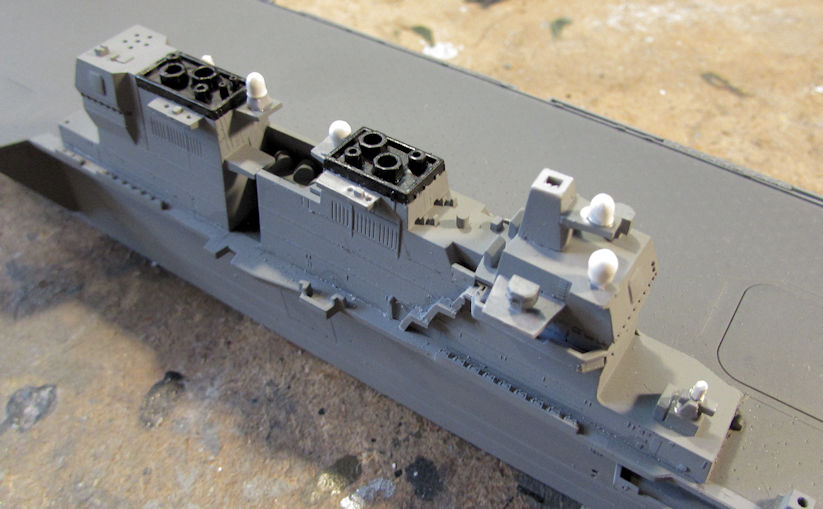
Here's a close up shot of the island details:
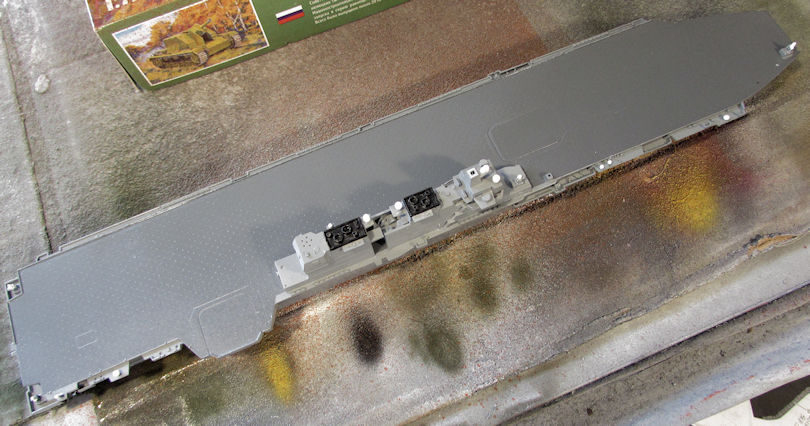
After that, I clearcoated this for decals. You can't really see it too clearly in this pic, but it is shiny and ready for decals:
Okay, that's all I got for now. I hope you enjoyed the tour. Stay tuned, there's more to come; especially since it's supposed to rain for the next three days! Yay!!!
Thanks for looking in, comments are welcome.


 .
.


 There's more progress in that one post than I make all year!