|
|
Post by dukemaddog on Aug 31, 2020 22:16:26 GMT
Thanks Ian! Yeah, both an M-1070 and a HEMMTT, along with a Japanese transporter as well. Now to get them done....
|
|
|
|
Post by PorcoRosso on Sept 1, 2020 15:13:31 GMT
The A400m is looking great.
|
|
|
|
Post by dukemaddog on Sept 1, 2020 18:28:08 GMT
Thanks Porco! It's taken a lot of sanding and filling and sanding again to get that A-400 looking halfway decent. Now I need to add the landing gear first, then test-fit everything to see how much weight I'll see to add to the nose. I for got to add it before I closed this up, but there's a sizable space in the nose gear bay that hopefully will fit enough weight to keep this on her feet.
Stay tuned.
|
|
|
|
Post by Paul B on Sept 1, 2020 18:43:04 GMT
Get that lead in there Duke  , better safe than sorry |
|
|
|
Post by dukemaddog on Sept 2, 2020 19:17:53 GMT
Oh yeah. Will do Paul. I hope to be getting back to this today.
|
|
|
|
Post by dukemaddog on Sept 5, 2020 21:53:07 GMT
Here's a small update showing everything done in the past week. I'll start with my aircraft as usual. On the C-54, I masked off all the windows on the fuselage using my new Vallejo liquid mask. Looks good so far, even though it's tough to see in these pics: 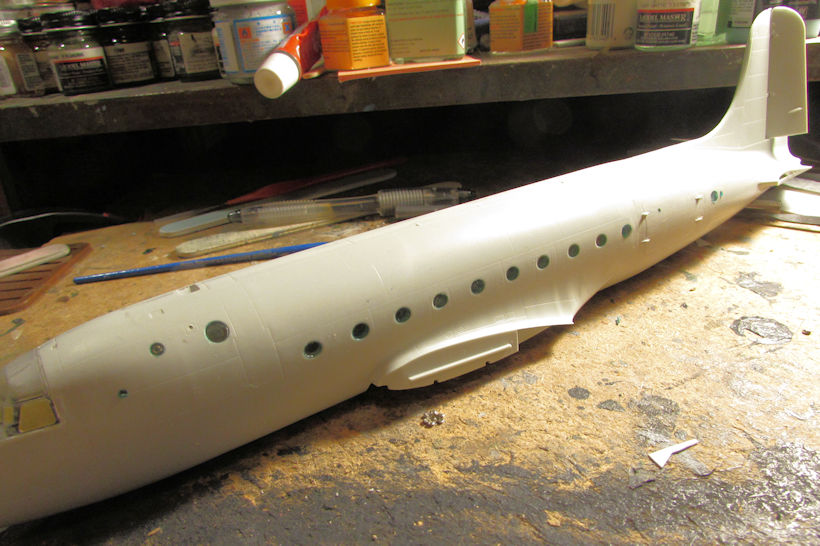 Next I completed all the flaps for the wings and tail feathers. Not all are installed just yet: 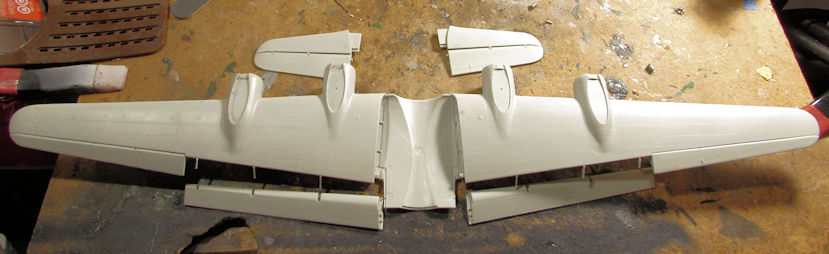 After that I decided to dry-fit the wings and tail on the fuselage. Tail looks good, but the wings have some space issues that I'll have to deal with: 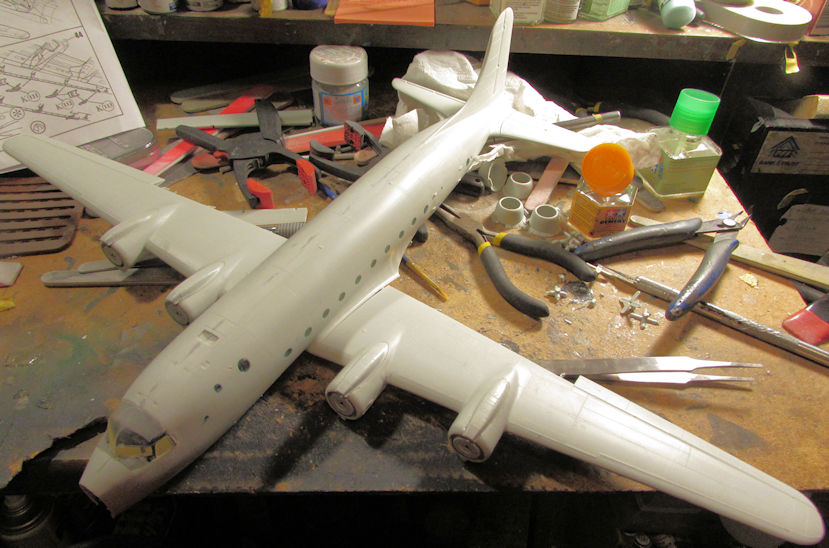 My next project was the A-400 Grizzly. I also masked off the fuselage windows on this as well with the Vallejo mask: 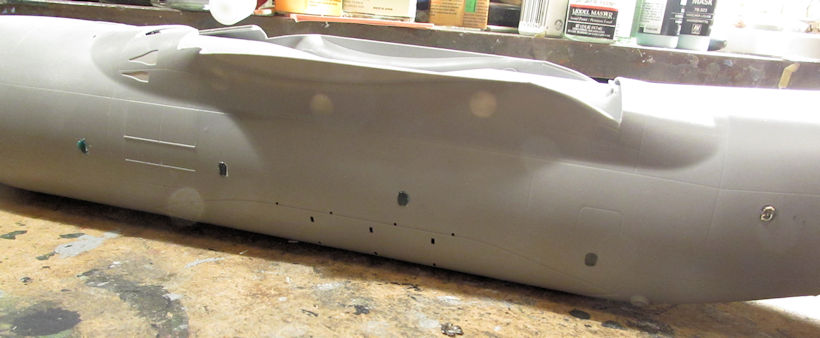 I then started on the landing gear bays. I'll have to paint some interior and find some clear parts before I can go further here: 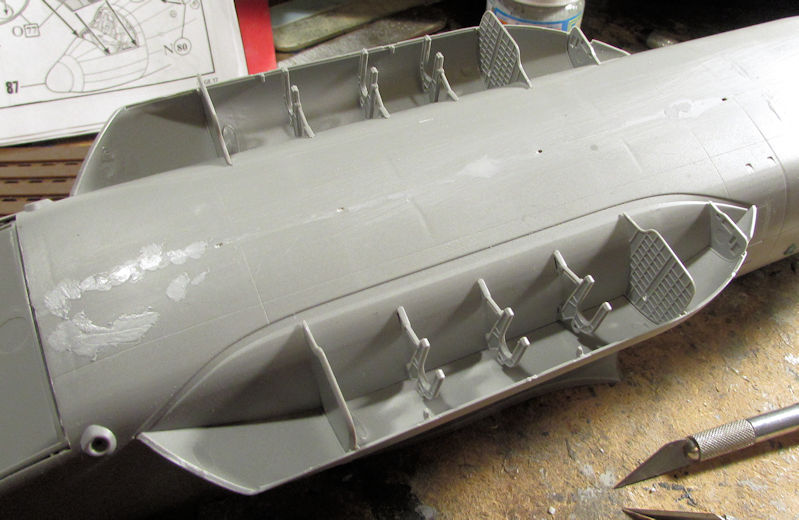 I then built the propellers. Simple enough: 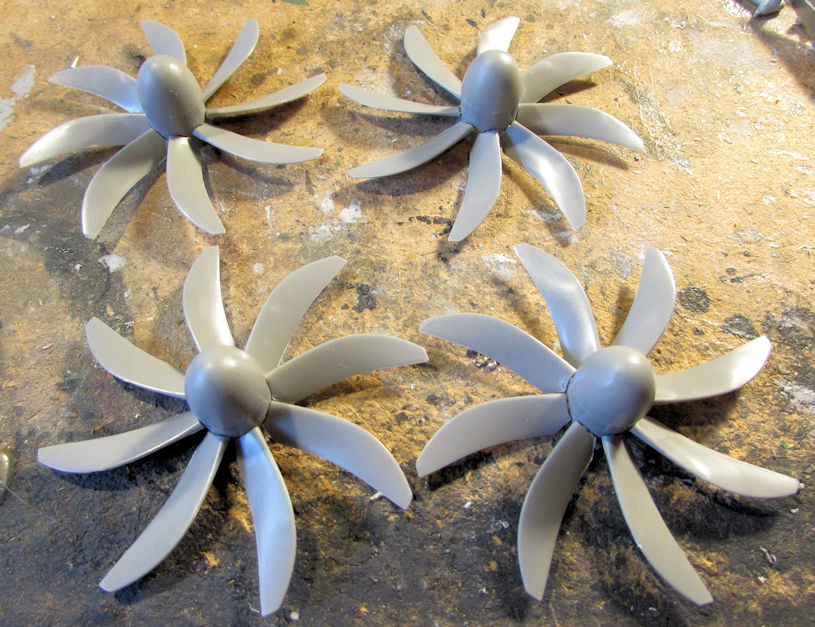 I then snap-fit the wings and tail on this one to both test the weight I'll need for the nose; as well as see what fit issues I'll have on the wings: 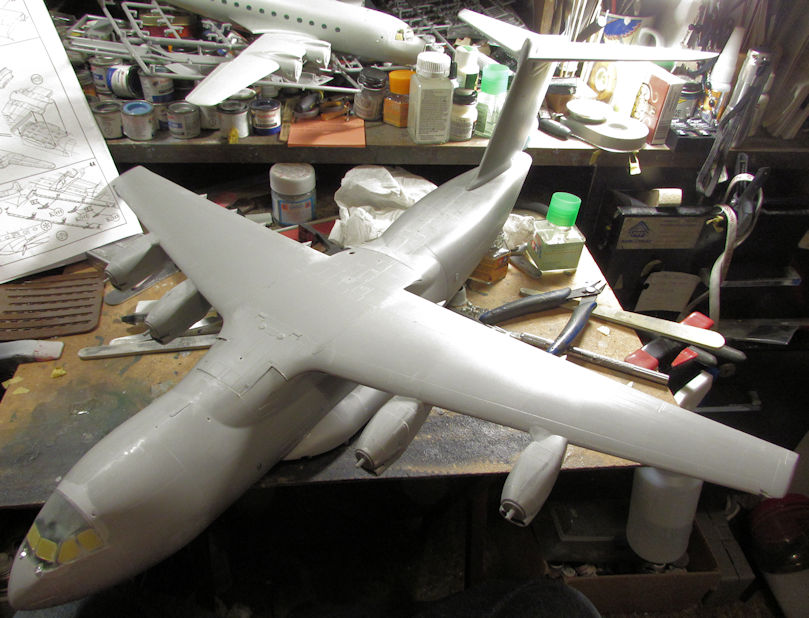 Moving on from there, I finally got all the parts on the landing gear bays for the AN-124 Condor. I then started assembling the main gear bay doors: 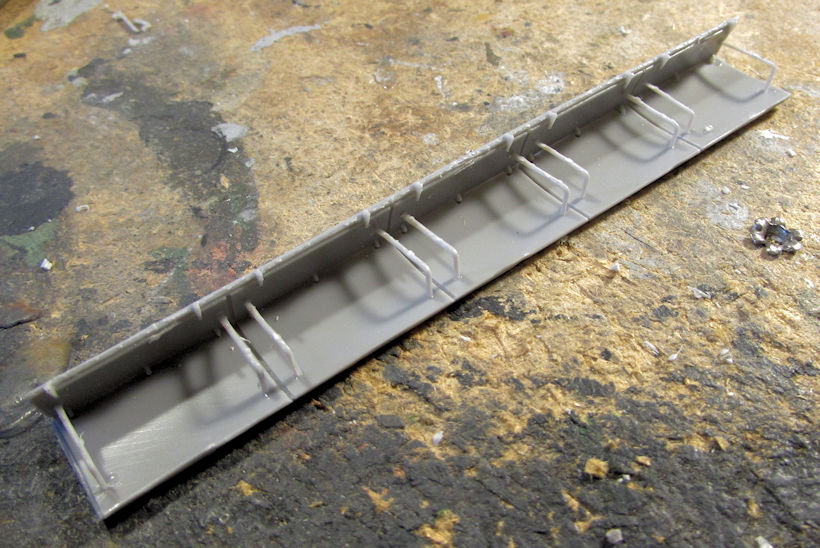 Here are all the main landing gear bays and doors ready to install on the fuselage. I need to paint everything first before I add them in: 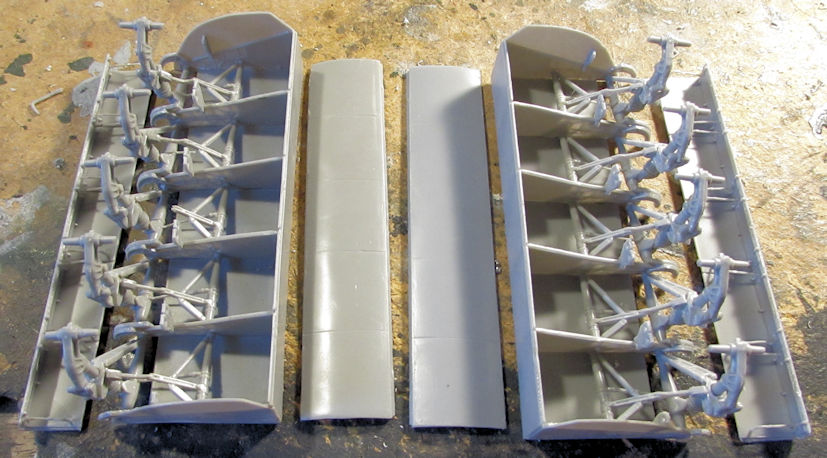 After that I wanted to see what it was going to take to mount the cockpit inside this thing. First thing I needed to do was to cut out a section of the nose. Using the scriber and knife shown, I was able to do that: 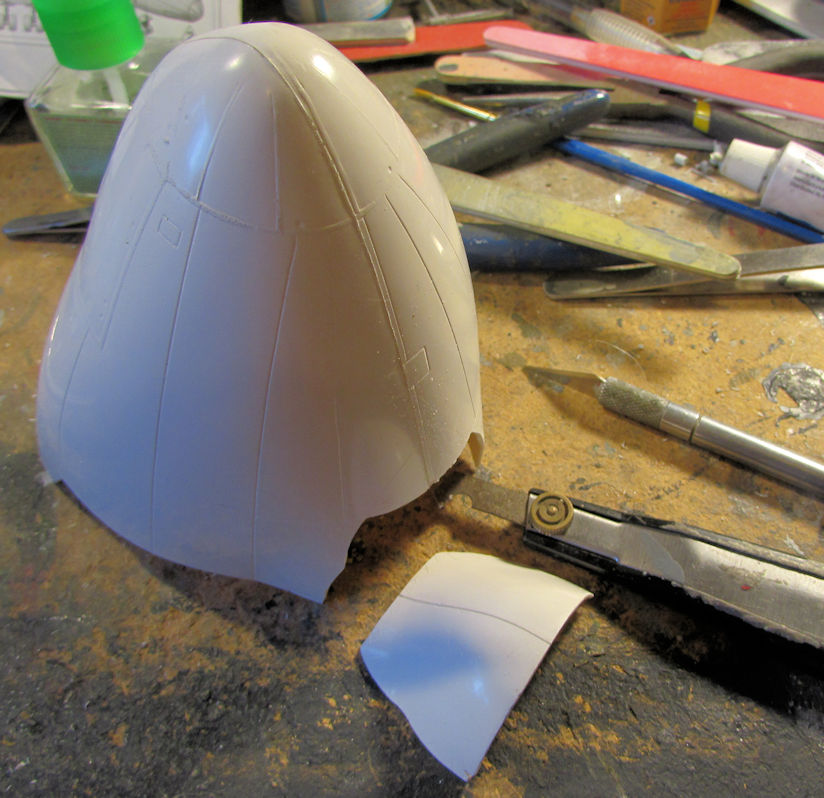 Later I test fit the cockpit inside the main fuselage as indicated by the instructions. I'm gonna have a bit more cutting to do; as well as filling later on when this all goes together: 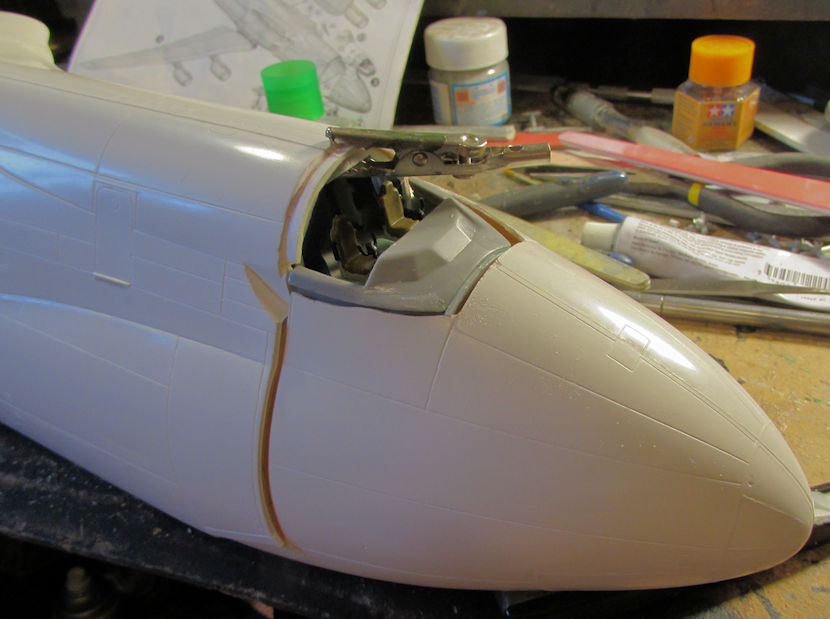 You can see why I didn't paint anything behind the pilot's seats... After that I masked off the windows on the main cockpit canopy: 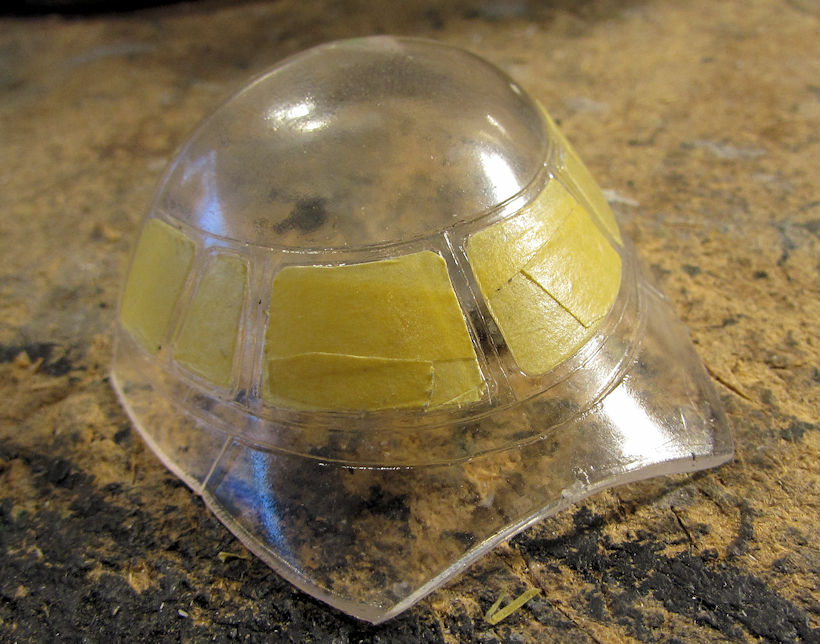 That's all I got on my aircraft. Next is my armor; which got a little done. Most if it was tedious, like the masking on the HEMMTT tank transporter and trailer with Silly Putty: 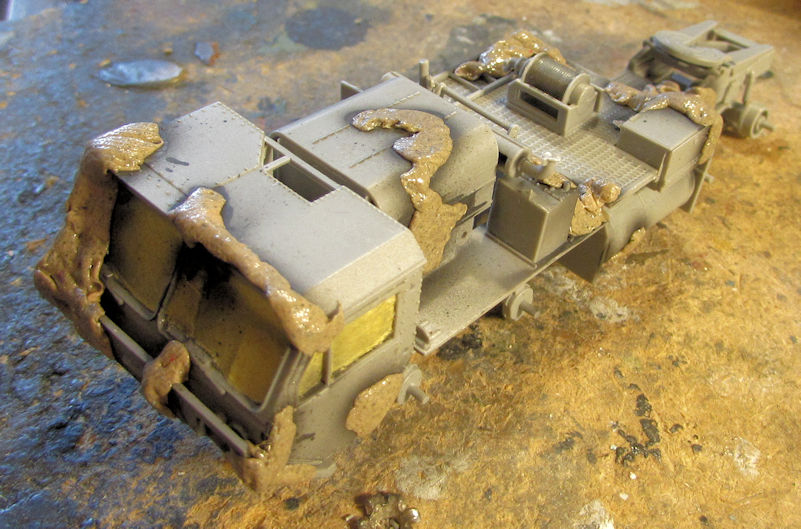 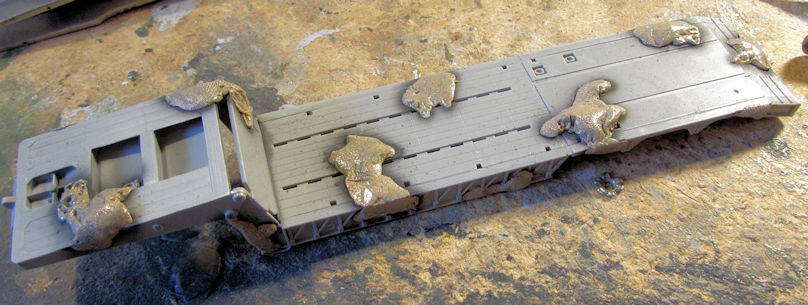 I also masked off the M-1070 and trailer at the same time: 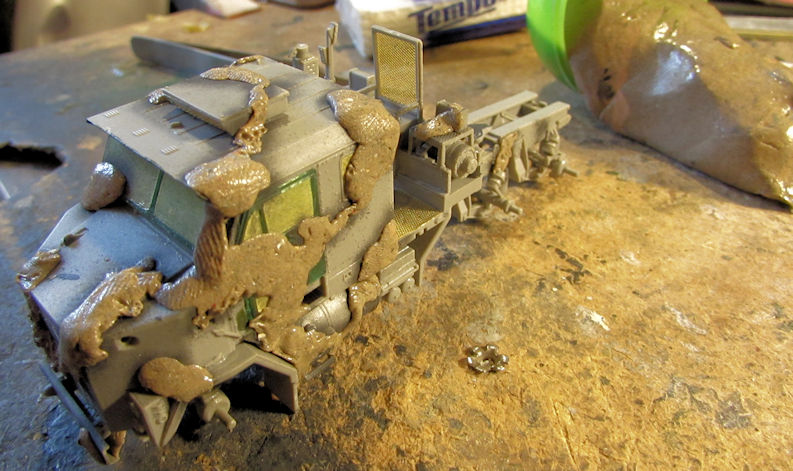 You can see in that pic that I still have plenty of Silly Putty on hand.... Here's the trailer. It was a bit more difficult to mask than the HEMMTT trailer: 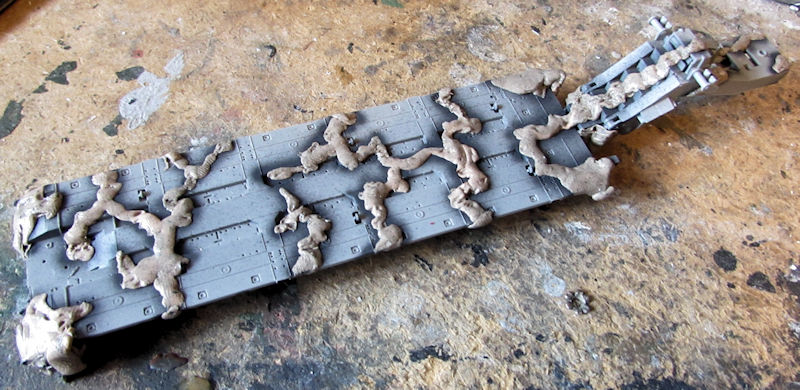 After that I moved ahead on the BTR-3K, finally getting the turret completed: 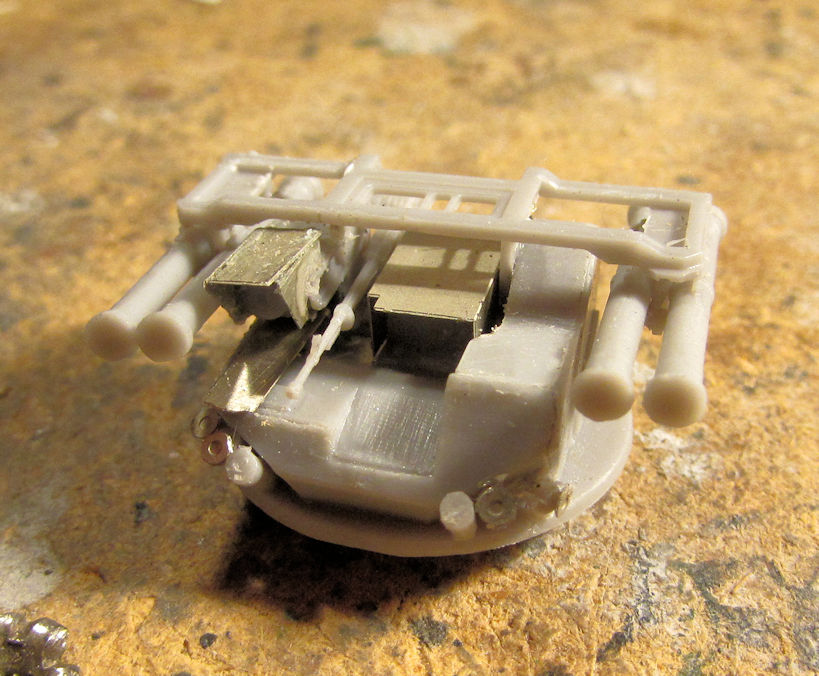 What an ordeal that was! I also finished most of the detail parts on the main hull in preparation for paint:  Time to shoot some paint on this Bad Boy, and possibly see about adding the digi-camo decals later: 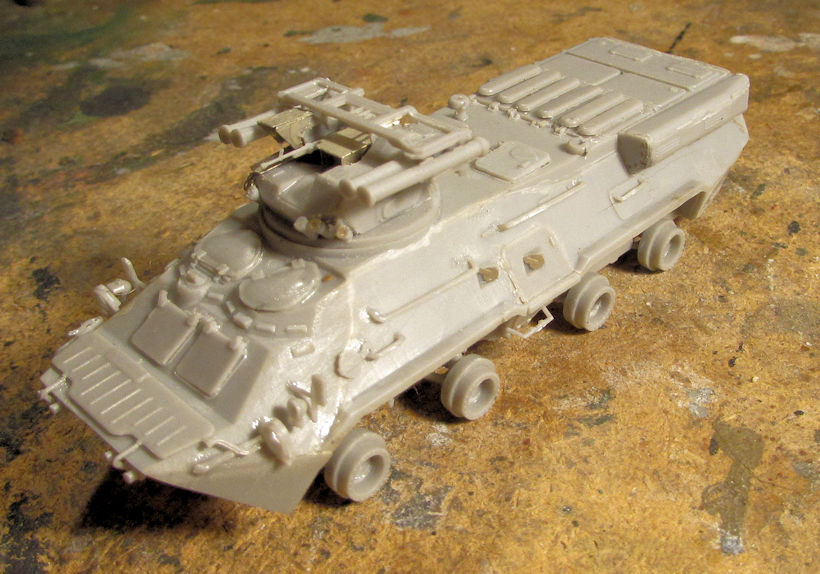 That's all for this small update. Stay tuned for more later and thanks for looking in on this one. Comments are always welcome. |
|
|
|
Post by Paul B on Sept 5, 2020 22:04:25 GMT
Lovely work Duke  . The BTR is a real beaut fella and I must say I have gotta try that Vallejo masking fluid out  . I need something like that when I start my Macchi MC205, it should make the Italian camo much easier |
|
|
|
Post by PorcoRosso on Sept 6, 2020 6:06:17 GMT
Nice work on the aviation builds Duke.
|
|
Si B
Plastic Connoisseur 
Posts: 1,443
|
Post by Si B on Sept 6, 2020 7:41:47 GMT
Coming along very nicely there Duke B)
I’ll have to take a look at Vallejo liquid mask...is it a turquoise colour in the bottle?
|
|
|
|
Post by Armorguy on Sept 6, 2020 13:35:51 GMT
I prefer this kind of masks these days!
|
|
|
|
Post by dukemaddog on Sept 6, 2020 21:05:06 GMT
Thanks Paul! The BTR is kinda growing on me. Before I wasn't all that crazy about it. Now that it's almost done....Yeah!
Thanks Porco! I really want to finish some of these huge aircraft!
Thanks Si! I appreciate that. Just trying to maintain the momentum. Paul and Si, the Vallejo masking agent is turquoise in the bottle and dries into a darker, semi-clear turquoise. It's a bit tough to cut when dry, so shaping it while wet is the best option in my opinion. Paul, with the irregularity of Italian camouflage this type of masking agent would fit the bill exceptionally well, especially when applied straight from the bottle.
AG, I agree wholeheartedly!
|
|
|
|
Post by SteveM on Sept 7, 2020 7:19:44 GMT
So let’s me see? A C-54, and a A400M, plus one An-124... do you live in a barn matey? That lot would fill my whole modelling space! Nicely done though, I don’t know how you keep the mojo up |
|
|
|
Post by Ian H. on Sept 8, 2020 17:26:43 GMT
Duke, that BTR variant looks really cool! Also looking forward to the camo on the tank transporters.
Regards,
Ian
|
|
|
|
Post by Boots on Sept 8, 2020 18:12:58 GMT
Another busy and excellent up date Mark  |
|
|
|
Post by dukemaddog on Sept 8, 2020 18:34:00 GMT
Steve thanks! The way this house looks right now it might as well be a barn! What a cesspool! No, I have no room for these big projects but I'm building them anyway because A) I want to see them complete and B) if I wait till I have the room, they will never get done! I am surveying the ceiling to see where I can hang these when they are done. As for the mojo, one thing that helps is being able to switch from aircraft to armor and back again; with the occasional ship thrown in. That helps keep everything fresh.
Ian thanks! I can't wait to start slinging paint at those tank transporters myself. It might happen today as it's a cool enough day to shoot paint. I agree about the BTR. I don't usually model Ukrainian vehicles but that one was too cool to pass up.
Boots thanks! Hopefully soon I'll be posting some more.
|
|
|
|
Post by Snipersmudge on Sept 9, 2020 4:43:45 GMT
as ever another feast of work, great stuff!
|
|
|
|
Post by dukemaddog on Sept 9, 2020 20:37:19 GMT
Thanks Pete! I got more done, so hopefully I'll be able to post soon.
|
|
|
|
Post by dukemaddog on Sept 12, 2020 22:23:36 GMT
I just realized I'm been posting here instead of in my 2020 Manufacturing Thread. Since I'm about five posts behind on it; I'll just keep posting here until 2021. Then hopefully I'll remember to keep posting there next year!
Okay, here it is a week later and I actually have something to show for it. This is another small update for this week. First, I painted the propellers for the A-400 in basic black: 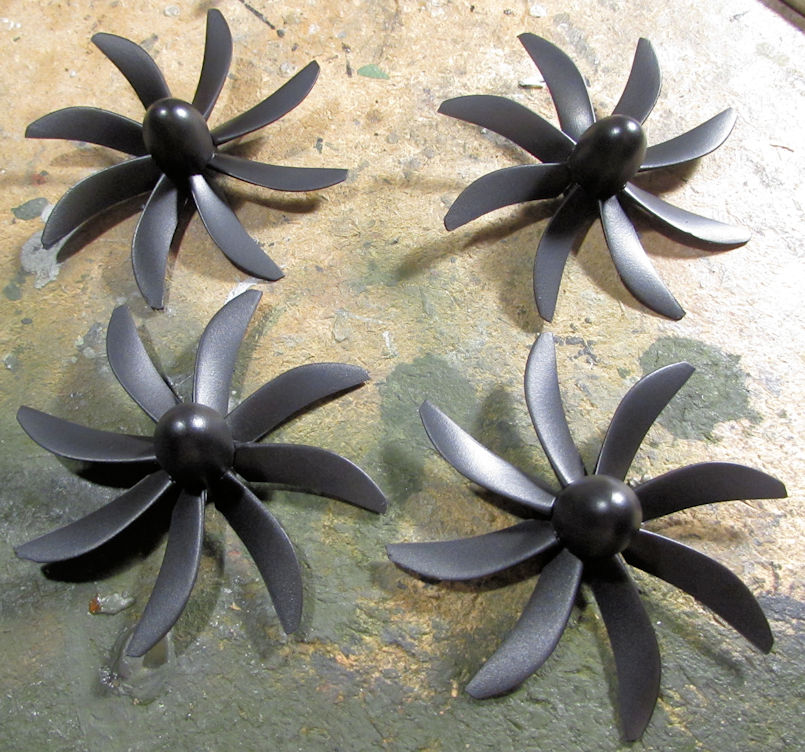 And that's all I did on that plane. I guess I was too interested in moving forward on the An-124 instead because I kept going back to it. To wit: While chatting on the phone with someone, I picked up the one wing and started dry fitting the wing fences and engine pods, mostly to see what kind of adjustments I was going to need to do to make them fit: 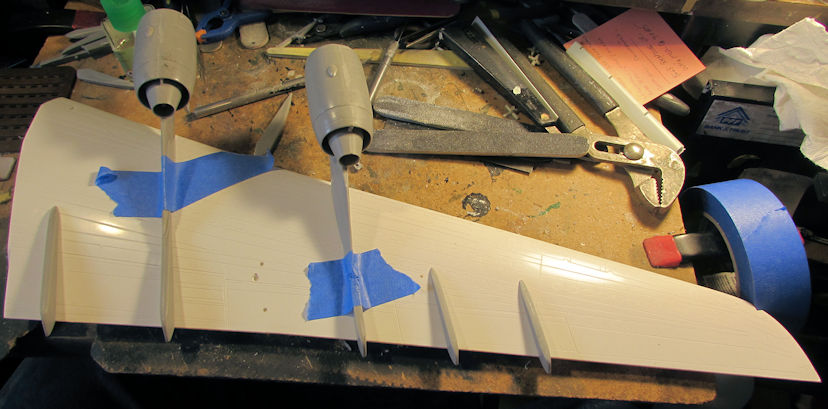 Well, I took some time to make whatever adjustments were needed and the next day, I found myself pulling out my two-part epoxy and gluing them all down. I started with the wing fences first as two of them on each wing needed to be fit under the rear of the engine pods: 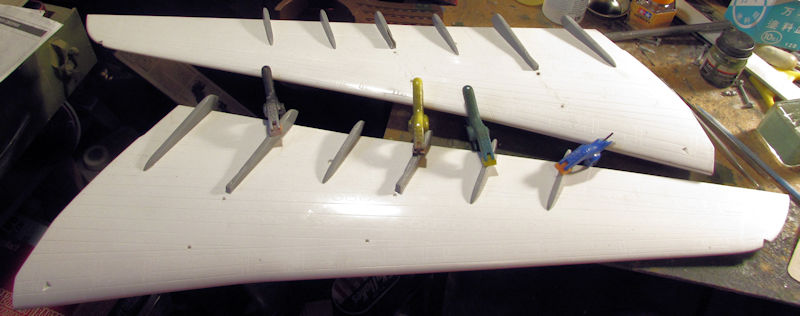 You can see just how big those wings are. They are overhanging my workspace by half! The next day; after letting the wing fences dry overnight, I added the engine pods: 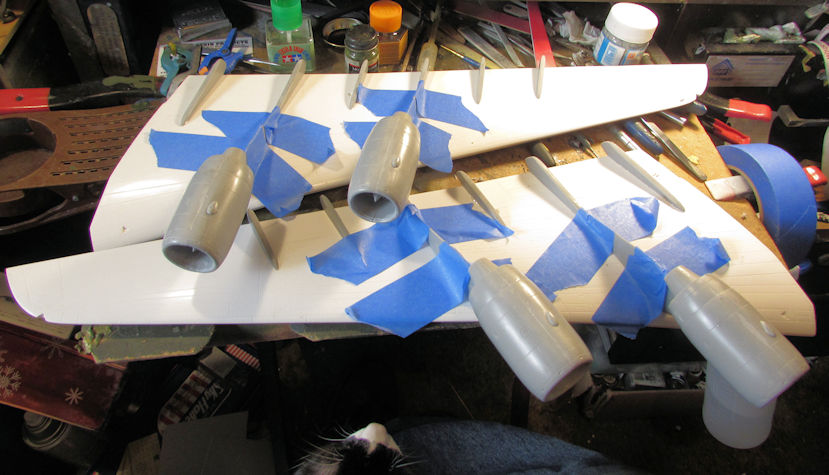 They are still drying there, later I'll have to do some filling and other repair work due to some issues with fit and my not paying enough attention to what I was doing till too late. Meanwhile, I decided to finish the nose section as well. I needed to cut two sections out of the bottom for the nose landing gear. I did that and then proceeded to glue in the nose gear 'bay'... such as it is: 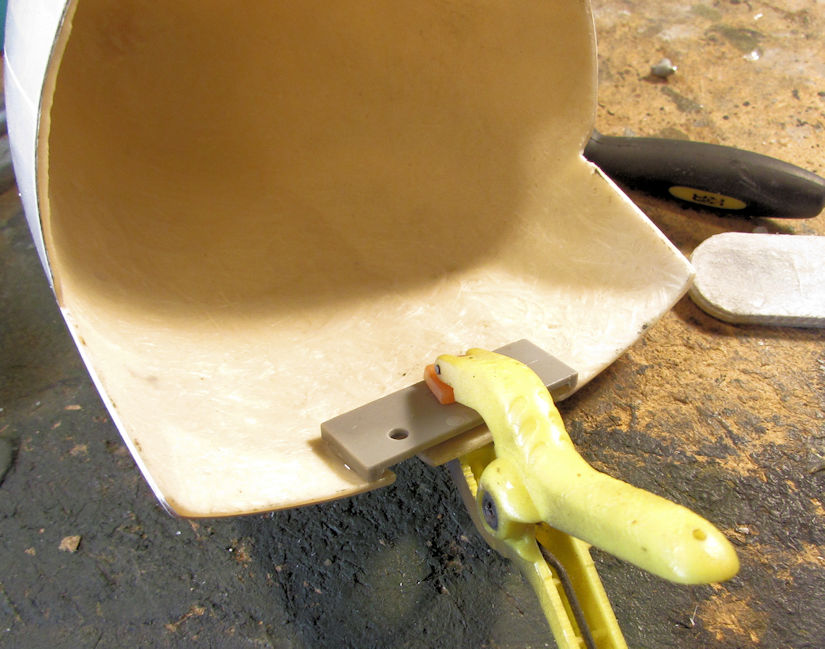 This is all you can see of it from the other side. I guess there is no room for hanging gear doors, so this is what you get: 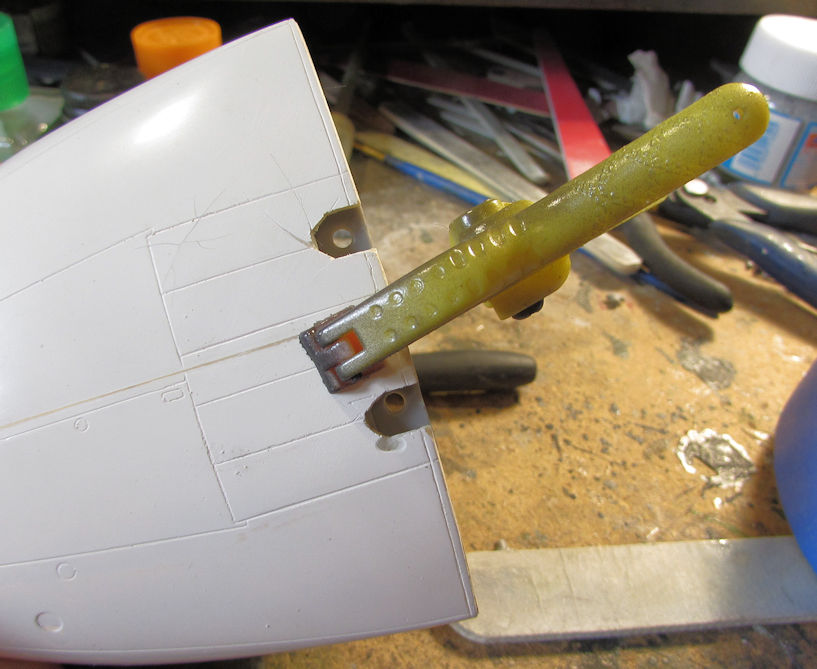 Hey, at least I don't have to worry about detailing it! LOL! Now all I need to do is find the missing nose gear strut so I can finish building it.... Oh, I also have to remember to put the ten pounds of nose weight in there so this will sit properly. Now that the wings are done I can actually paint these and the tail feathers a light grey as called for in my chosen paint scheme. After all that work on this monster Russian, I was finally done with planes for a bit. Back on Monday, it was actually cool enough to open my window to vent my airbrush. I jumped at the chance to finish the camouflage on the tank transporters. They were already masked with the Silly Putty so I loaded and shot the brown color onto the tractors and trailers. First the tractors.... 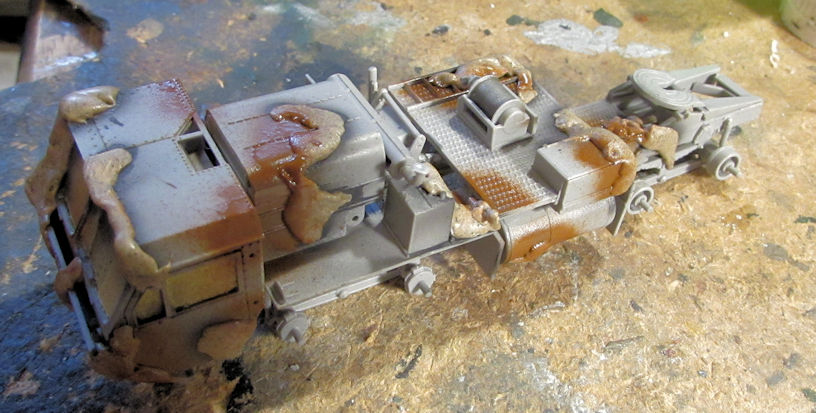 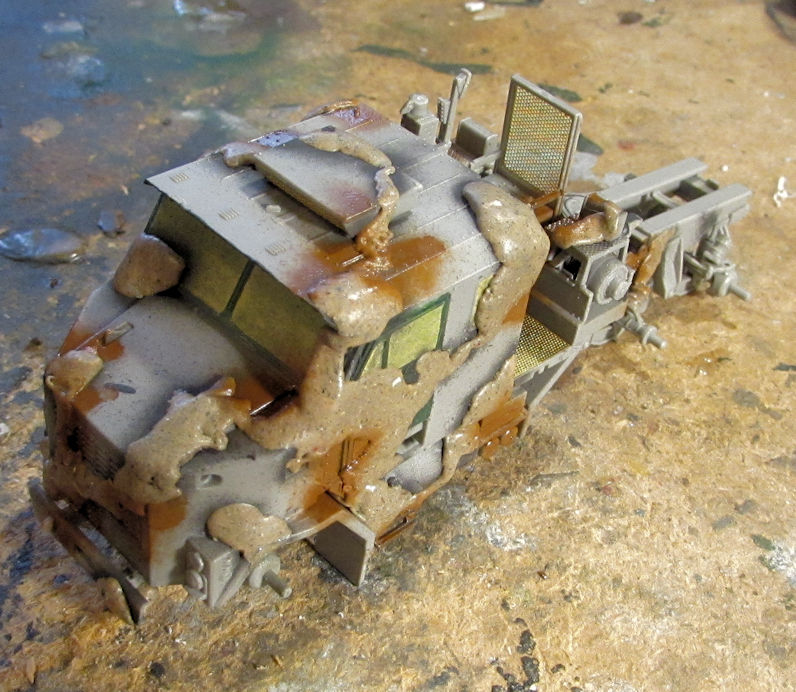 And then the trailers: 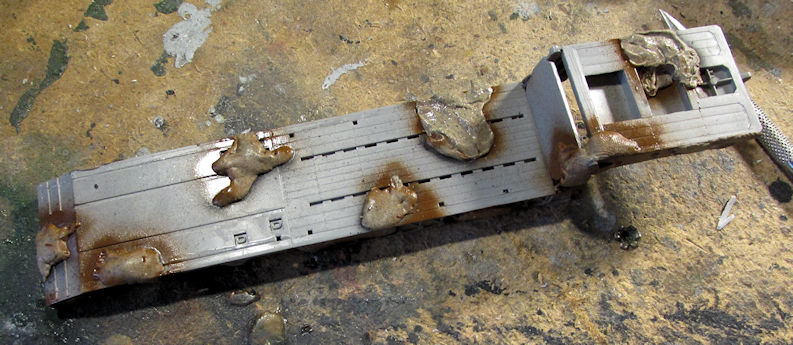 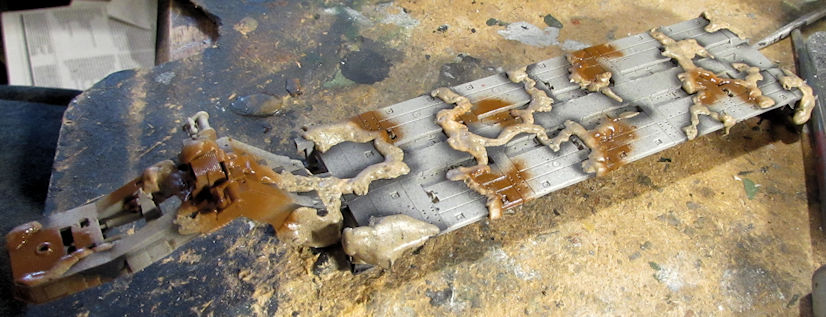 Then I moved and/or added more Silly Putty to cover the brown spots: 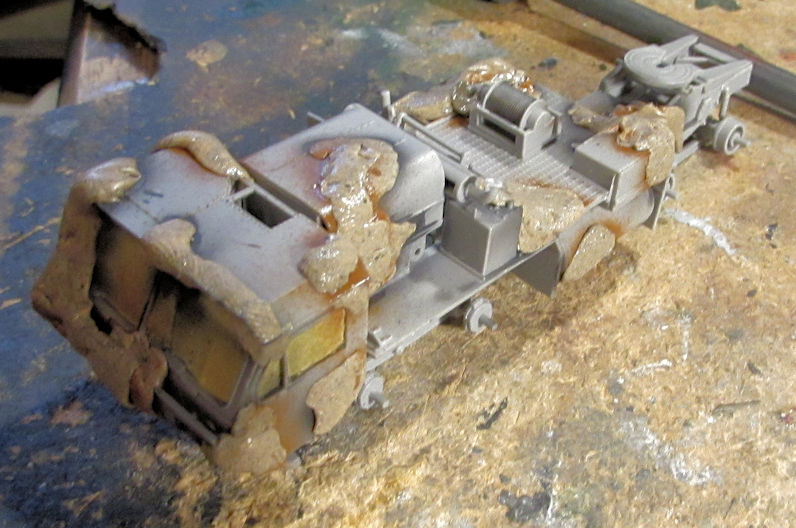 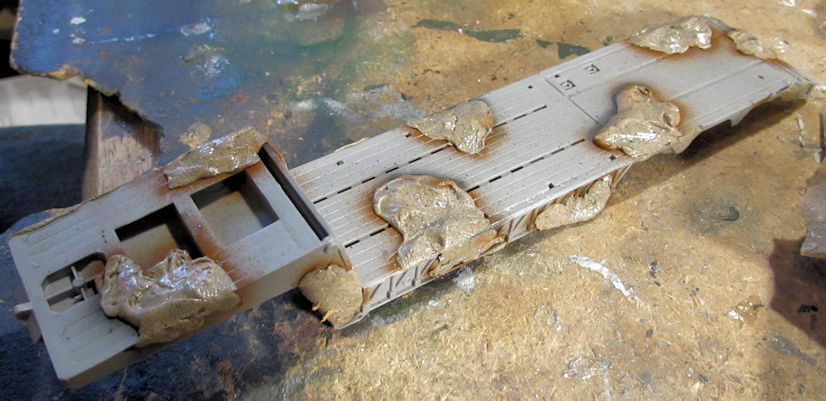 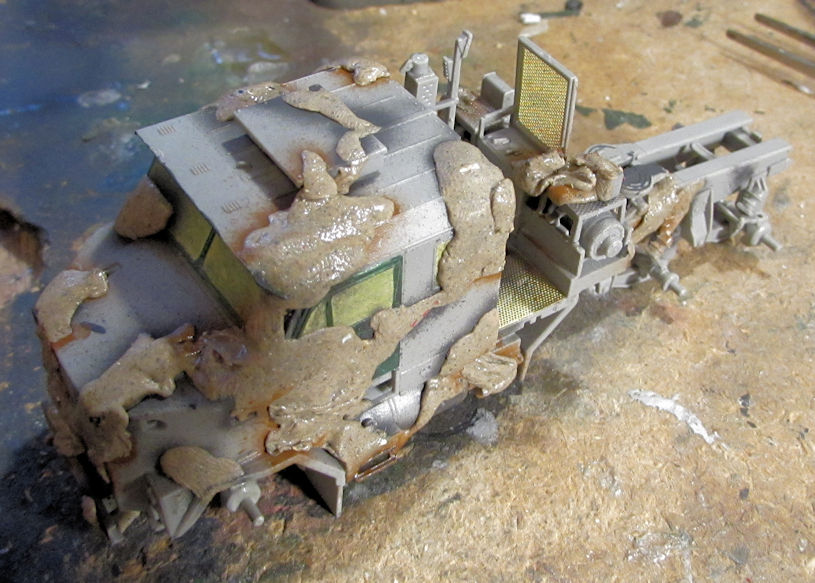 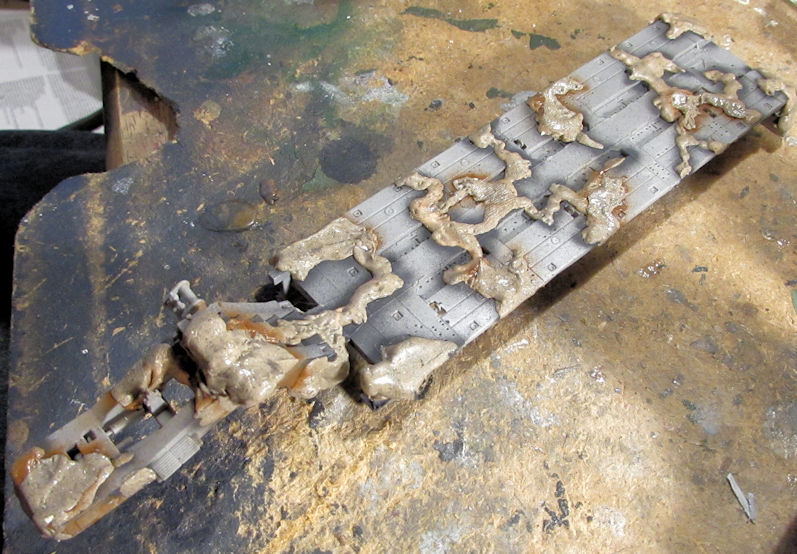 After that I shot the final green color on top:  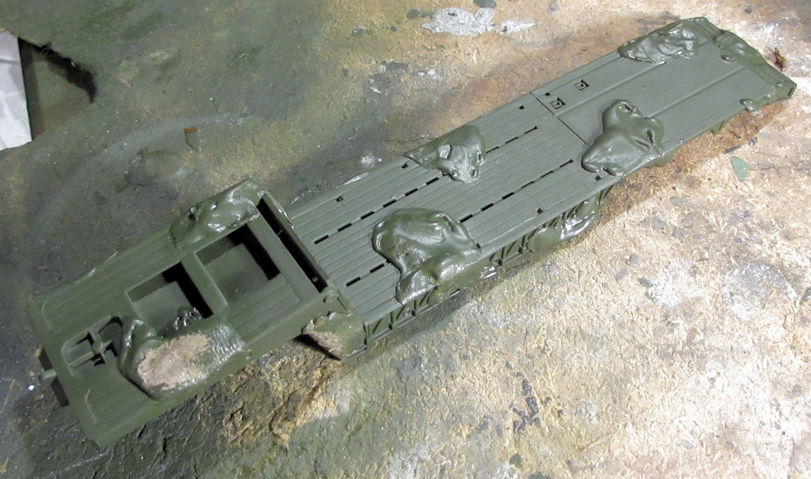 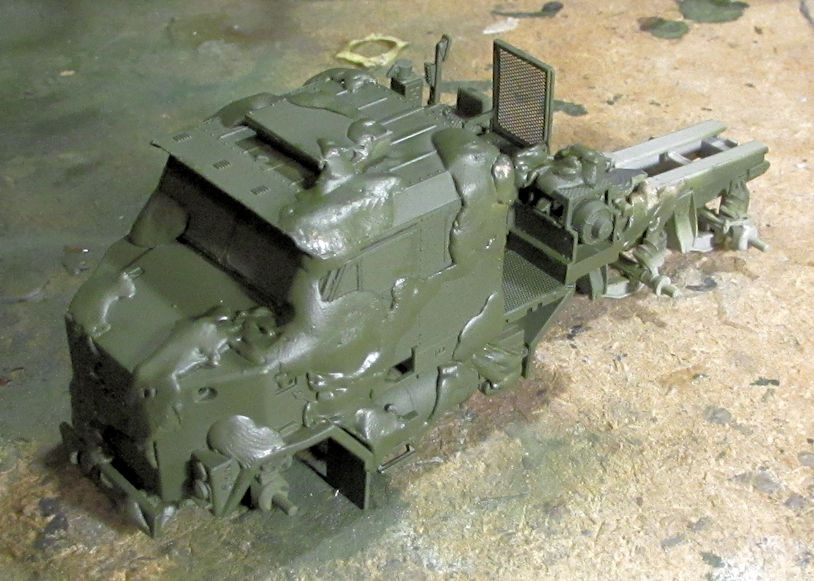 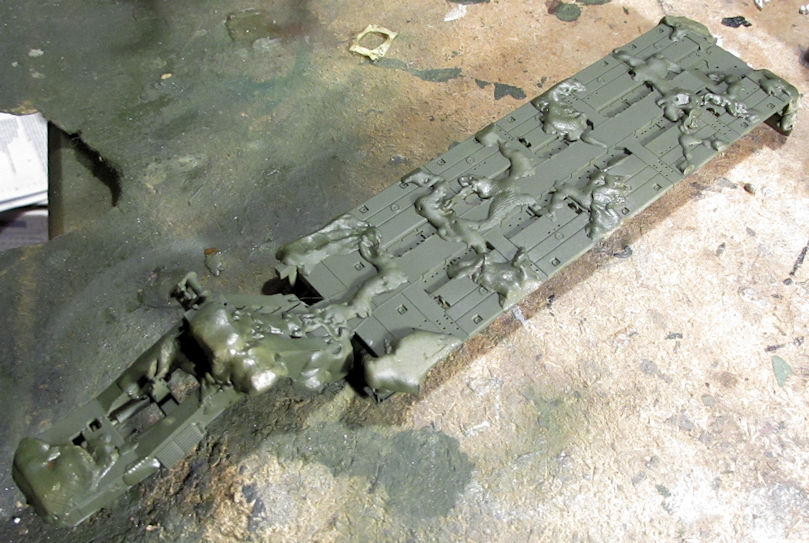 A day later I peeled it all off and was pretty pleased with the results: 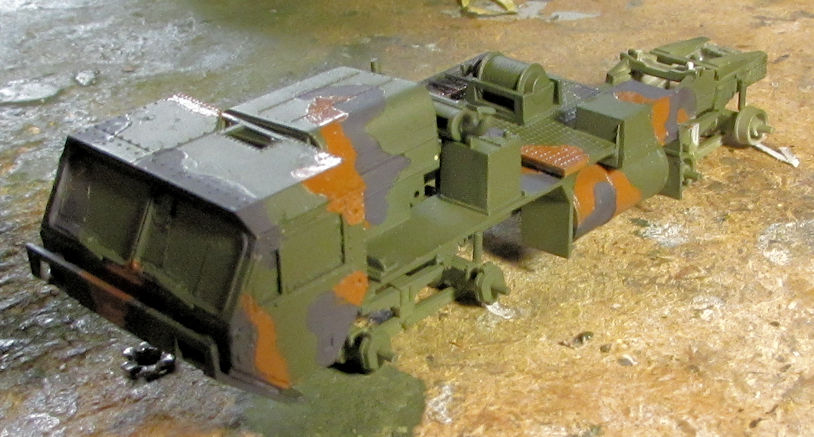 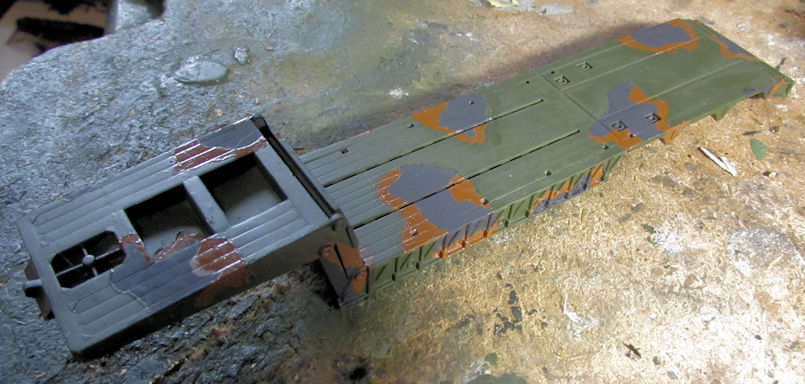 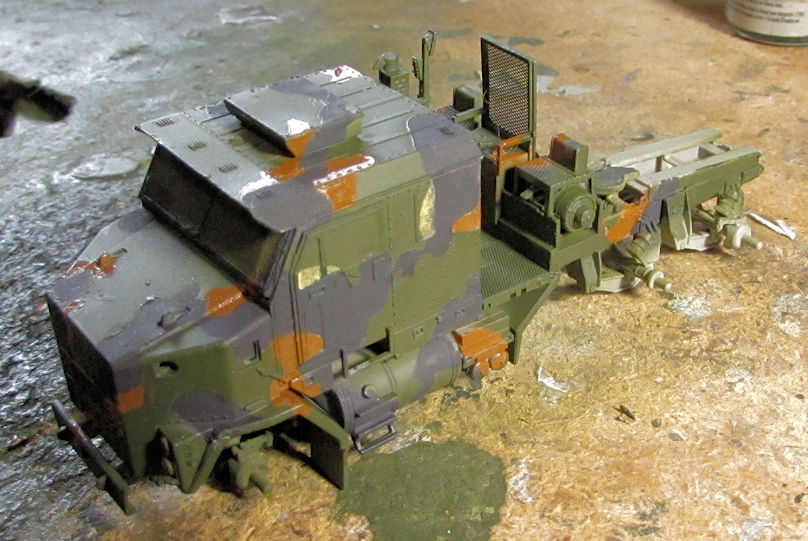  You can see I also lost the trailer hitch pad on the HEMMT tractor. Man, I cannot catch a break! Time to rob another kit for one! There is still some additional painting and touch ups to be done, but these are getting very close to the clearcoat and decal steps. Finally! Also, I shot a base coat of green on the BTR, but didn't shoot any pics of it. I'll try to remember to post them in the next update. And that is a full account of my last week at the workbench. It ain't much, but I'm happy. Hopefully there'll be more to see next week. Thanks all for looking in, comments are welcome. |
|
|
|
Post by Snipersmudge on Sept 13, 2020 5:45:59 GMT
Another busy week I see mate, nice work all round.
|
|
|
|
Post by Paul B on Sept 13, 2020 6:06:58 GMT
Never stopping . Those props have turned out really nice |
|


 , better safe than sorry
  .
. .
.


