Si B
Plastic Connoisseur 
Posts: 1,443
|
Post by Si B on Sept 13, 2020 6:18:39 GMT
The man is a modelling machine.....top stuff sir, keep it coming  |
|
|
|
Post by PorcoRosso on Sept 13, 2020 6:48:52 GMT
Looks like a very productive week to me Duke. Nice going.
|
|
|
|
Post by Armorguy on Sept 13, 2020 6:56:16 GMT
Each time when I visit the Factory I expect to discover an army of Munchkin-like creatures on the images painting and masking, gluing and sanding...great stuff Duke!
|
|
|
|
Post by SteveM on Sept 13, 2020 7:33:22 GMT
I’m looking forward to seeing those big birds side by side Duke, it will be an impressive pic!
|
|
|
|
Post by dukemaddog on Sept 13, 2020 20:15:44 GMT
Wow, thanks guys! Pete and Paul, just trying to stay busy and keep what's left of my sanity in this insane world!
Paul, I shot the props with a 96-cent can of Wal-Mart flat black spray can. Thanks Si! I shall do my best to keep things rolling. Thanks Porco! I was hoping to get a bit more done, but I'm thrilled with the progress so far. Thanks AG! In the past, I used to set up my models for pics in a small factory background and added several work crew in 1/72 scale working on them or watching the workers. It took a good bit of time to set up so I stopped. That and the factory background I was using wasn't very big so something like those tank transporters wouldn't fit. They looked like this: 
If I could get a big enough factory photo backdrop, I'd start again since I am calling this thread "Maddog Manufacturing"! LOL!!
Steve, thanks! That would be an epic pic! Hopefully when the Hobby Days start opening up again, I could get such a pic with all those big planes side by side, but right now; there's no room! LOL!!
|
|
|
|
Post by Ian H. on Sept 16, 2020 22:58:28 GMT
Love those A400 props. Watched one in the Mach Loop in Wales on YouTube. No mistaking that sound. Nice camo on the tank transporters as well.
Regards,
Ian
|
|
|
|
Post by dukemaddog on Oct 14, 2020 21:27:09 GMT
Thanks Ian! I'm sorry I didn't see your post earlier. For some reason my e-mail notification dropped that one. That must be awesome seeing that A-400 fly.
Despite recent issues in life, I managed to slowly get some progress worth showing. I'll start with the An-124. Okay, first off: Hallelujah! I found the second forward landing gear strut and promptly added the wheels to it: 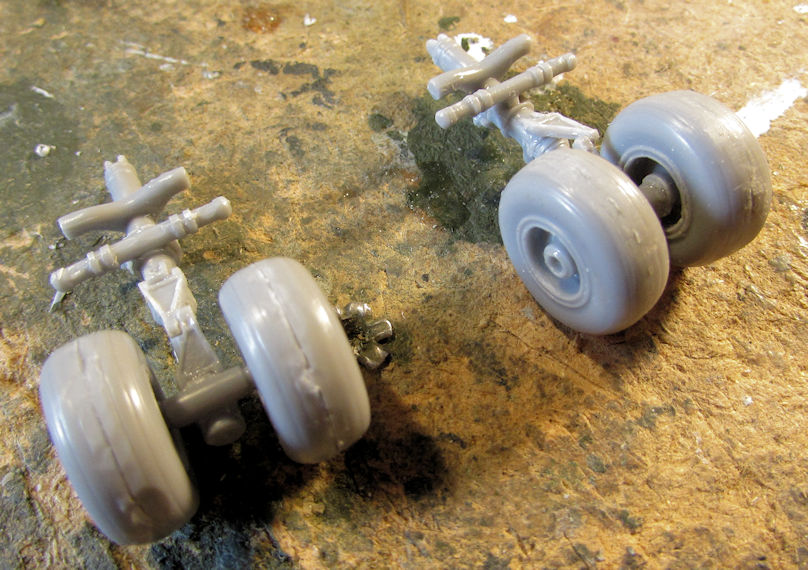 After that, I started to tape off the contact areas on the ends of the wings and tail surfaces. Horizontal stabilizers: 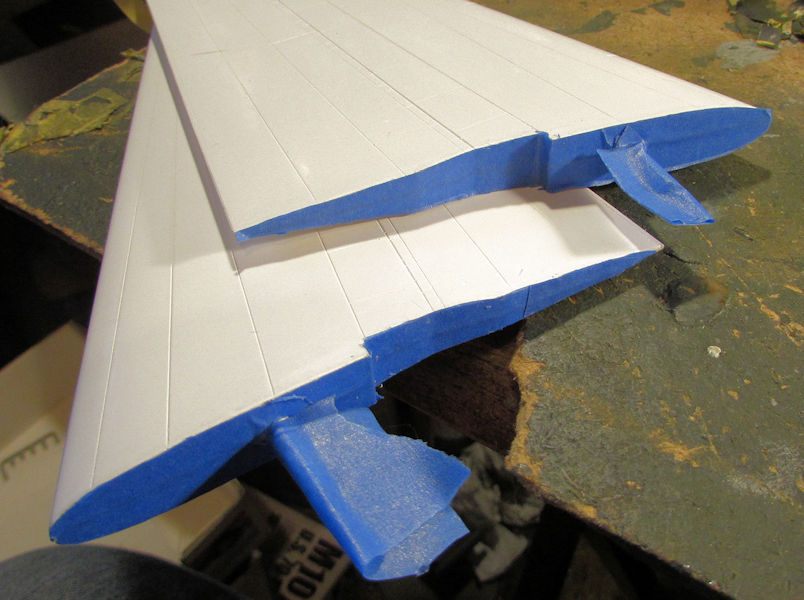 Wings: 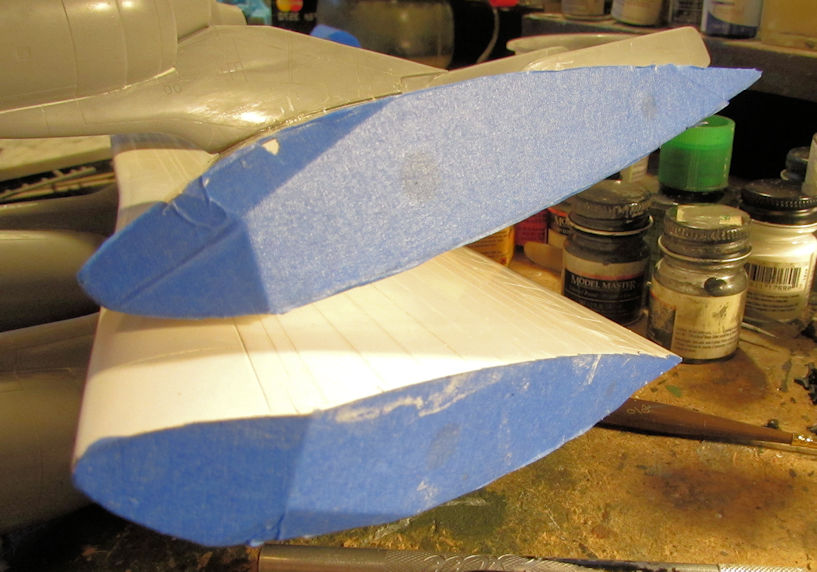 And the fuselage: 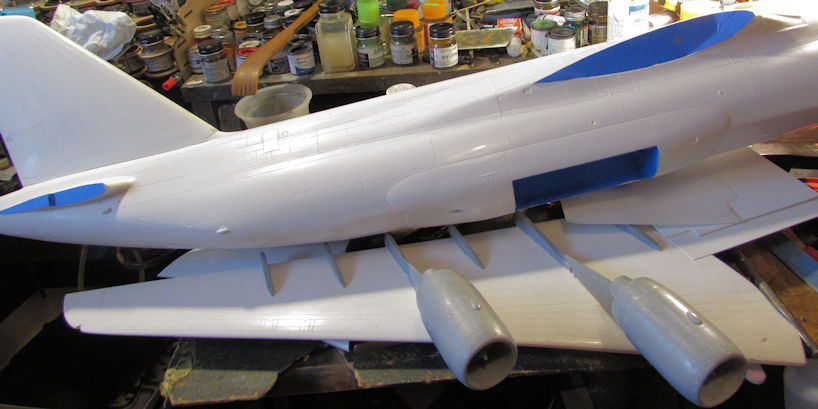 Now they are all ready for paint; at least in the masking department. Still, in order to paint the fuselage, I'll need to close up the nose. In order to do that, I have to glue the cockpit into place; then the canopy shroud, and then close up the nose. These are the preparations I made to do all that. First; the cockpit was glued in using the JB weld shown: 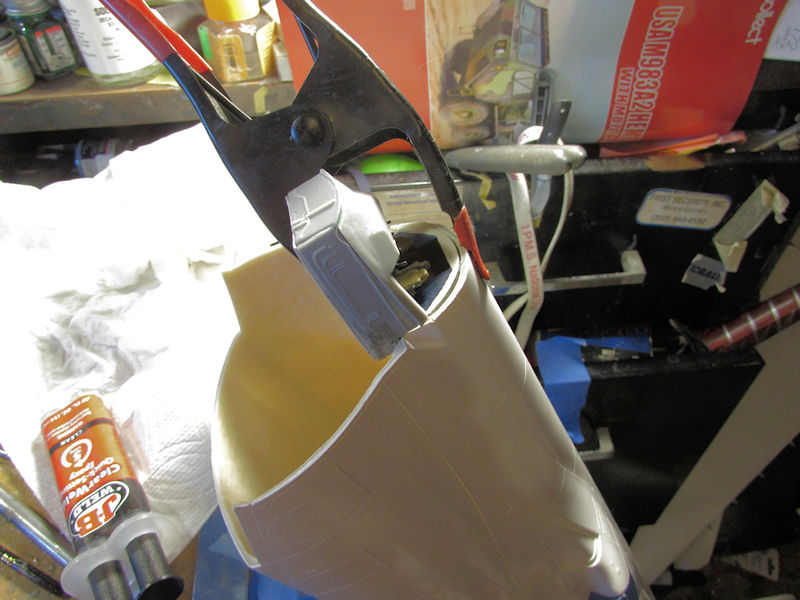 That didn't work. So, I pulled the already loose cockpit out and decided to add a strip of styrene to the underside of the cockpit sub-assembly: 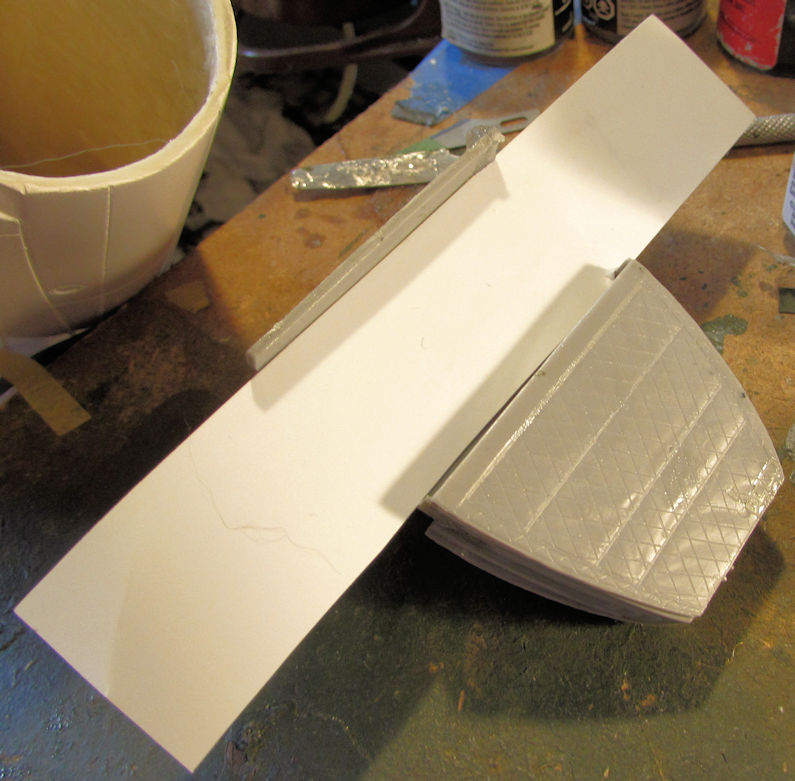 Once that was dry I added some JB Weld to the 'wings' and then clamped them to the insides of the fuselage: 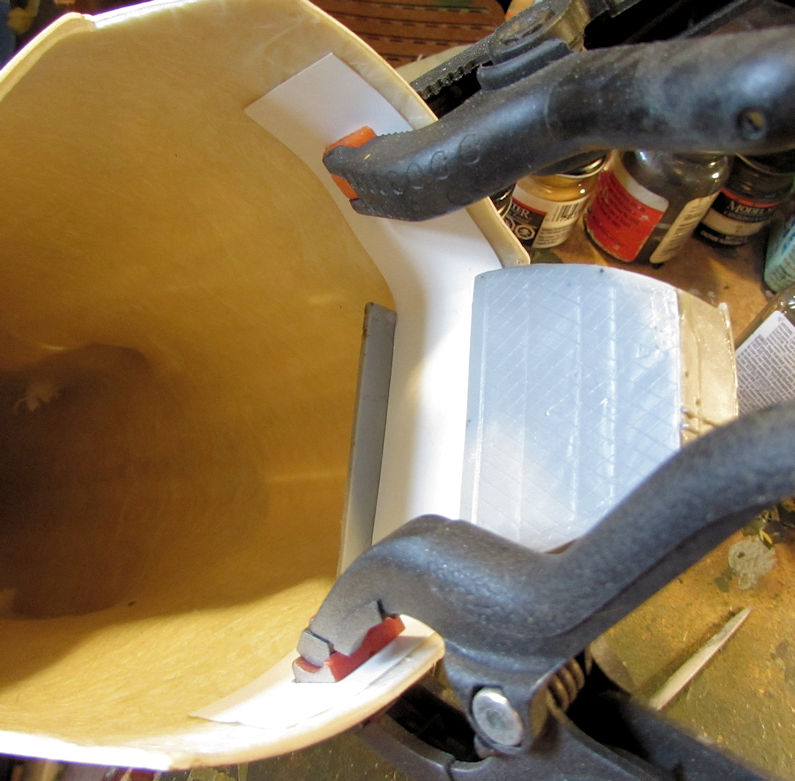 That is still setting now. Afterward, I added some extra reinforcing strips to the sides of the nose to help hold it in place once glued: 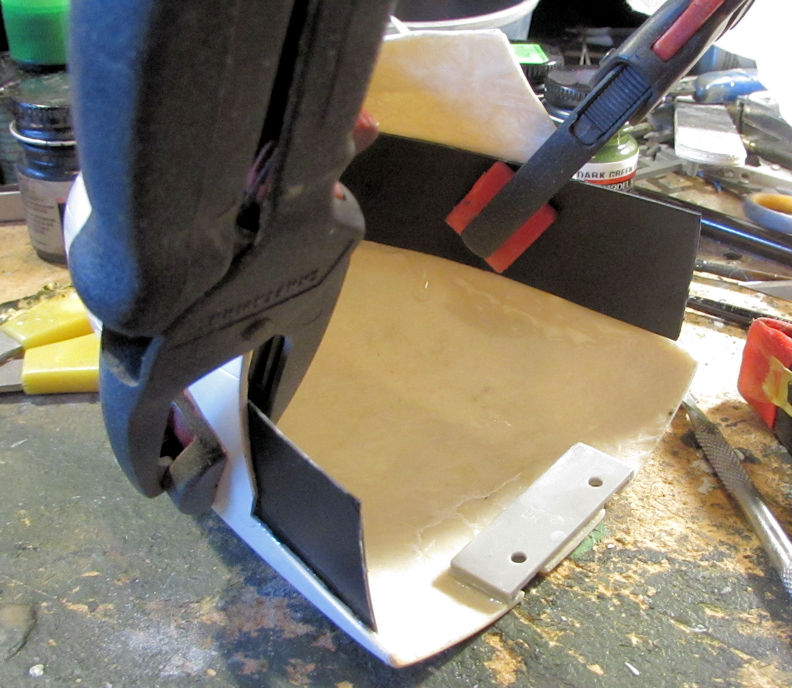 That should hold it better than the butt joint they call for in the instructions. Oh, and in the middle of all that, I still had to re-glue another engine pod that fell off for the third time. I had glued it with JB Weld twice and I still found it on the ground two days after I'd glued it before. Hopefully the third time is the charm. Now on to my armor... So, first in the lineup is the Churchill Mk III AVRE. All I really did here was to apply the decals and add the tracks to this: 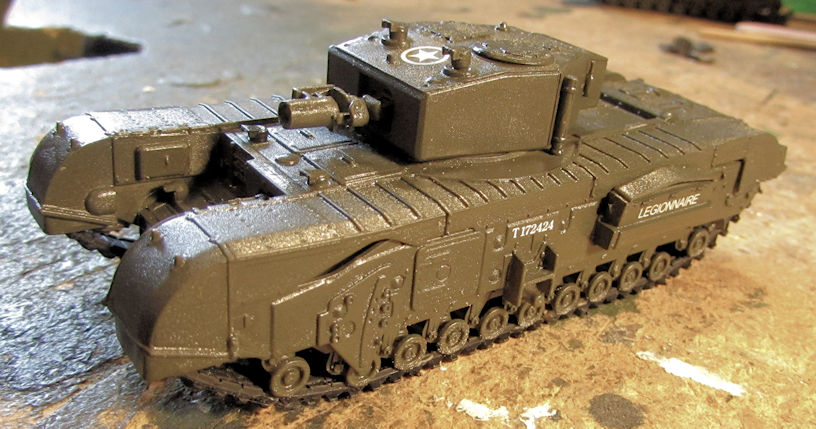 And the same for the Churchill Mk IV: Both of those have since been shot with a dullcoat. Yep, after weathering these, they will be done! After that, I decided to work on a Shelf Queen that has been languishing for a couple years while I tried to score another HVSS Sherman kit. Since I got one from the stash sale, it was time to pull it out and get my M-51 Isherman moving again! As a reminder, this plate was missing; pinged off into the Netherworld years ago: 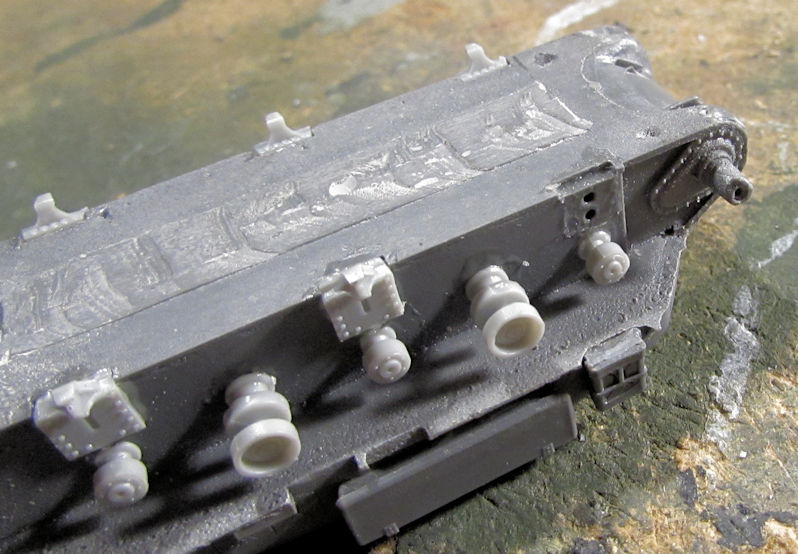 I then installed the last one and then added the idlers and some other detail parts to the hull: 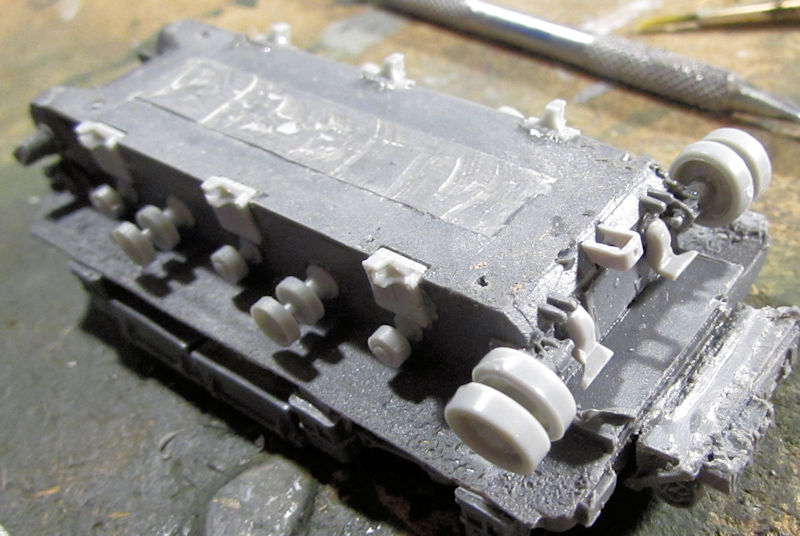 Now I should be able to add the bogies and the drive sprockets to this and then get it painted. Next up on the tour is the Japanese Type 73 tank transporter. I added the decals to this as well:  I then installed all the wheels on this: 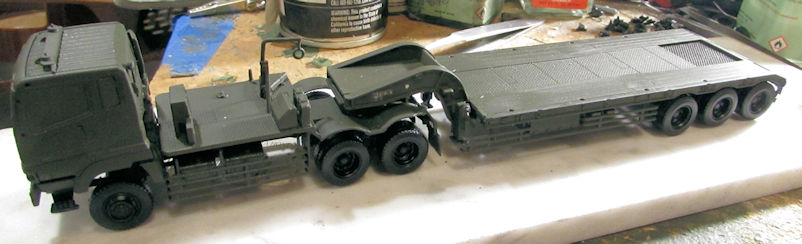 So, I then looked at the instructions and noticed the deck of the trailer needed to be painted. So, I masked off and painted the black wooden planks first: 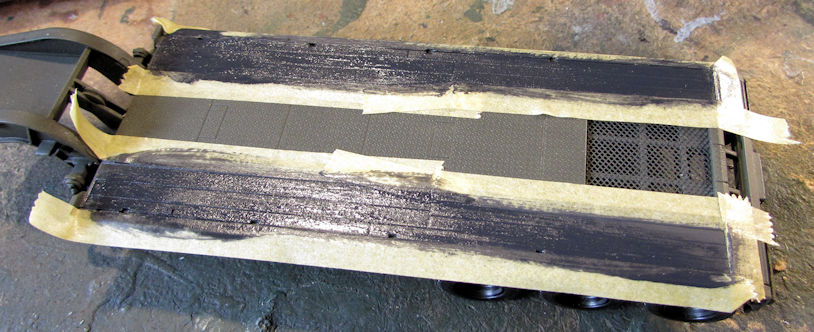 When that was dry, I masked again and added the white guidelines to the sides: 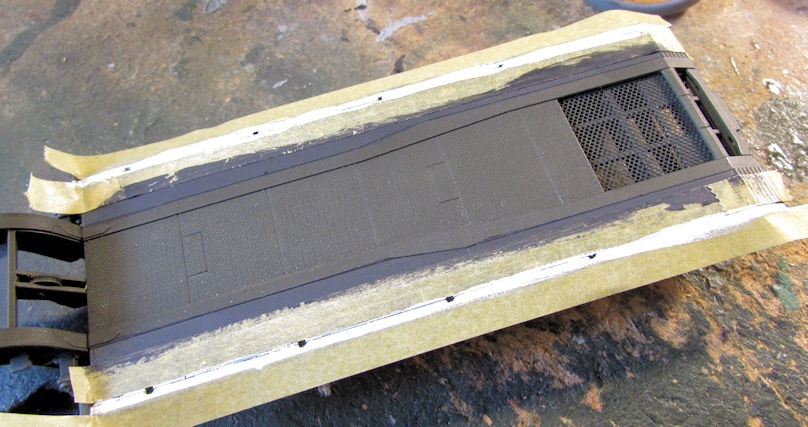 This really looks pretty cool this way! 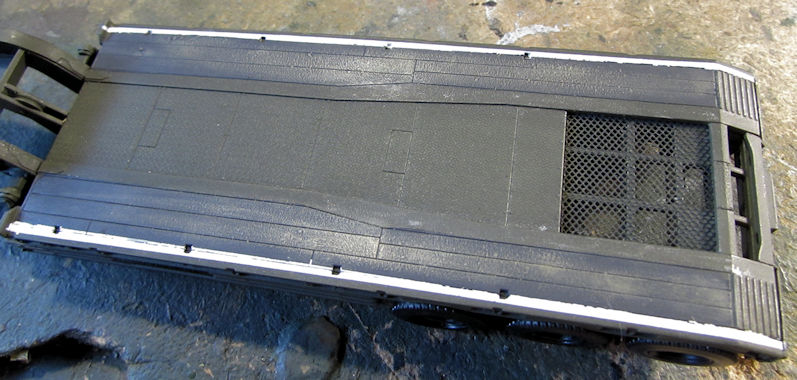 Next on the tour is my problem project. This HEMMTT tank transporter has been broken and rebuilt at least three times! The first thing to go wrong was the clearcoat wrinkled! So, I shaved off the raised wrinkles and re-painted this: 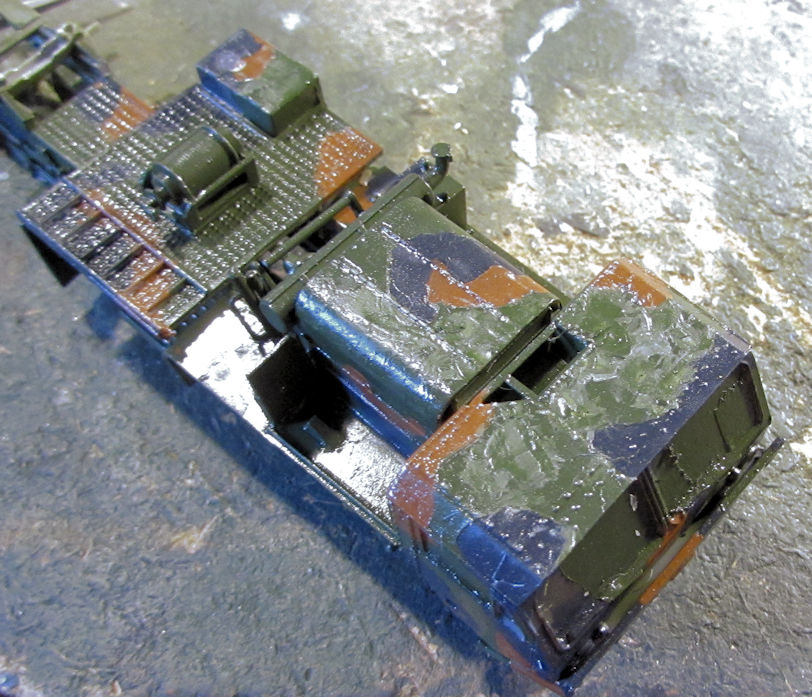 After that I stole a trailer hitch plate from another kit and installed it in the back: 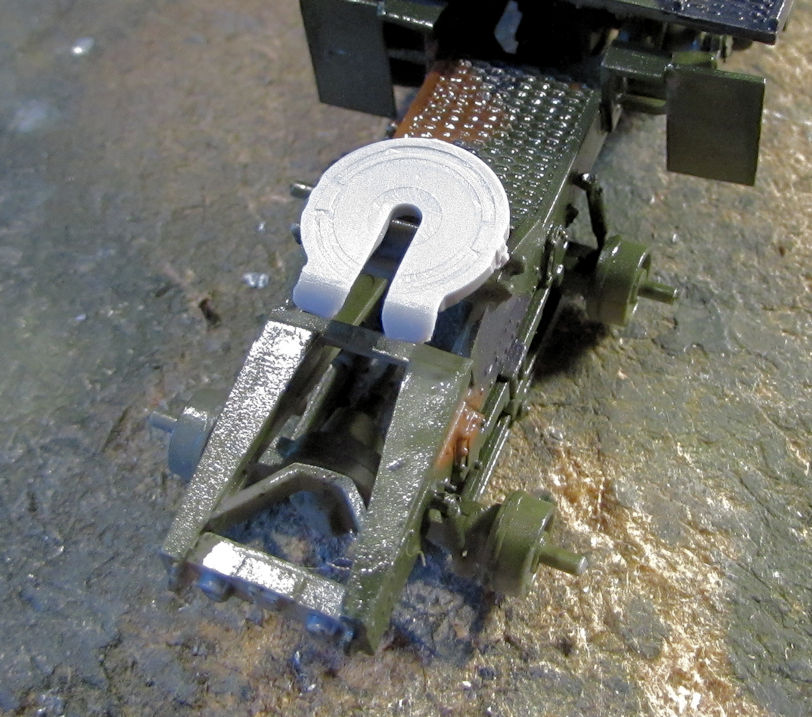 Two days after that happened, I found the original in a spot on the floor that I had looked at at least seventeen times before while searching for this and other lost parts! Needless to say, that is now in my parts box! This was decaled along with the rest of the models. You can see them just below the angry-looking headlights: 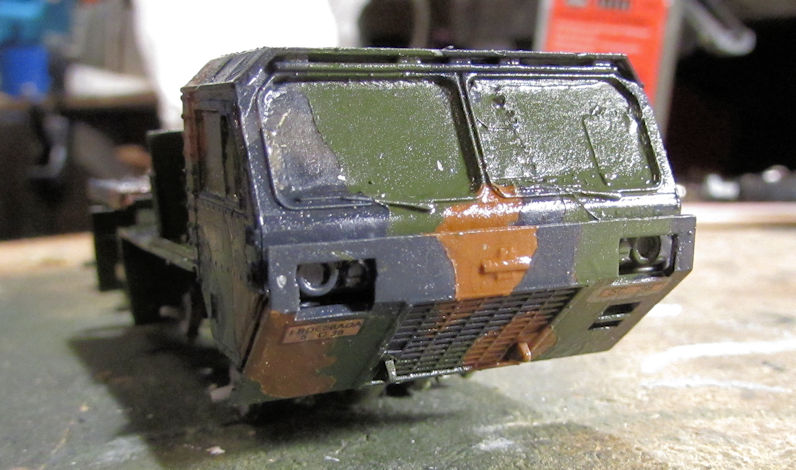 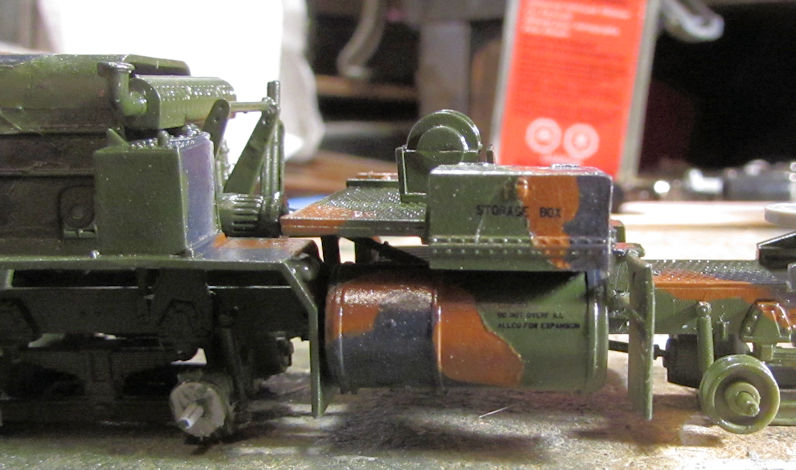 Later I added the wheels to this whole model. The marble strip this is sitting on was used to insure all tires touched the ground: 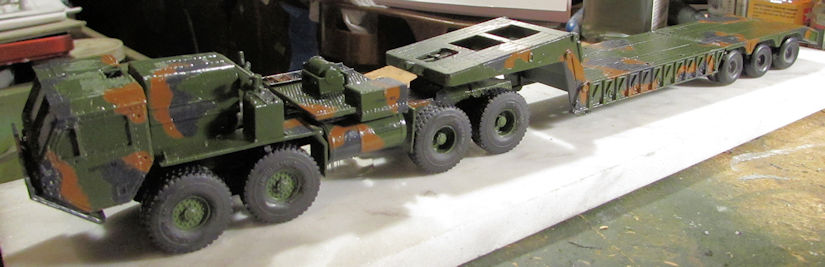 I've since had to repair two of those wheels.... twice each! This last one is the M-1070 tank transporter and trailer. While decaling everything else, I also decaled this: 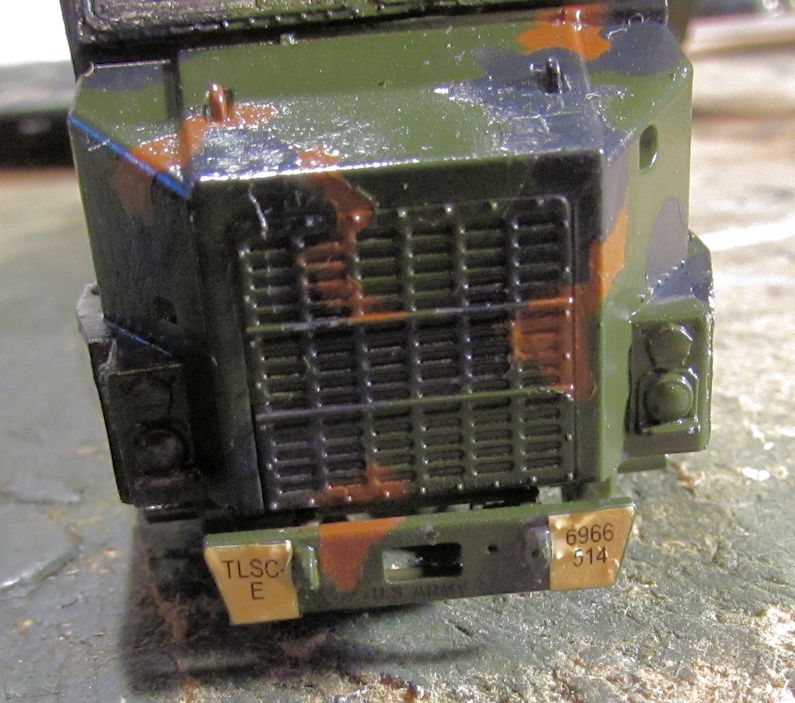  Yeah, that decal is crooked. Nothing I can do about it now. I never did expect this to be an award winning model; I just wanted to build it for my collection. Moving on... I realized I still hadn't added the ramps to the back of the trailer. Fixed that and started to paint them in this pic: 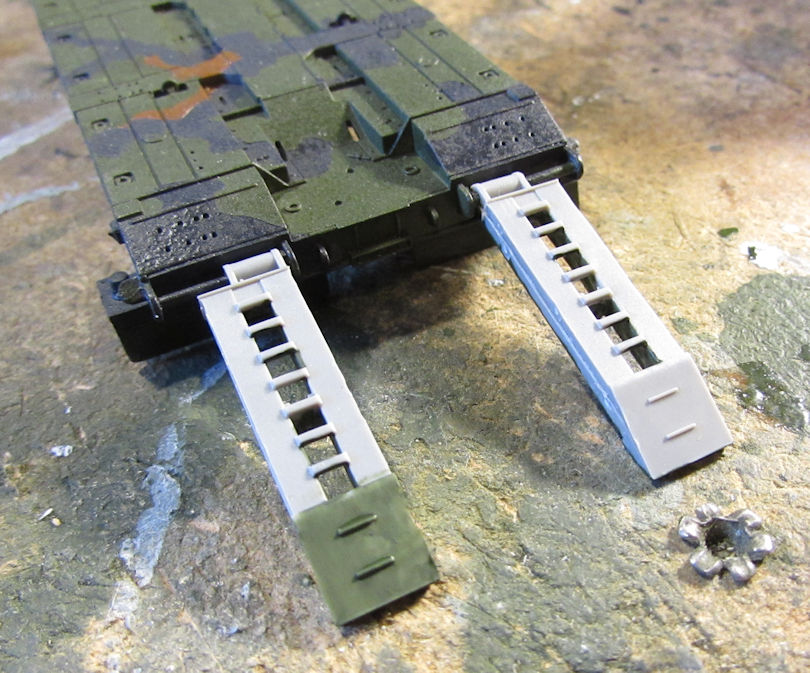 Next it was time for some fun! I assembled all the wheels for the trailer. You can see them all here with one of the trailer axles: 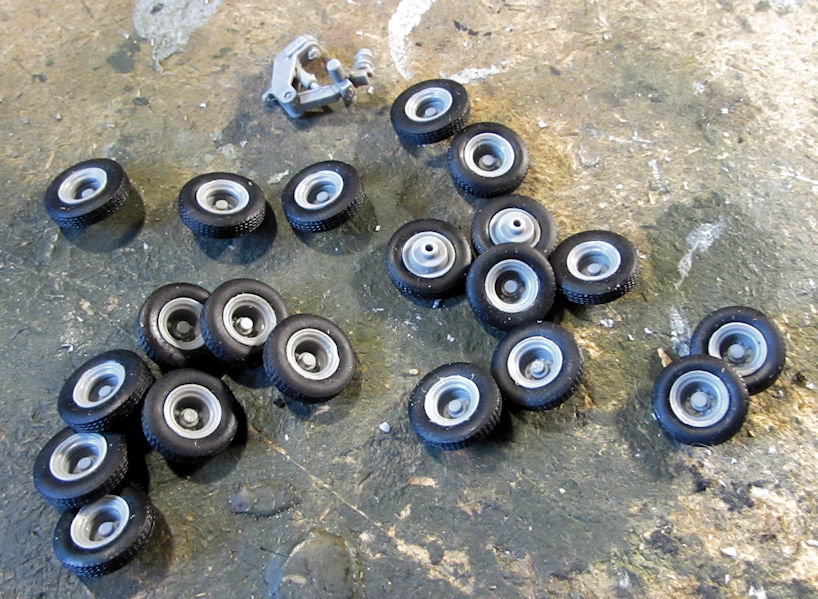 I then painted the hubs: 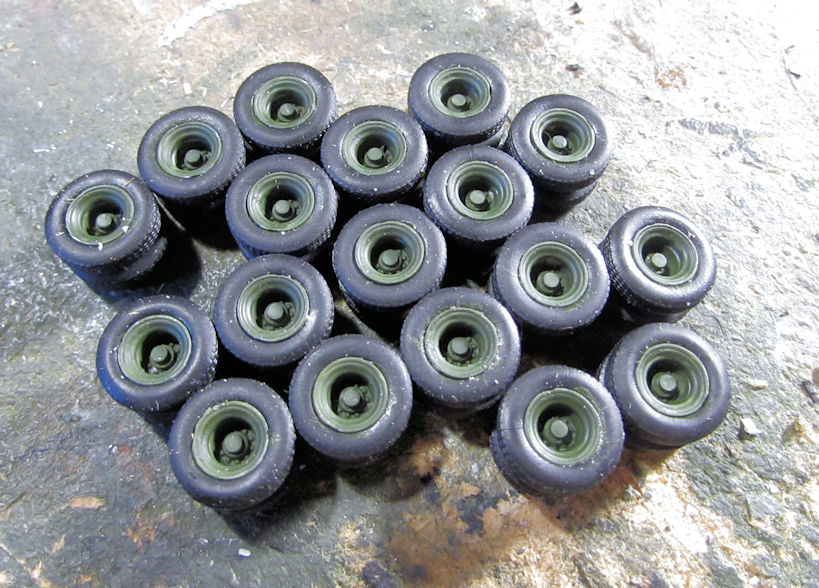 Here they are all installed under the trailer: 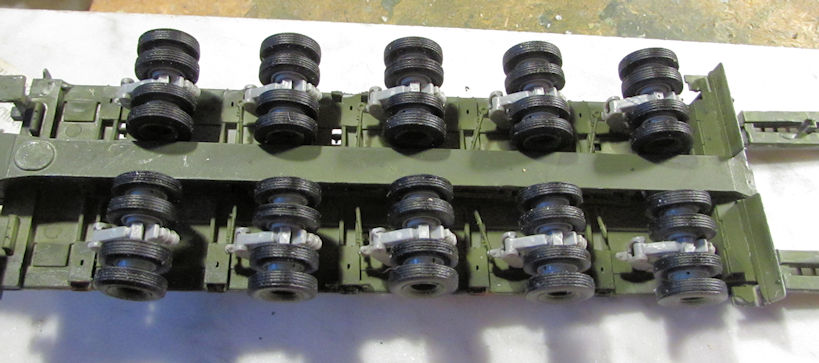 Using an adjustable clamp, I then clamped this to the marble slab to insure all wheels touched: 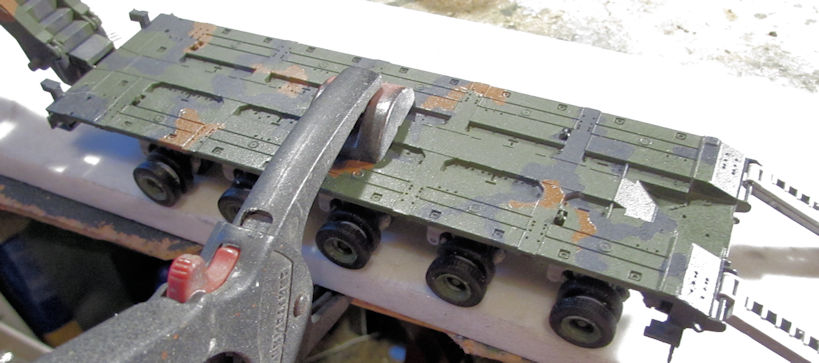 After that, installing the wheels on the tractor was easy:  I then started to assemble the P/E rear view mirrors using Gator Grip Glue: 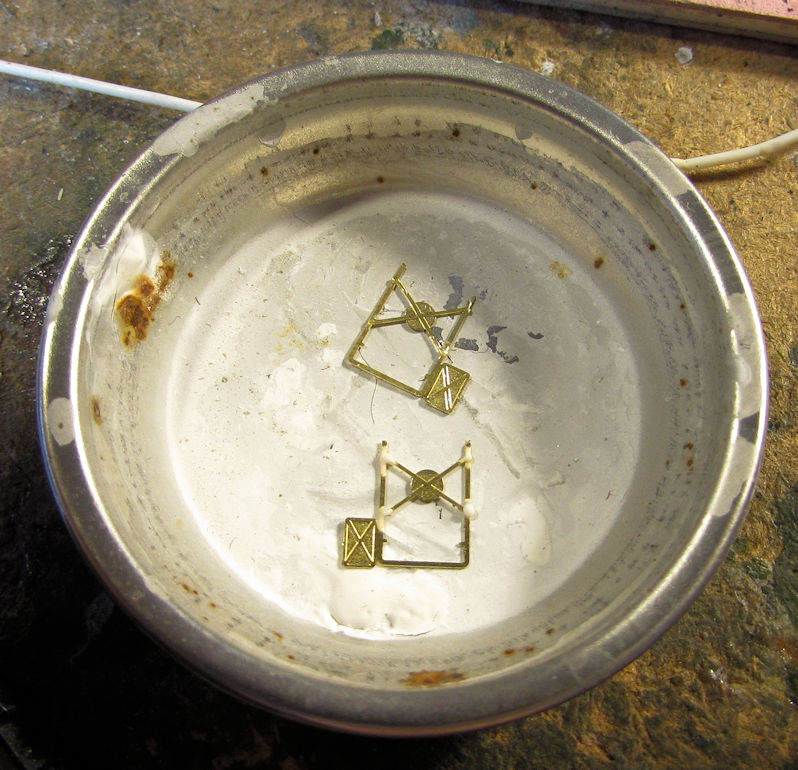 While those are drying, I installed all the final detail parts to the tractor: 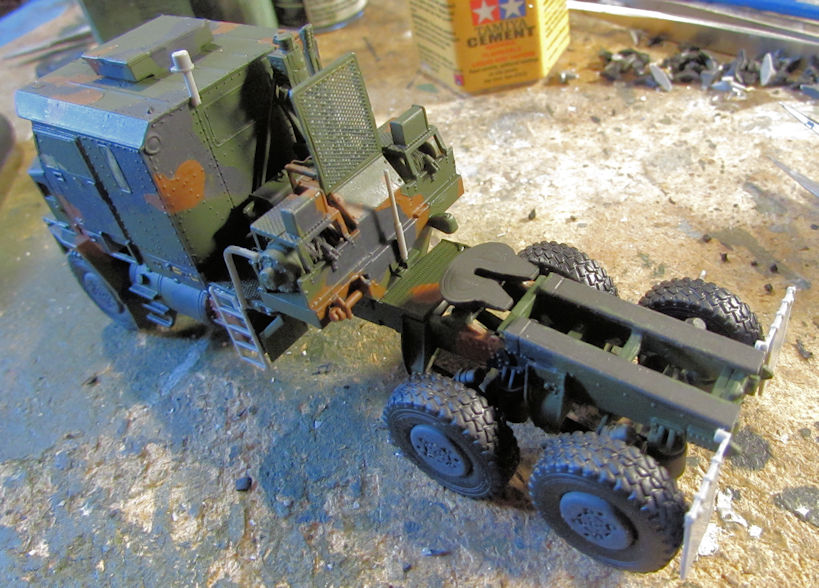 Here she is all assembled wearing her new shoes: 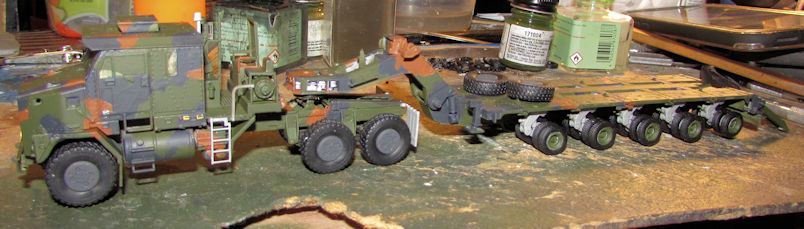 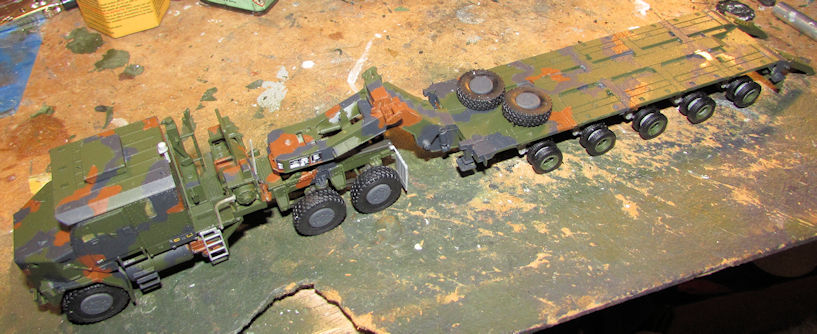 The two wheels on the trailer deck are the last two wheels I'll have to add once I find that lost axle assembly. Well, that completes this latest tour of Maddog Manufacturing. I hope you enjoyed it. Comments are always welcome. Thanks for riding with us! |
|
|
|
Post by Armorguy on Oct 15, 2020 6:47:22 GMT
Lovely update as usual my friend. I like the Churchill "Pétard" a lot. The plane issue was tackled perfectly.
|
|
|
|
Post by Paul B on Oct 15, 2020 7:58:47 GMT
A grand update Mark  . Good to see the M51 back in the game  |
|
|
|
Post by dukemaddog on Oct 15, 2020 21:30:51 GMT
Thanks AG! That An-124 is a challenge to figure out the best ways to get things to stick. Now it is finally holding and I can move forward. And yeah, the next time you see those two Churchills they will be finished.
Paul, thanks! I'm thrilled to be back on that M-51 as well. It's been sitting far too long.
|
|
|
|
Post by SteveM on Oct 16, 2020 7:19:58 GMT
Look at all thoughts wheels! That’d drive me mad.
The An124 looks to be made from strange material too so no wonder it’s fighting you.
We have A-400’s fly low over us on their trip home from Wales, once you’ve heard one you’ll never mistake it for anything else. Those big props are unique
|
|
|
|
Post by dukemaddog on Oct 17, 2020 20:30:25 GMT
Thanks Steve, I'm thrilled you stopped in! I was actually pleased at how easy it was to assemble all those wheels and get them mounted under the trailer. As I mentioned, it did get a bit tedious but overall was far simpler than doing all the wheels on the An-124. Speaking of which, yes: the fuselage is made of fiberglass coated with resin for the exterior panel line detail and smoothness. So far, LB Weld has been the most effective glue, provided it is clamped well and has the opportunity to set fully.
With everyone commenting on the A-400, it looks like I'll have to get back to that one soon. I agree though, those props sure are unique; in some ways they call to mind submarine props to me...
|
|
|
|
Post by Ian H. on Oct 20, 2020 18:33:54 GMT
Duke, glad to see the AN-124 shaping up! Looks great. Also, I love your AVRE Churchill and the coven of tank transporters.
|
|
|
|
Post by dukemaddog on Oct 20, 2020 19:56:45 GMT
Thank you Ian! Hopefully soon I'll be able to get them finished. I did get some primer on the wings and tail of the An-124 but they will need some additional sanding and re-spraying. Who knew primer would have a tough time laying down on resin coated fiberglass?
|
|
|
|
Post by Ian H. on Oct 20, 2020 20:18:40 GMT
Duke, whether it's air or ground it seems like all your projects have 96 wheels on them. Hats off on all the wheel work.🤣🤣
|
|
|
|
Post by dukemaddog on Oct 21, 2020 18:43:41 GMT
Lately you are right. Even the Churchills have massive numbers of wheels, although they were far easier to do.
Stay tuned, more to come.
|
|
|
|
Post by PorcoRosso on Oct 22, 2020 16:36:44 GMT
Some great construction going on there Duke.
|
|
|
|
Post by dukemaddog on Oct 22, 2020 21:52:11 GMT
Thank you Porco! Glad you like it. Now that I finished those five; I'll be starting a few new ones while working more on the big planes.
|
|
|
|
Post by dukemaddog on Nov 12, 2020 21:06:44 GMT
Well, now that I reached my latest milestone, I decided it was time to get caught up on a few shelf queens while also starting some easy assembly models and a couple others on my list to start. More on that later. Before that, I tried to move forward on more of my aircraft, but I only kept going back to the An-124 to the exclusion of all other aircraft. So, here is the progress I made on that monster. To start with, I painted the main landing gear bays and the forward landing gear, following the directions as closely as possible: 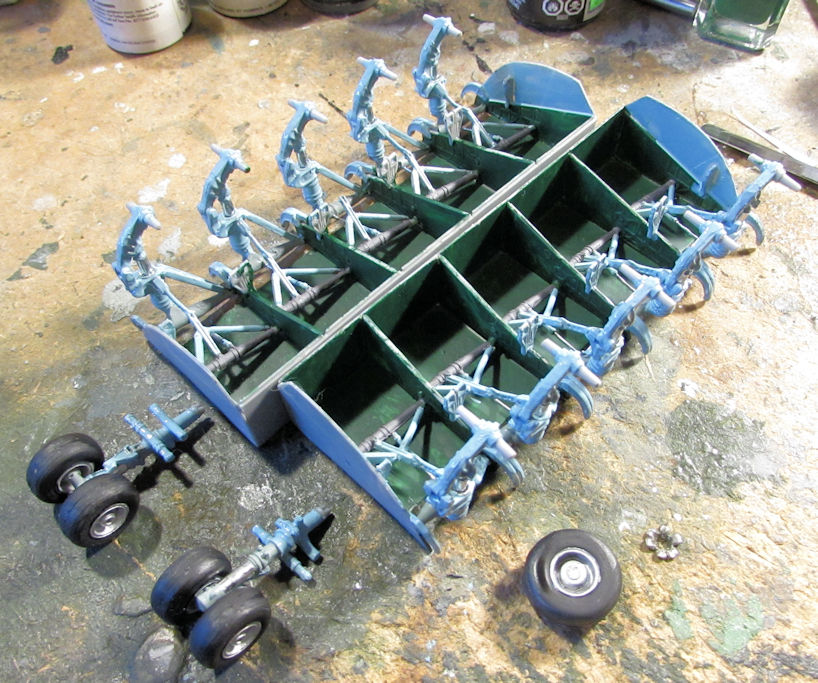 Later I added the folding landing doors on the main gear bays. Afterward I realized that I hadn't painted them so in this pic you can see the start of my masking them for paint. The larger doors lay flat on the other side of the main gear bays; I'll add them once I install these on the fuselage: 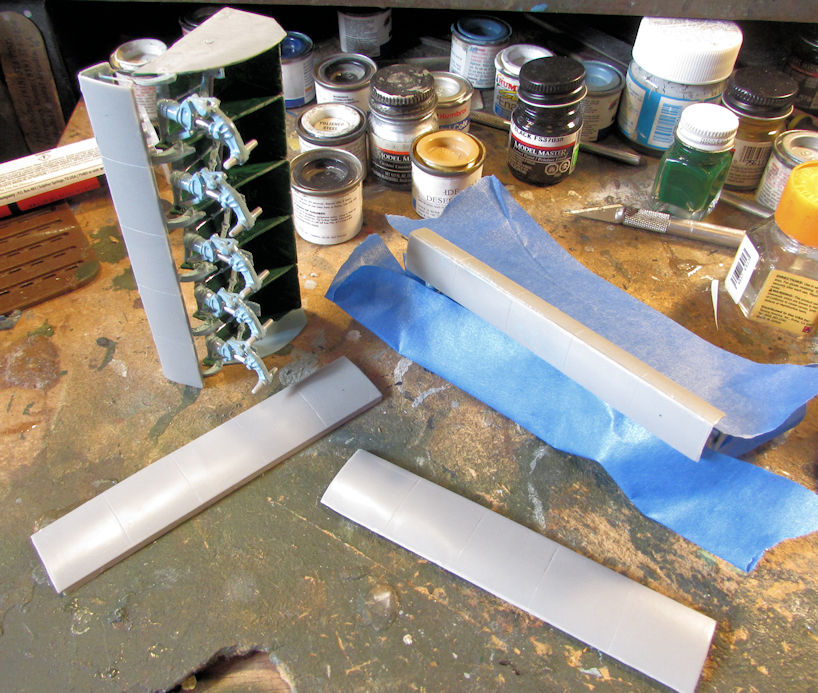 Here they are fully masked... 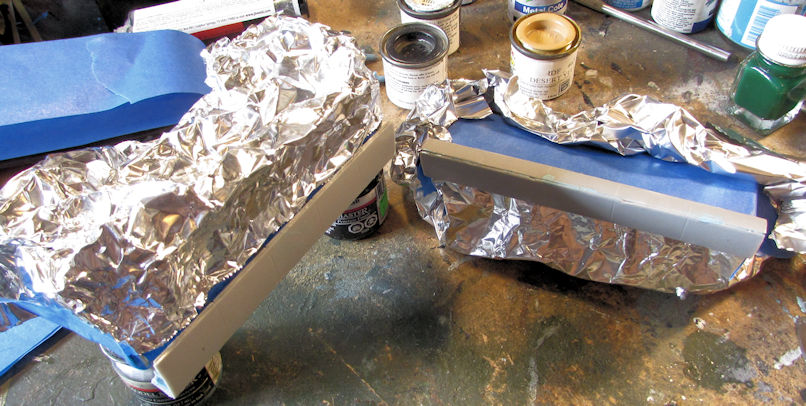 And painted... 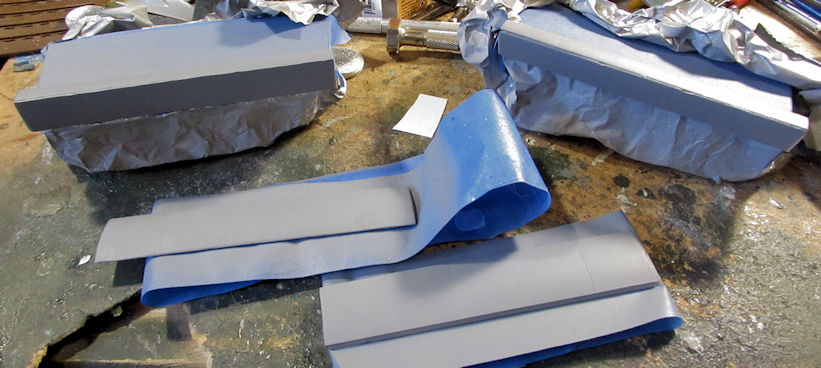 And here are the two main landing gear bays all completed, even with the wheels already installed:  Previously I had added the nose weights to the inside of the nose cone. They had been drying for two days and so now it was time to finally cement that nose cone onto the fuselage: 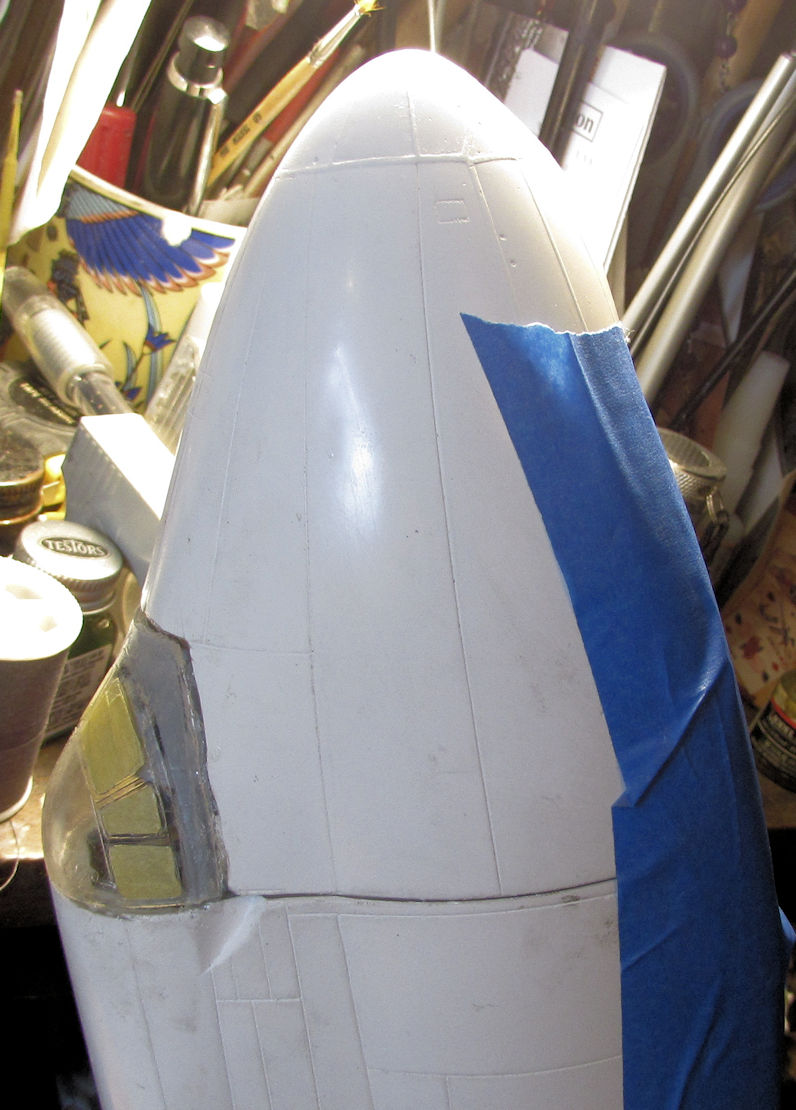 You can't see it here, but on the other side and the front of the cockpit clear part there are huge gaps. I proceeded to pull out my Tamiya white putty and fill them in: 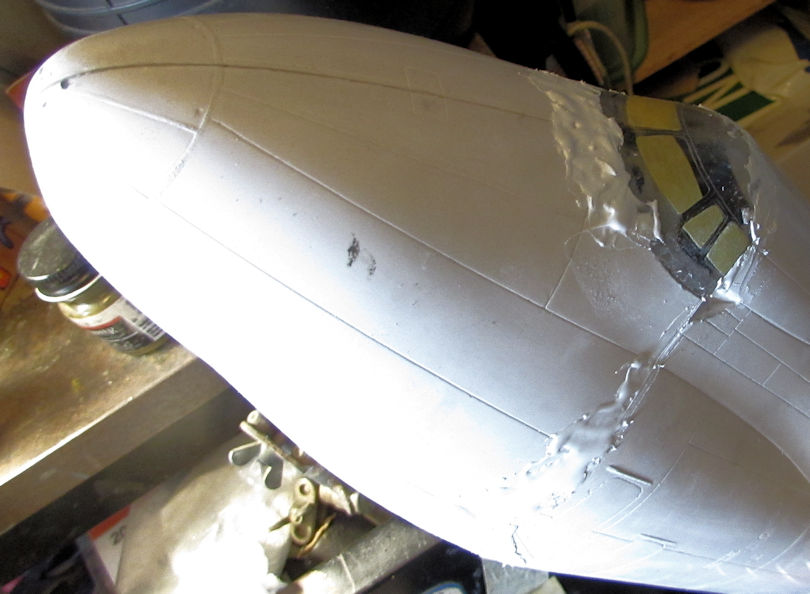 By the way, that fuselage is leaning against my desk since I have nowhere else to keep it. Later on I'll be sanding that down and then I can rescribe missing panel lines. Then this part will be ready for paint! Finally! Speaking of paint; I was able to paint the wings and tail surfaces. They are grey on the version I'm doing, so I shot them with three coats of grey and then a shot of gloss. The gloss actually came out semi-gloss which I like better: 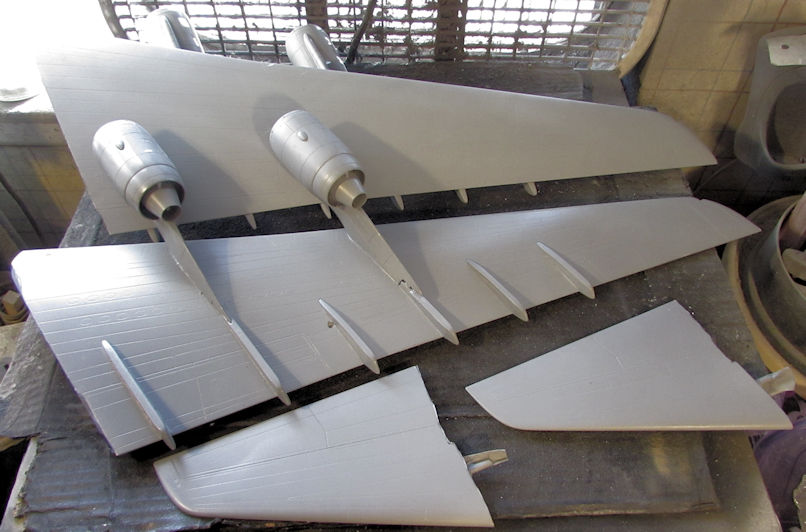 Later I'll mask off and paint the metallic sections of those engines. And that completes the update on that massive plane. Now for some of those shelf queens I mentioned before. First up is my M-51 Isherman conversion. I finally moved ahead and got the main bogies on as well as the drive sprockets. I also glued together the DS tracks for this: 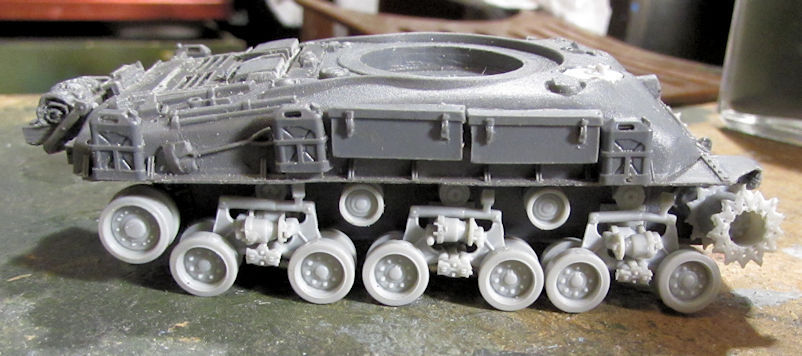 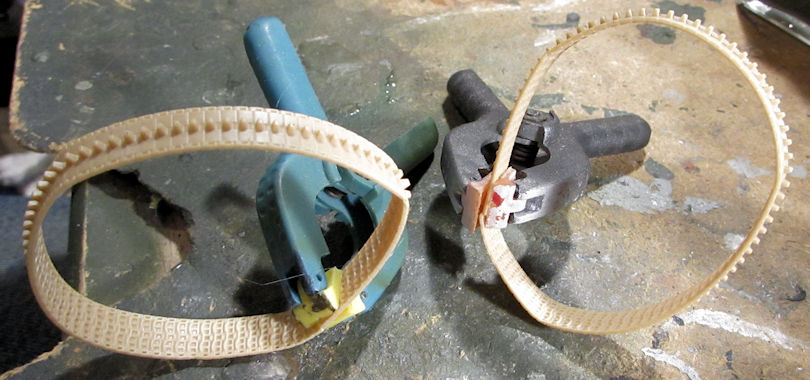 Now all I have to do is add the headlights, taillights, and brush guards to this and I can paint it. Next up is a 1/24 scale 1929 Coke Delivery Van I started some months back. Maybe a year now.... Anyway, I was having trouble getting this painted because the red would not go down right. I decided I was going to assemble the main body of the van so I could paint it altogether: 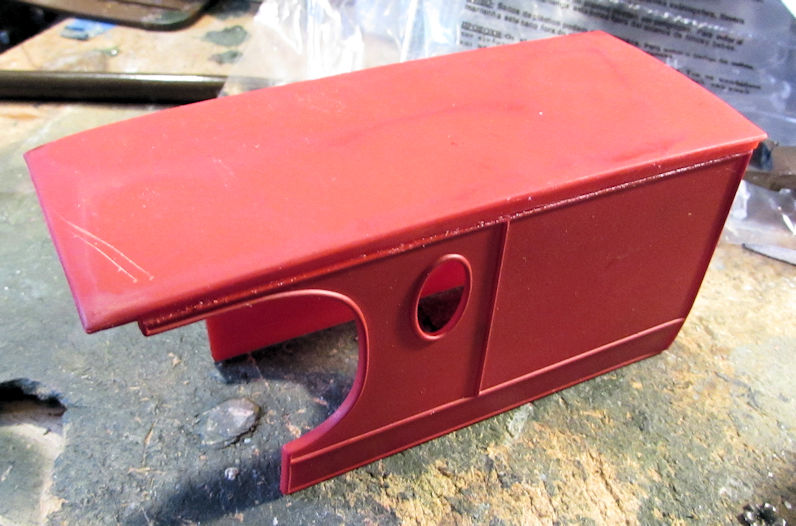 Here it is dry-fit on the lower body/floor: 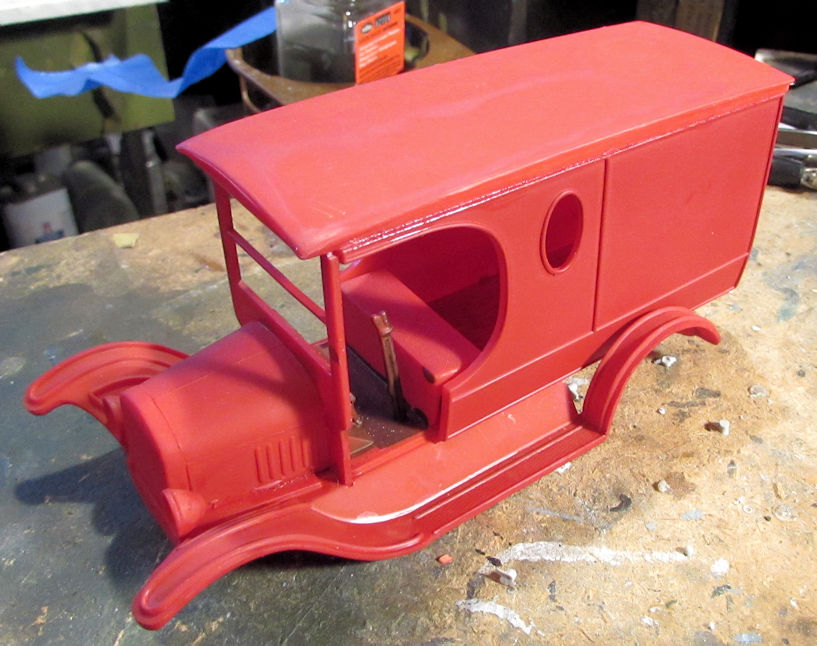 Now I'll shoot the red all over this and later I'll remove the upper body and paint all the interior details. Maybe then I'll be able to get this finished! And now for a couple easy-build models from Trumpeter that I started to keep the mojo flowing. This is the lower hull of the Russian BTR-70 Early version. That took ten minutes to build: 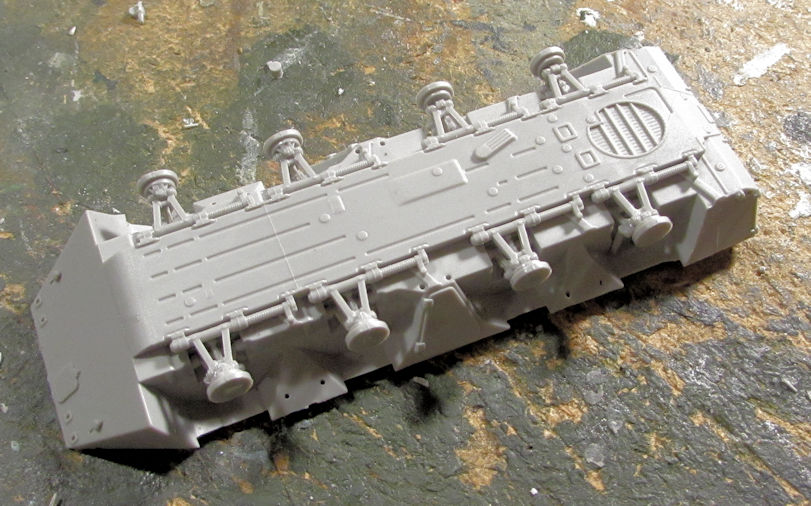 Fifteen minutes later and I finished the upper hull and turret with all the bits. Here they are cemented onto the lower hull: 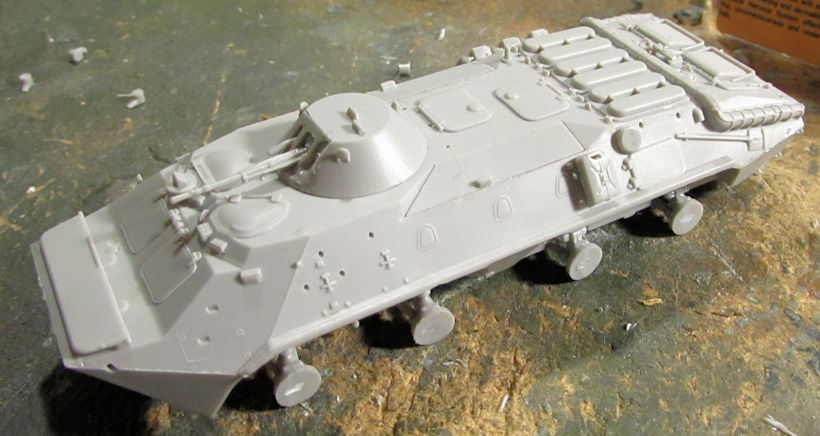 Now it's ready for paint. Since that was so easy, I also started the Trumpeter BTR-70 Late version. The lower hull assembly was the same so I didn't shoot pics of that. After twenty or twenty-five more minutes, here is the late version all assembled and ready for paint now: 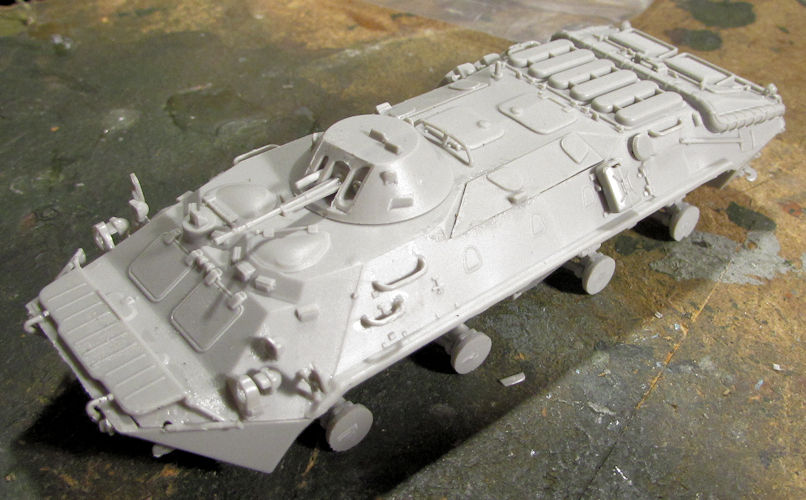 And now to show that these are indeed two separate BTR's here's the shot of them side by side, the early version is in the front: 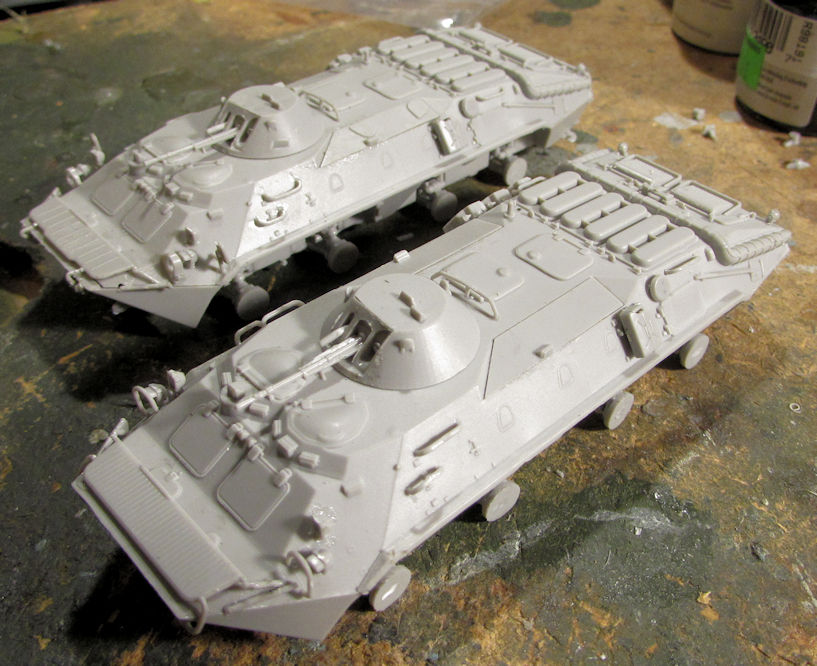 Finally, the most recent model I started was the D-9 Dozer that came with my M-1070 tank transporter. I didn't get too far with it so far, but it's already looking pretty good. First was the main body assembly: 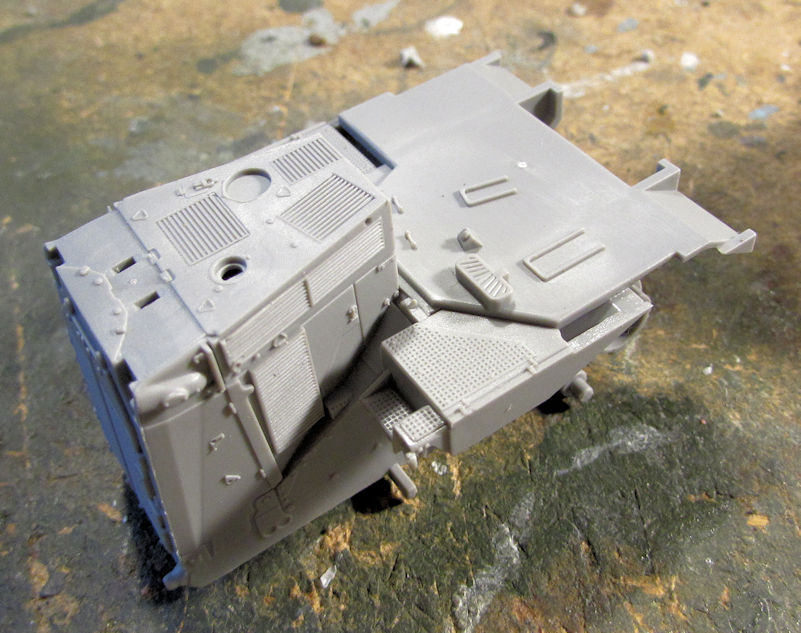 Then I built the tracks and running gear. Man, Takom did it right! Take a look at how great these look: 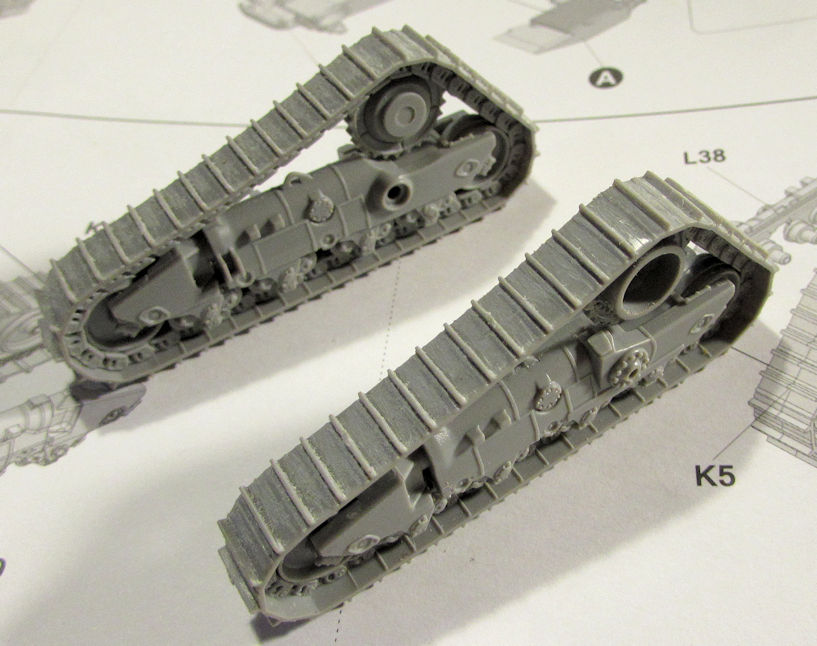 If you look closely, I did have to sand away the mold seam down the middle of those assemblies. Easy peasy! Here are the track assemblies dry-fit to the main body: 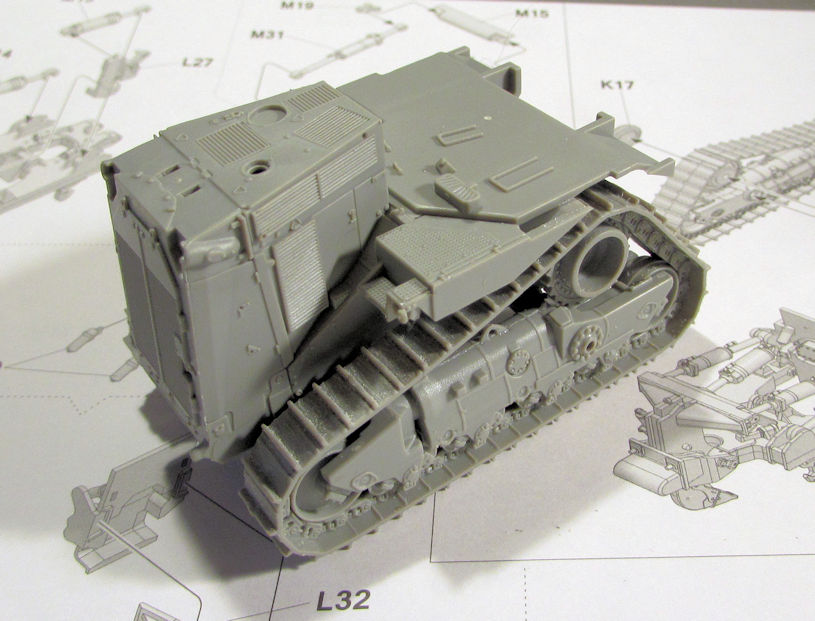 And that's as far as I got this week. Hopefully this trend continues; I want to get more of these done! Thanks all for looking in, comments are welcome. |
|
|
|
Post by SteveM on Nov 12, 2020 21:25:04 GMT
More great progress Duke I’ve got that Takom kit in the stash too so I’m looking forward to seeing what you do with it |
|


 . Good to see the M51 back in the game