|
|
Post by SteveM on Jan 28, 2021 8:32:56 GMT
I nearly choked on my corn flakes when I saw that 124 against the bench, that thing is ridiculously big!  Love the digi camo too Duke  |
|
|
|
Post by dukemaddog on Jan 28, 2021 22:36:42 GMT
Thanks Steve! Hmmmm, maybe I should stop posting pics of that monster; I don't want to be responsible for poeple losing their life to corn flakes! LOL!
Thanks for the compliments Steve, yeah; that's a Big Boy and gonna be a challenge when it's time to add the wings to the fuselage like that. Note of you will: all the military vehicles seen in the background are the same scale as that Antonov. I also appreciate the compliments on the digi-camo. That was actually pretty fun to do.
|
|
|
|
Post by Ian H. on Feb 1, 2021 1:08:19 GMT
Great looking models, Duke! I really love the BTRs, especially.
Regards,
Ian
|
|
|
|
Post by dukemaddog on Feb 21, 2021 2:12:44 GMT
Thanks Ian! I apologize; I missed your post when my email notification of a reply didn't get sent. Okay, here's the latest I got done this past week; most of it done on the Hobby Day weekend. I'll start with the aircraft that got messed up. Some time back, I realized I needed a lot more weight in the nose of the A-400. A LOT. So, since the rear end was still open, I decided to add it and then tilt the plane forward. Naturally when I maneuvered the fuselage for additional sanding or fitting of parts, the weights were not fastened down so they rattled around and sometimes fell out of the still open rear end. So, I took an empty paper towel; tube and slipped it down through the rear opening and then shot some spray 77 adhesive through the tube to coat the weights and then set it aside propped up on it's nose to let the stuff dry. Good news: It worked. The weights don't move anymore. The Bad news: some of the adhesive flowed down to the nose and apparently was 'hot' enough to do this before drying: 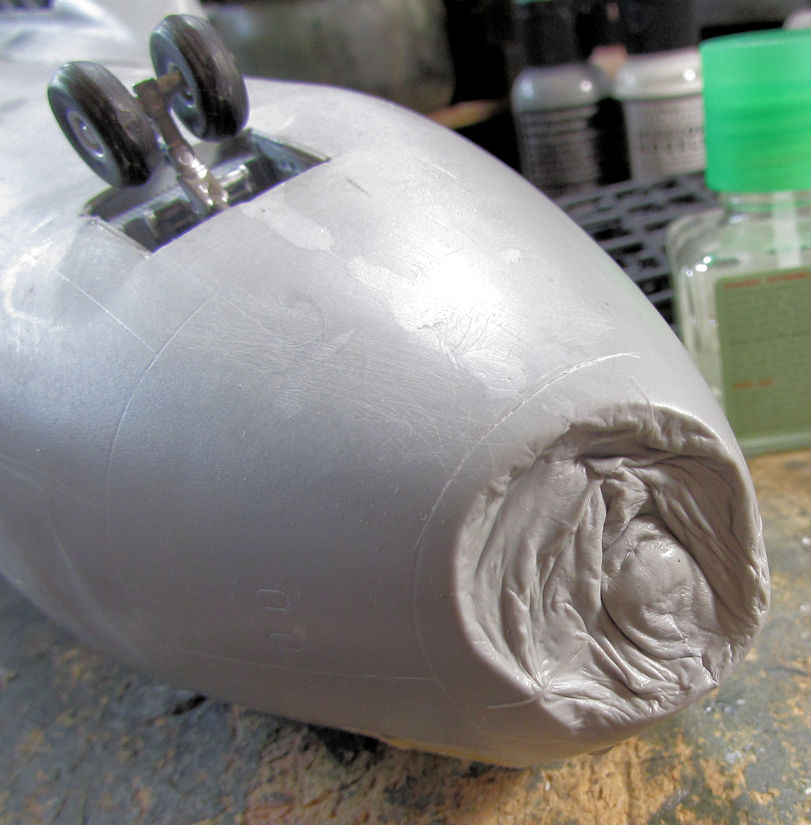 So, until I figure out how to sculpt a nose for this, or find something to graft on; this bird is grounded on the Shelf of Doom for a while. Meanwhile, I moved on and got some progress done on the 1/35th scale M48 Patton tank I'm doing for my local AMPS club Group Build for the Vegas Nationals. First, I painted the tracks that were dry and ready to paint: 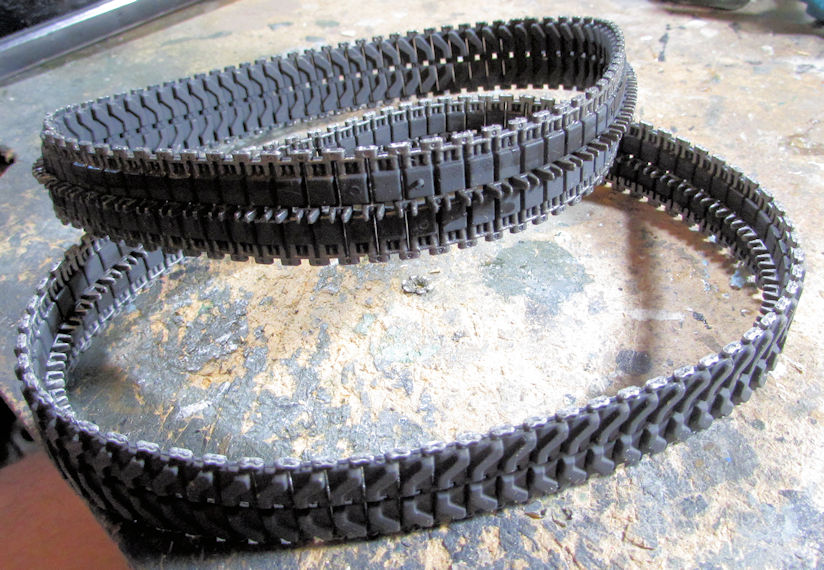 I then shot some additional modulation on this: 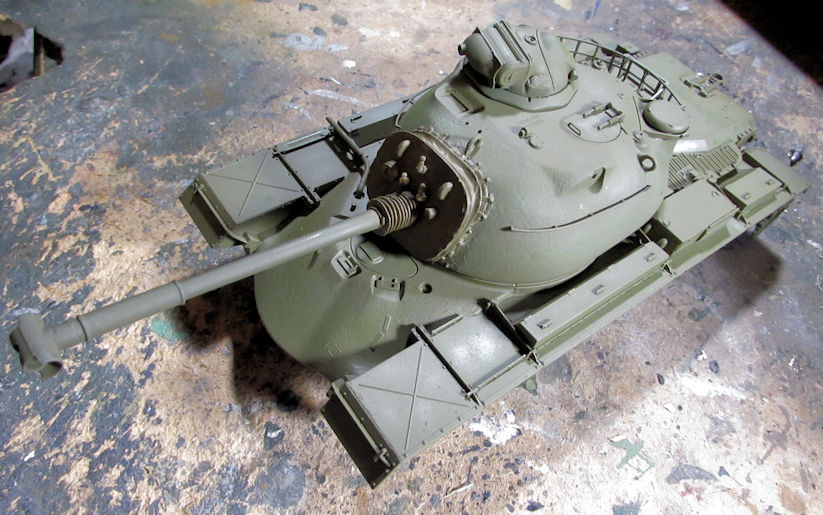 ...which I covered with another thin coat of OD green again. It doesn't show up well in these pics, but there is definite modulation here: 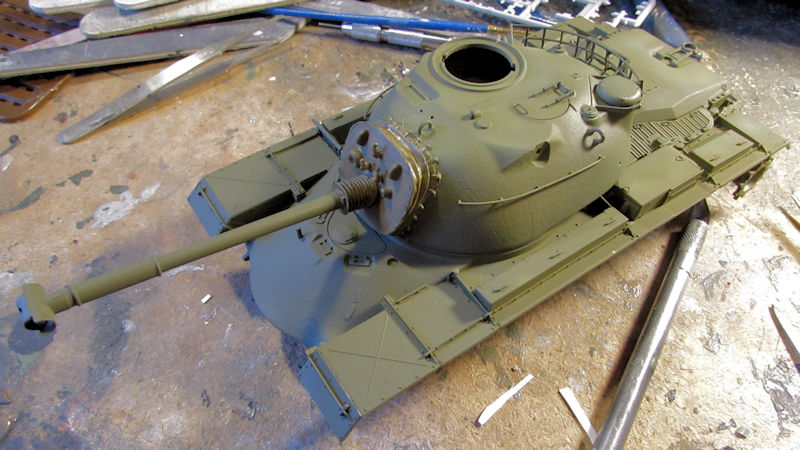 Moving on, I started another new kit. This one is the ACE kit of the AT-1 Snapper Anti-tank vehicle. It was started for a "Goodbye 2020 Group Build" that was started on another Forums. Here is my early progress... First I completed the suspension underneath: 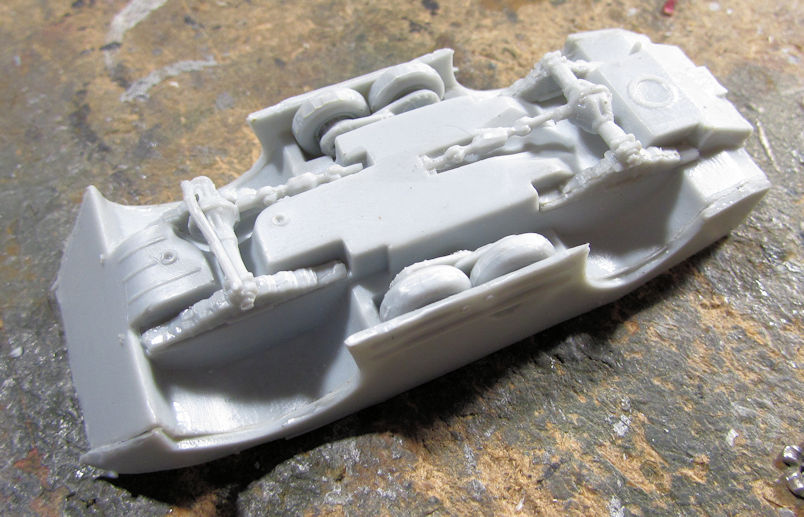 Then I did the top part: 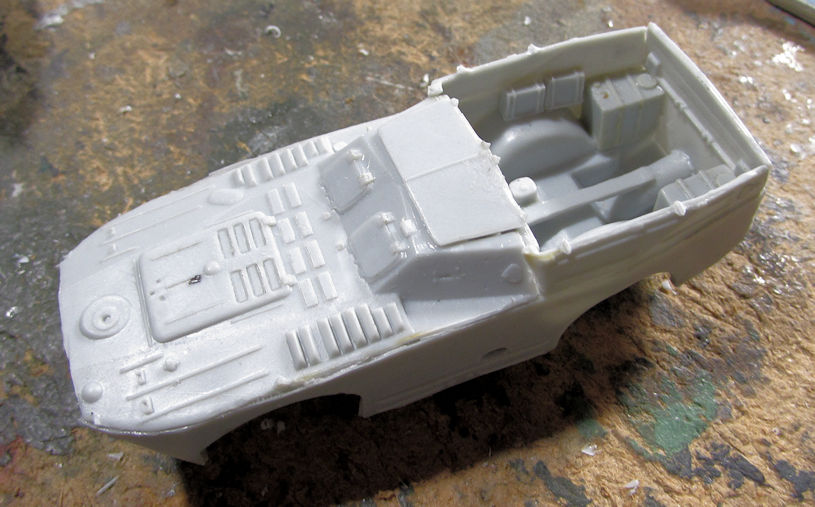 I have some brackets for the spare missiles to go in and then I'll have to paint that interior. Once I put the top on, that will be impossible to paint. Later, I assembled all the Snapper missiles but didn't shoot pics of them. Before I get into the next models; I have to show this. Do you remember me leaving off the round cylinder off the HEMMTT tank transporter tractor because it got lost? I was doing some cleaning and finally found it! Here it is installed on the model: 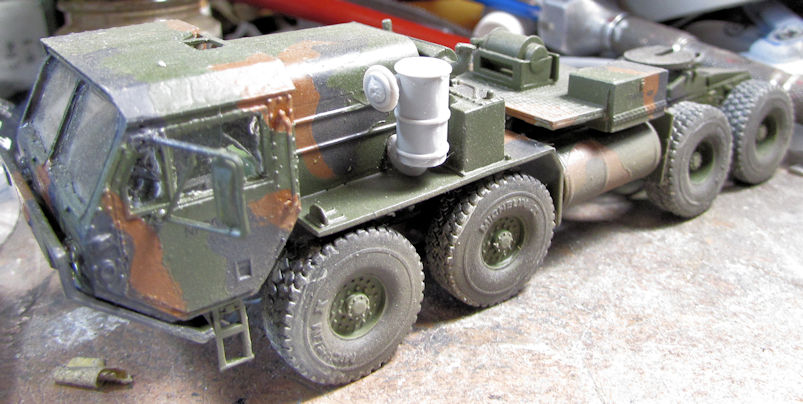 Later I painted it to match the model; but I was so excited that I finally found this that I had to shoot it after it was glued on, just in case it fell off and disappeared again. Moving on to my other in-progress models.... The first thing I did, since this model is so close to the finish line; was to clearcoat the Russian MSTA self propelled gun. Interestingly enough it was such a quick build that I didn't get shots of it under construction! Anyway, here it is in it's basecoat and clear coat: 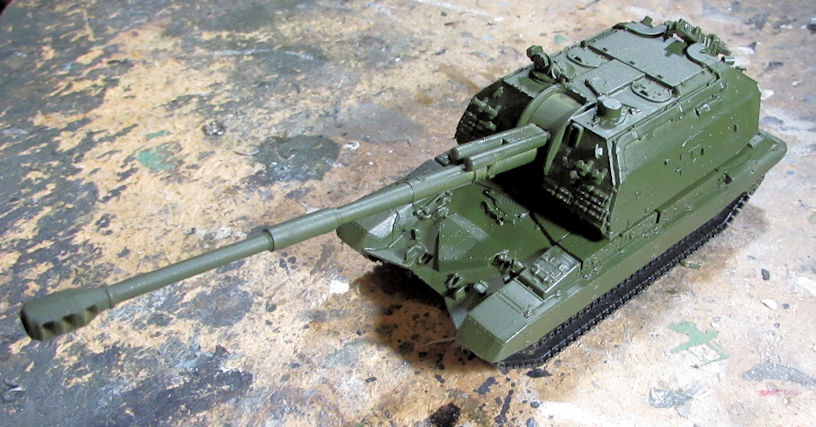 Later I added the decals to this: 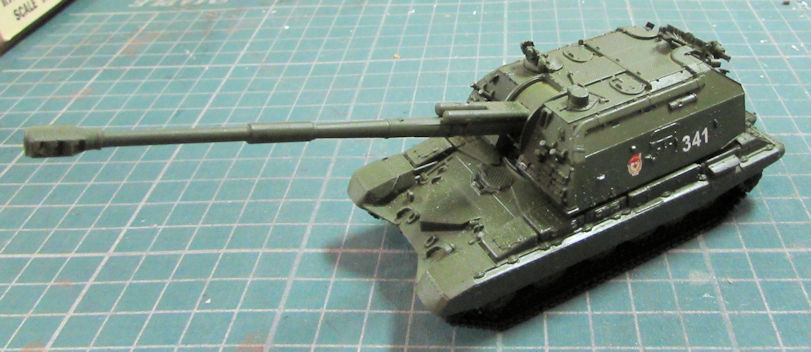 Now all that's left is final parts, detail painting, dullcoat and weathering. Next up is the US Army M109A6 that got most of the fiddly parts that wouldn't break much during handling before I shoot paint. I added the hatches, headlights and other detail parts: 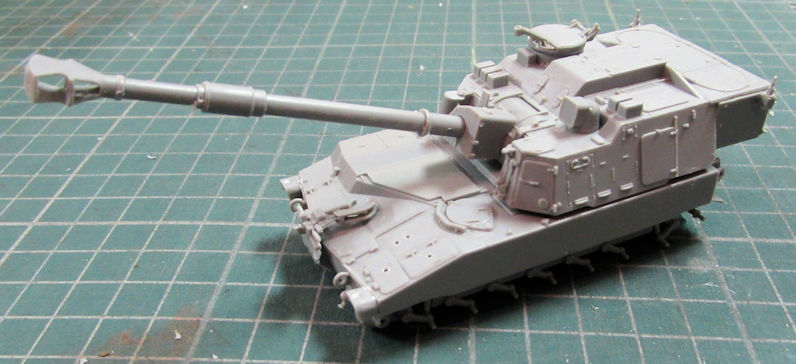 Next, it was time to move forward on the Takom 2-n-1 kits of British vehicles. I started with the FV-432 APC, adding the hatches, headlights and other detail parts that weren't delicate: 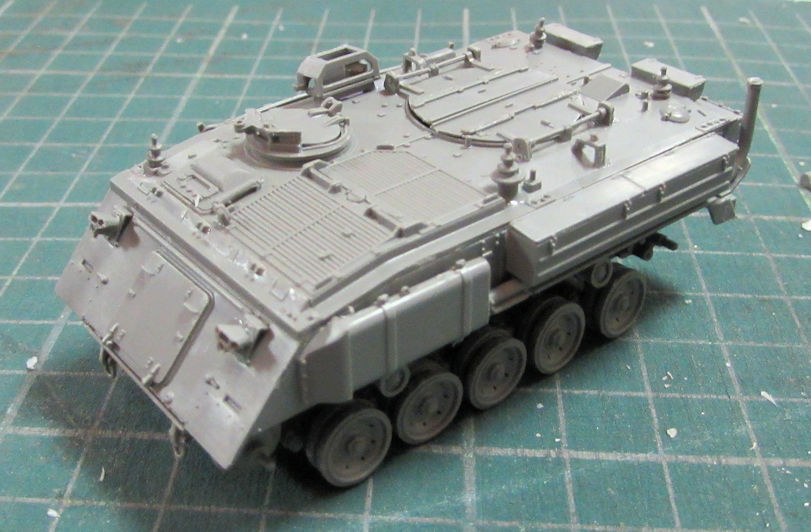 Afterward, I decided to try the tank track jig they included in the kit. It looks like this: 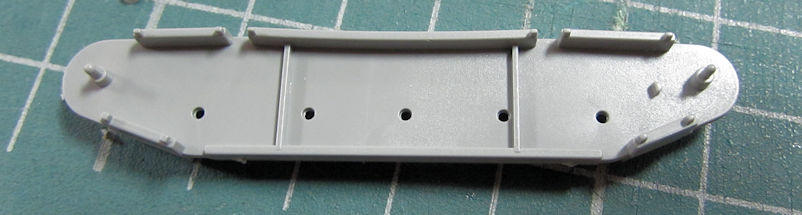 The drive sprocket and idler wheels go on the end posts and the top run of track is glued on to connect them: 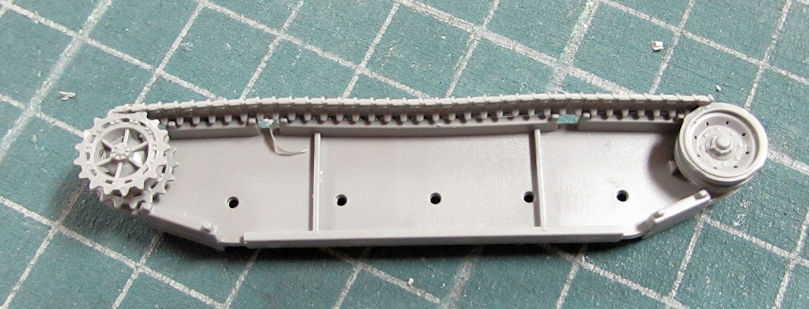 On the other side were some huge ejector pin marks that were so close to those posts that one got cut while I was removing the EP. It had to be glued back into place and so I was only able to do one side. Once the upper run of track was done, then I added the individual track links on the idler and drive sprockets, followed by the end runs to the bottom run of track: 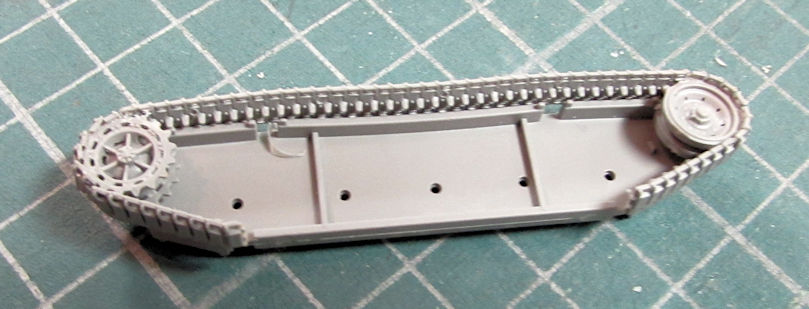 Later that is to be removed from the jig and glued onto the model, then the bottom track run is glued on to complete the tracks. The Chieftains all have the same jig for their tracks. Overall a pretty good system; but I'm hoping the larger track links on the Chieftains are easier to do than these small, fiddly things! Speaking of Chieftains, I moved ahead on them, finishing off the turrets and adding all the detail parts to the upper and lower hulls; starting with the Chieftain Mk.5:  Later I added the baskets to this tank, but I still have some P/E mesh parts to insert inside them before I paint. You'll also notice that the smoke dischargers are missing from the front of the turret. That's because Takom only molded one in the Chieftain Mk.5 kit, the other one was never molded. I know because comparing the sprues to those of the Mk.10 and Mk.11, the sprues that are supposed to hold the second one were shorter and had no broken connection points, indicating that the plastic never quite got into that part of the mold. I'll need to source some extras from the spares box; M1 Abrams dischargers look closest to these used on the Chieftains.They may not be accurate, but they'll be on there! Speaking of the Mk.10, I also finished the turret and added the detail parts to the turret and hull:  Late I added the baskets to this too: 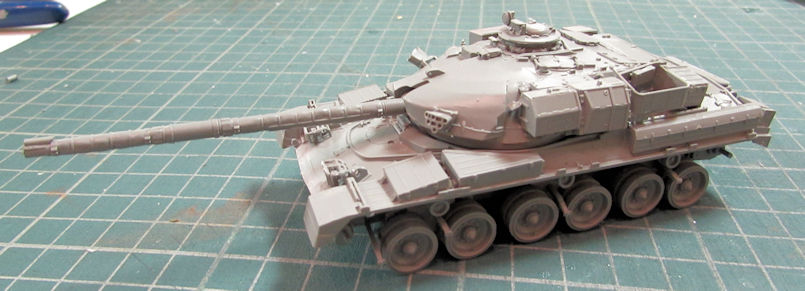 On the Mk.11, it was the same; finished building the turret and then adding all the non breakable detail parts to the turret and hull: 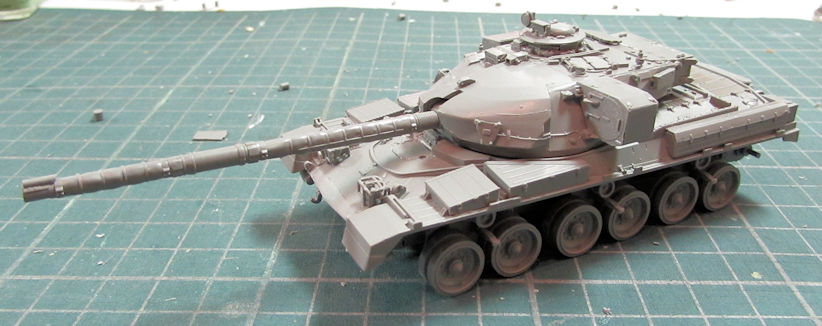 That one got baskets as well when I built them and added them with the other Chieftains:  And yes, the reason I waited to do the baskets is that I had to assemble each one from four to five pieces...each! AND I still have to add P/E mesh to them all! Anyway, here are the three Chieftains ready for track assembly and then paint: 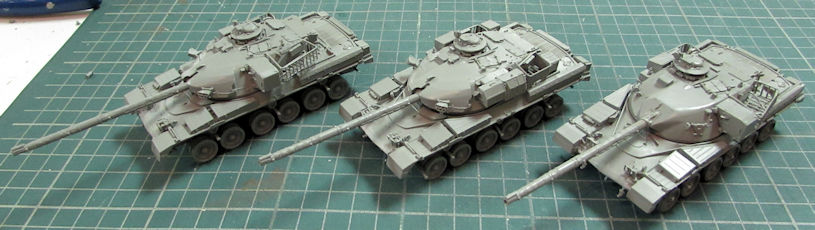 And that completes my latest update on my progress. Thanks all for looking in, comments are always welcome. |
|
|
|
Post by Paul B on Feb 21, 2021 7:08:21 GMT
Ouch that is a real pain with the nose melting like that Duke. Some putty build up and careful sanding could bring the shape back though. Lovely little cold British armour collection coming along there  , memories are coming back of driving and gunning those beautys |
|
|
|
Post by tommygunn on Feb 21, 2021 7:57:38 GMT
Chieftains look ace.
Real pity about the nose.
|
|
|
|
Post by PorcoRosso on Feb 21, 2021 14:25:36 GMT
Nice collection of Chieftains.
|
|
|
|
Post by dukemaddog on Feb 21, 2021 17:17:55 GMT
Thanks guys! I can't wait to get the Chieftains to the paint stage.
Paul and Tommy, I agree about the A-400 nose; I figure I'll try some epoxy putty and shape it. Hopefully that will work out.
|
|
|
|
Post by Ian H. on Feb 21, 2021 19:38:59 GMT
|
|
|
|
Post by dukemaddog on Feb 27, 2021 6:05:29 GMT
This has been one of those one-step-forward/two-steps-back kinda weeks. That is why I've only done this much. I'll start with the 1/35th scale M-48 Patton I'm doing for the SoCal AMPS Group Build. This actually went pretty well; probably the only thing that went well this week. To start with, I added all the extra detail parts to the upper hull that I'd left off before. Things like headlight, lifting hooks and gas caps for instance: 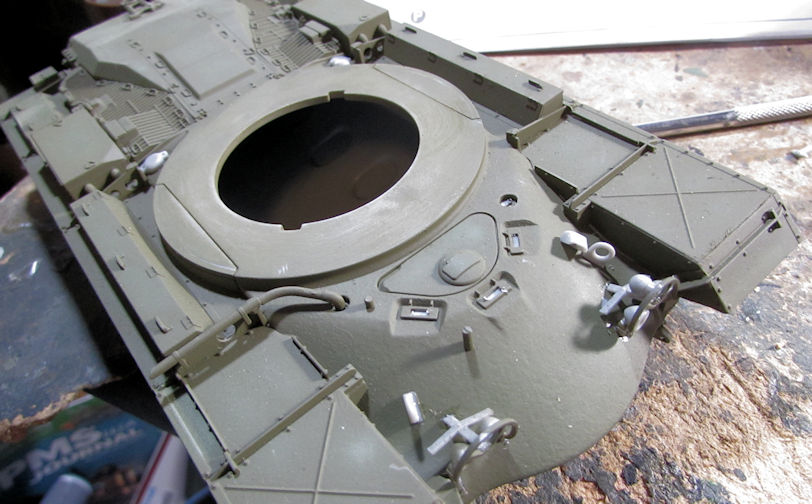 Of course, this didn't all go so pristine; when I went to add the vision blocks to the driver's hatch, I found that one was either missing or never molded. There's supposed to be three as seen on the instruction sheet to the left. You can see I only have two. I never handled this sprue before so I have no idea where the third one went: 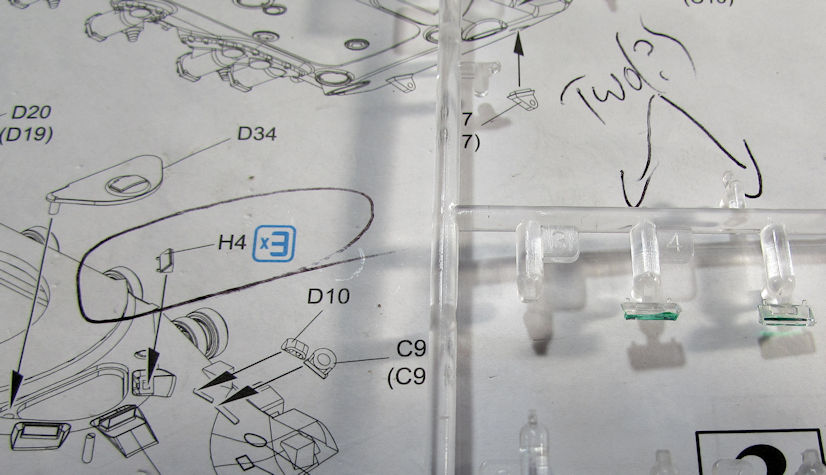 So now, I will only put on the center one and see what I can do about the other two. Until then, I'm moving forward on this. I did have all the clear parts for the turret, so I added them all along with the rest of the detail parts:   I then started on the big searchlight: 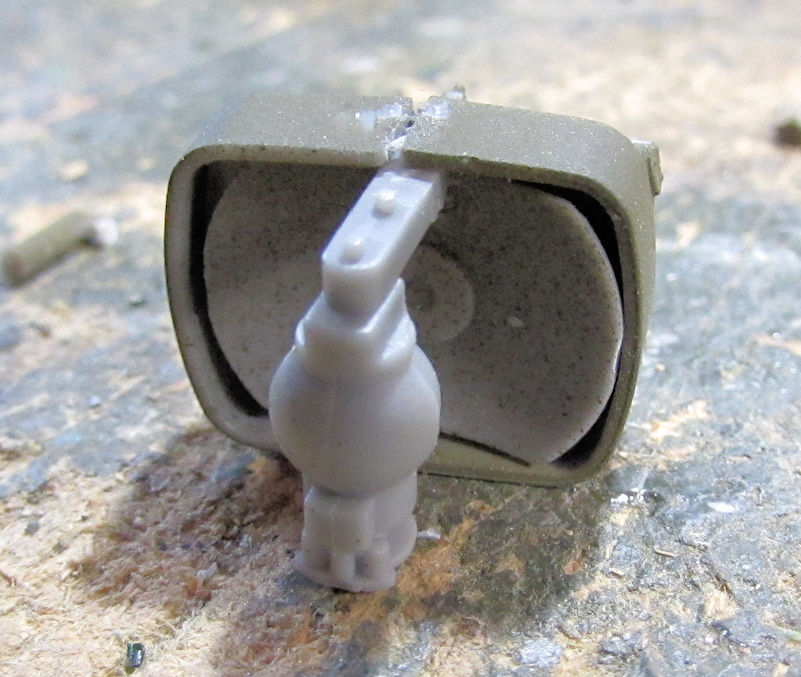  I'm gonna paint the interior before adding more and closing it up with the clear panel it comes with. That's as far as I got with that so far. Later, I started another little model for a Group Build on Missing Lynx Braille Scale Forums. This is my M-32 started. I did the lower hull first: 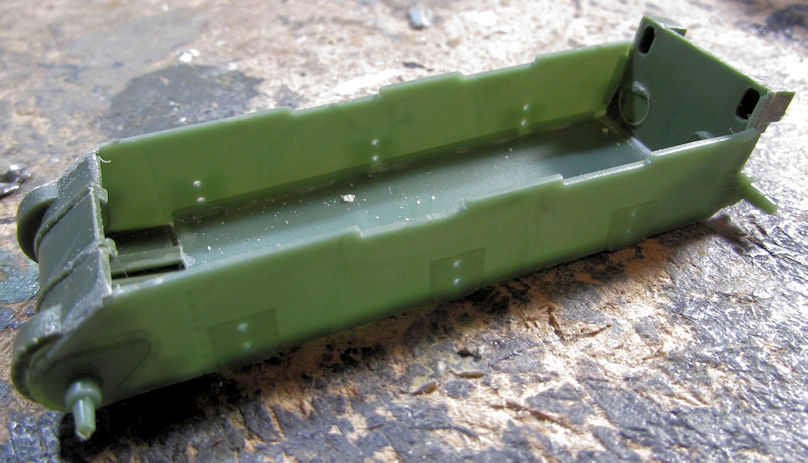 After that, I didn't want to deal with the running gear so I skipped ahead and started the mine rolling assembly. What a battle this turned out to be! After an hour and a half of fighting this thing, I finally got the following result: 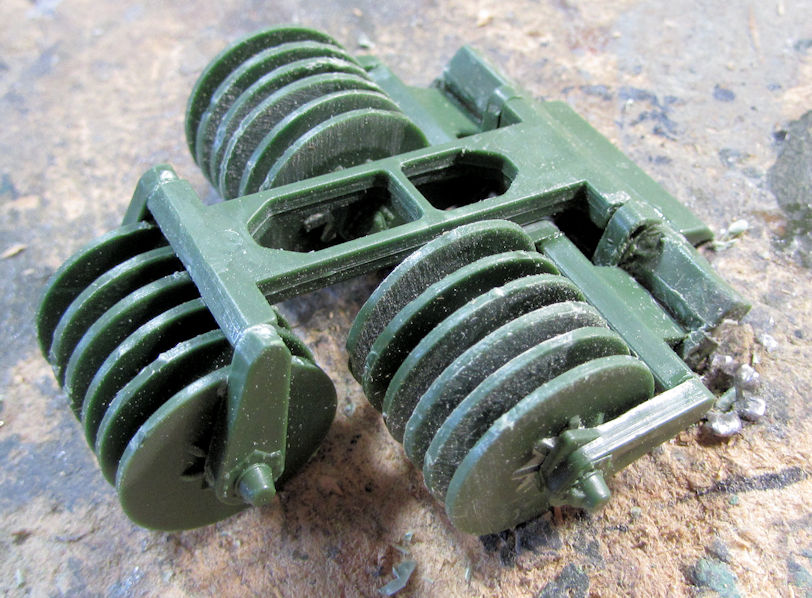 Later I built the turret and some of the parts for the lower hull. This is a mock up of all I'd done on this so far: 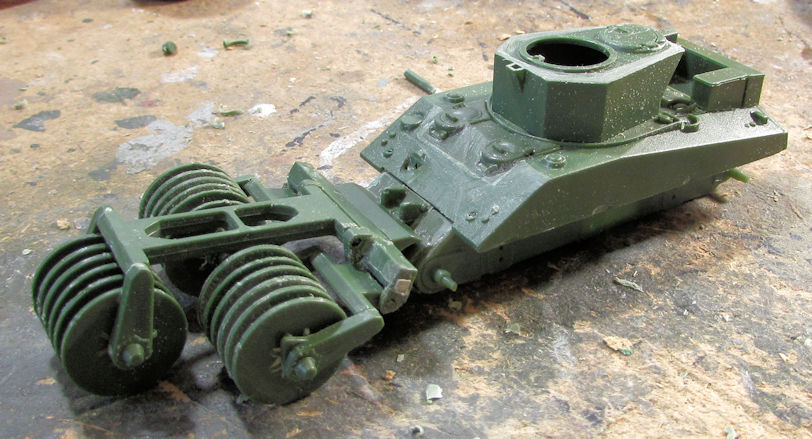 I'd had enough of that so I moved on, hoping to make some progress on some of my aircraft. The A-400 was bothering me so I started the sprue framework on the nose suggested by one other friend: 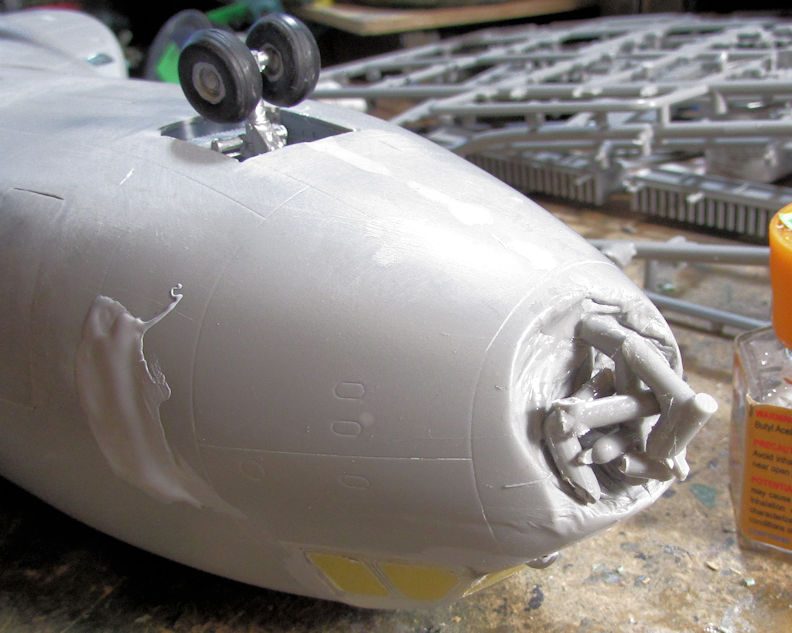 Of course, that caused a front wheel to come off: 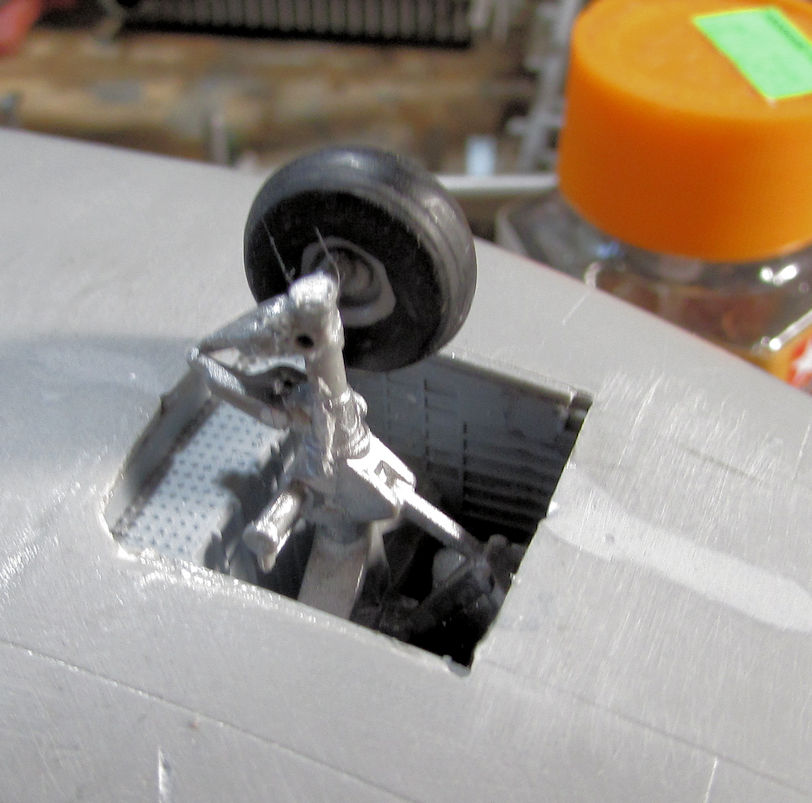 So I tried to glue it back on. It wouldn't glue on straight! So, I drilled out the stem, destroying it in the process of course, Then I added a piece of wire to the broken wheel: 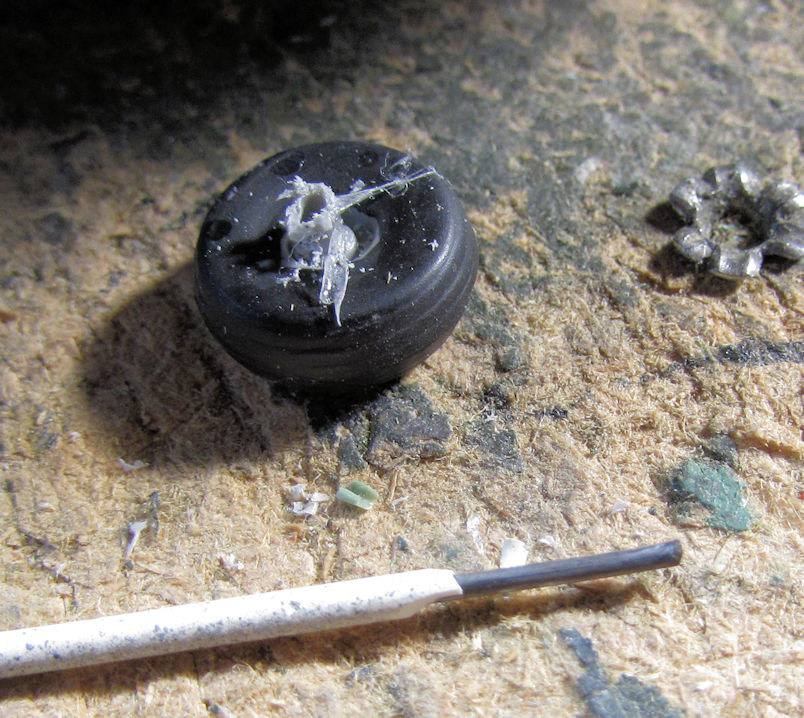 The axles ain't straight, but the wheel is even with the unbroken one, so this is DONE! 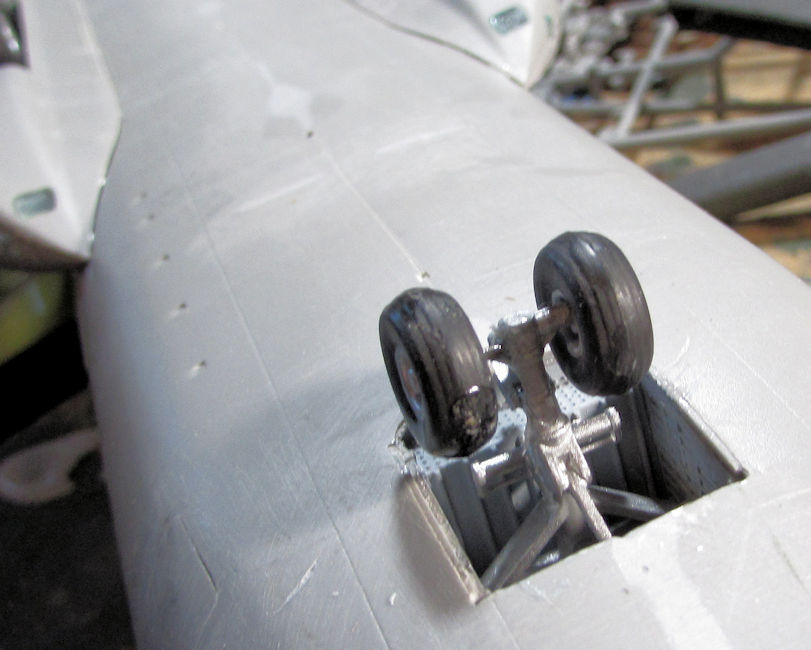 While doing that, I found a couple other areas where the spray 77 made the plastic soft and caused it to sink/ Mr. Surfacer 500 liberally applied filled those areas to be sanded after it dries sufficiently:  Okay, that was enough of that since it was really torquing me off. I decided to try and do something on my An-124. First, I taped off the underside, nose and tail where it is supposed to remain grey: 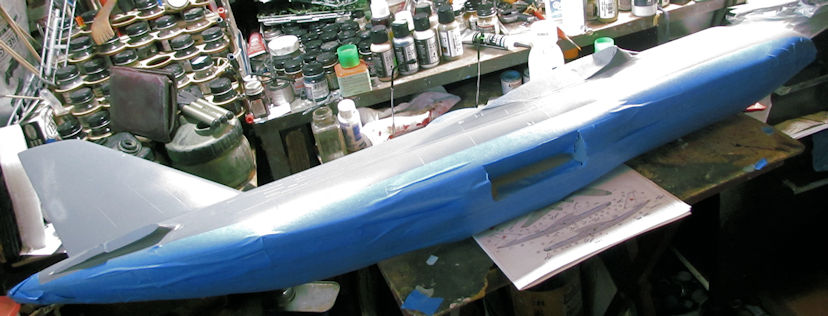 I then took it outside to shoot the white topside: 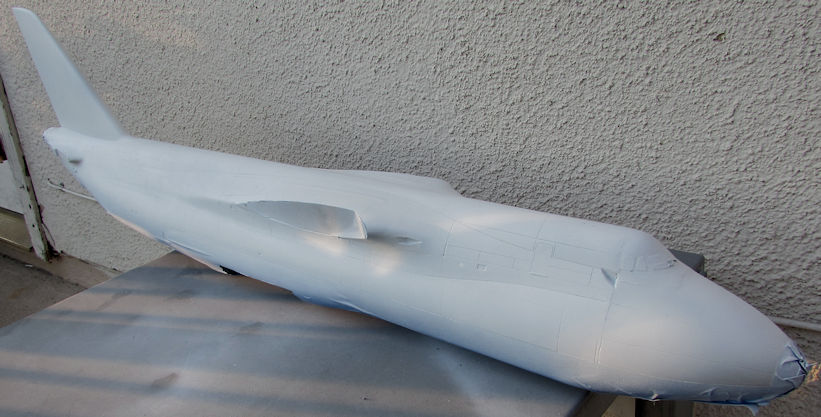 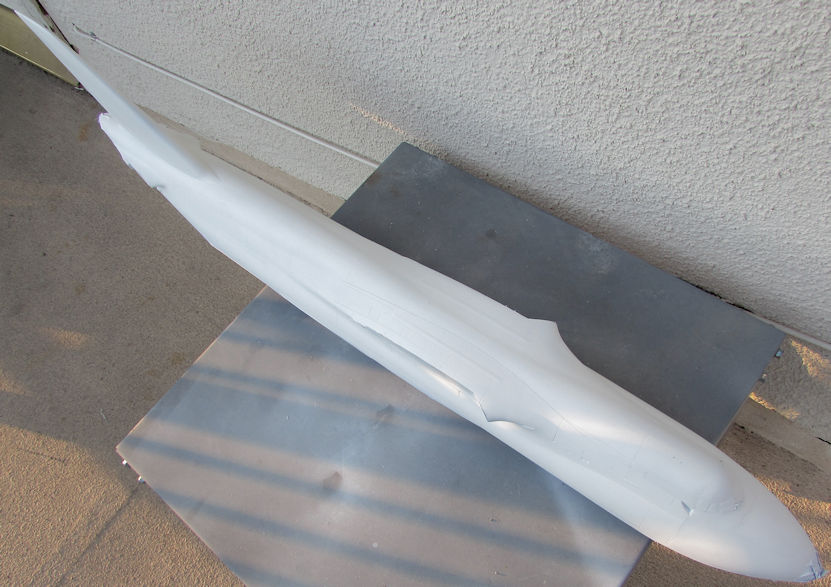 Looks good doesn't it? Yeah, I thought so too until I looked closer before glossing it. What you don't see in those pics are several smudges, patches of lint, extreme rough spots, and imperfections in the white paint, certainly not smooth or clean enough to shoot a gloss clear on it. That pic was shot three days ago. Since then, I've been sanding, washing, respraying, wiping, sanding re-spraying at least another nine times or more. Still ain't right. In between all that, I also taped off the tips of the wings and horizontal tail surfaces and painted them red: 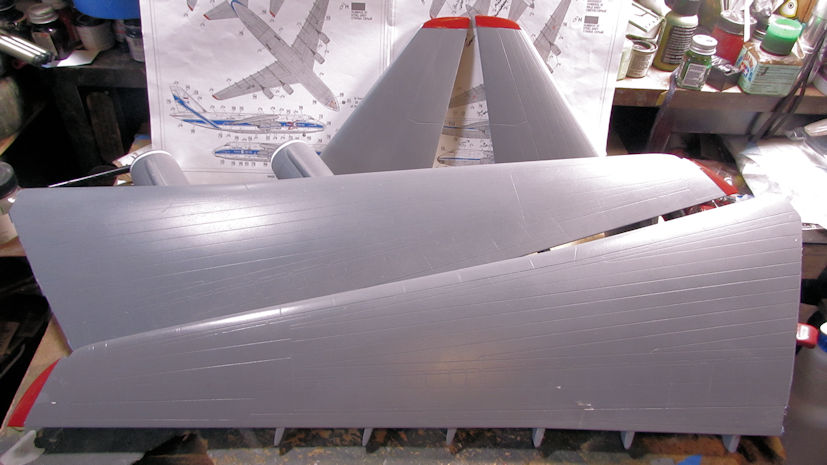 After that, it was time to paint the metallic parts of the engines. I masked off the front of both wings with the Tamiya flexible tape and on one of them, I brush painted an aluminum color on the edges and interior of the front of the engine: 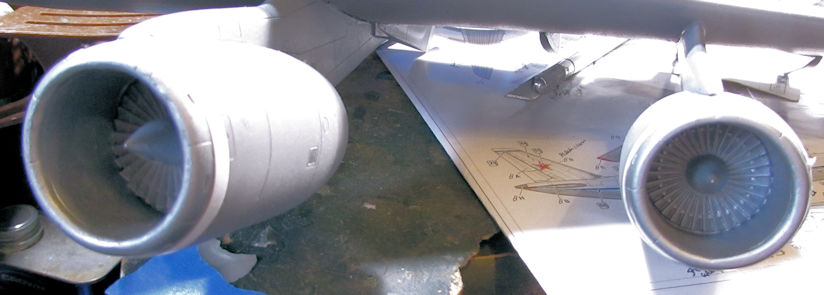 Kinda hard to see in that pic, but I did it. I then painted the tail cones a dark metallic color and drybrushed with a steel: 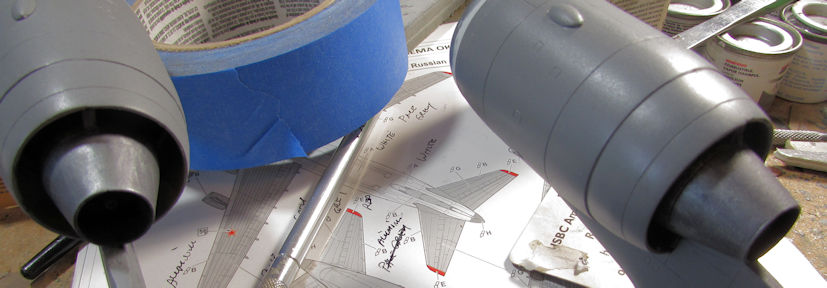 Not too thrilled with that drybrush, so I'll be redoing those rear cones. I also saw a lot of issues with the grey paint on the wings again. Gonna have to re-mask and re-shoot these grey and gloss coat again. Meanwhile, I pulled down the other wing and started to paint it too:  Naturally, as always, one engine had to break off again! I can never move ahead on this: 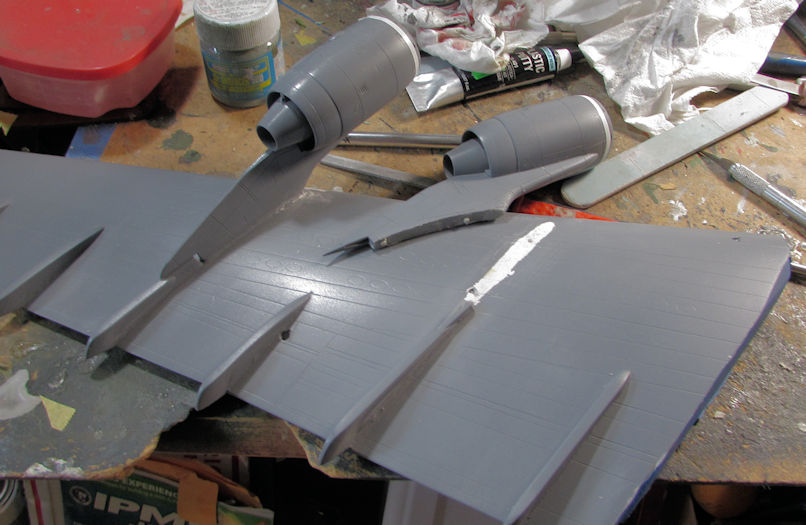 Yes, that was JBWeld! It has since been glued back on. That is gonna have to be re-shot in grey again too. Enough of all these hassles! By this time I was thoroughly fed up! I looked through my stash for some thing simple, easy and not needing paint so I could lose myself in just building. I found a kit I'd started some time ago: my Space 1999 Mk.IX Hawk. I had done some simple sub assemblies so I thought it was time to start putting it all together. I started by adding the engine cones to the main engine: 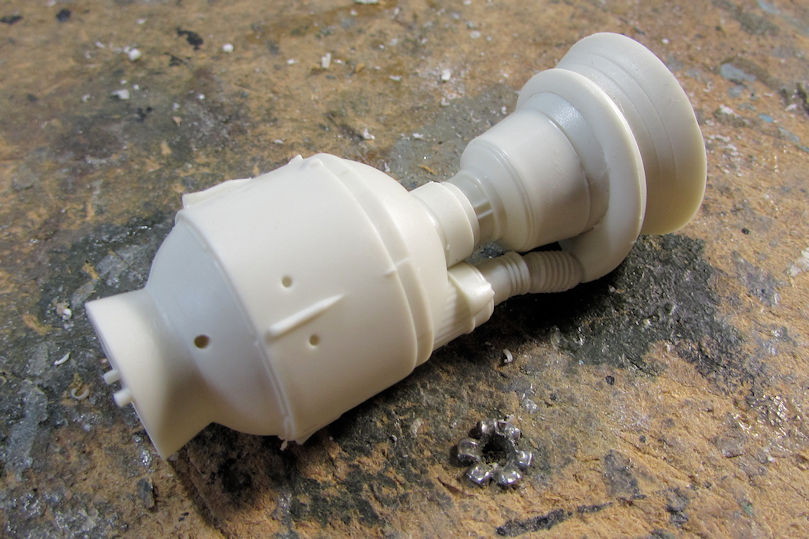 Later I assembled the rest of the model, losing myself in the build just like I wanted: 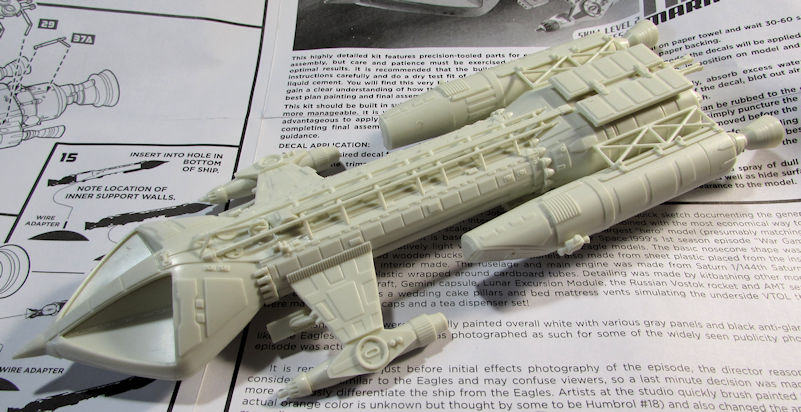 Here it is mocked up with the main engine: 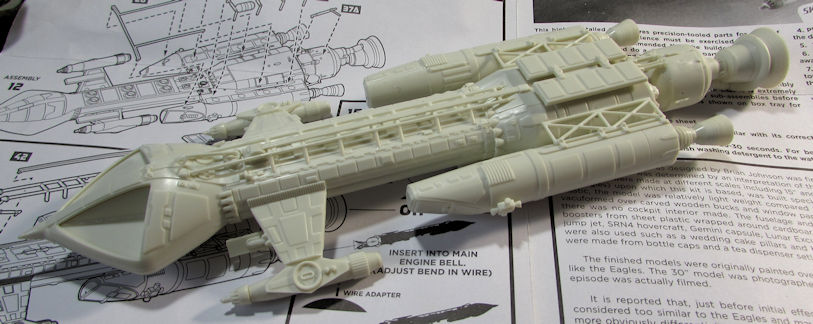 I gotta paint that main engine housing orange before I can glue it to the rest of the model. That seemed like a great place to end this disappointing week of model building. I hope you enjoyed this latest tour. Thanks all for riding along, comments are welcome. |
|
|
|
Post by dukemaddog on Feb 27, 2021 6:07:53 GMT
Duke, sorry to hear about the A400. That is devastating. On a plus note the armor kits looks great and I especially love the Chieftains. I bet those make Paul pace around the living room making random tank noises and, reliving his youth in 17th/21st.   
Thanks Ian! Yeah, that A-400 was a shocker but I think I can rebuild it. See my post above.
Yeah, I think I hear Paul too!
|
|
|
|
Post by tommygunn on Feb 27, 2021 6:39:24 GMT
Space 1999.
Now there's a blast from the past. I remember having the dinky toy, when I was a kid, with detachable nuclear containers.
|
|
|
|
Post by Paul B on Feb 27, 2021 7:15:28 GMT
Sounds like a rough week Duke. But at least you're still cracking on and haven't thrown the towel in . Off back to my room to make tank noises again  |
|
|
|
Post by Ian H. on Feb 27, 2021 15:59:15 GMT
That Antonov is unreal and looks great! Love the Hawk as well. Cool looking ships.
|
|
|
|
Post by dukemaddog on Feb 28, 2021 3:40:08 GMT
Thanks Tommy! I have special memories of that show Space 1999. Back when I was a wee lad, my mother used to allow me to stay up late past my bed time and watch it with her. It was our favorite show and the two of us sat through every episode. Because of that, I have been trying to get all the Space 1999 kits I can.
Thanks Paul! Yeah, I refuse to let a bunch of plastic get the best of me... even though it always does. I guess I'm just stubborn that way. Next update I should have more progress to show on my Chieftains to go with your tank noises.
Thanks Ian! Yeah, that Antonov is unreal, especially in the constant need to keep re-spraying it to try and make the paint smooth and clean! Man I want to get done with that! I've always loved the Hawk too and it's been a very long term dream of mine to get one for my collection. I finally have and the cream is that it is in 1/72 scale!
|
|
|
|
Post by SteveM on Feb 28, 2021 8:35:32 GMT
Another epic Duke update! We have interest, variation, tragedy and recovery Seriously, great job rescuing the Altlas. The chieftains look great and I love that Space 1999 Hawk |
|
|
|
Post by Snipersmudge on Feb 28, 2021 9:09:19 GMT
Even with some problems mate it's all looking good!
|
|
|
|
Post by PorcoRosso on Feb 28, 2021 12:12:40 GMT
What an impressive line up of builds Duke. Good work.
|
|
|
|
Post by dukemaddog on Feb 28, 2021 17:20:39 GMT
Thanks guys! I appreciate it very much, especially after the week I've had!
Steve, you make my week sound like a broadcast TV Special Event! LOL! I like it! I am thrilled you appreciate my work.
Pete, Porco, thanks guys! I hope the coming week is better and more productive.
|
|
|
|
Post by dukemaddog on Mar 1, 2021 7:07:48 GMT
Well, here is a small update on some of the work I've done after recovering from that difficult week. Things seem to have gotten a bit better now. This is also all the work I got done yesterday and today. To start with, I assembled all the wheels for my 1/35th scale Patton that I am doing for the SoCal AMPS Group Build: 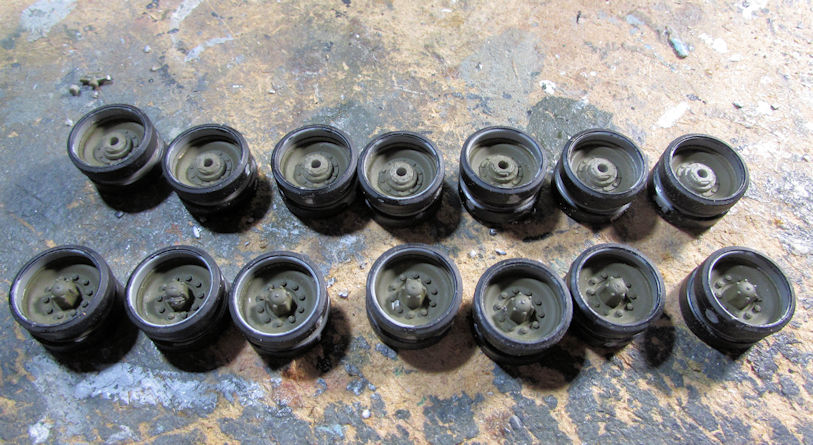 Next I painted all the bare pieces that I'd installed earlier: 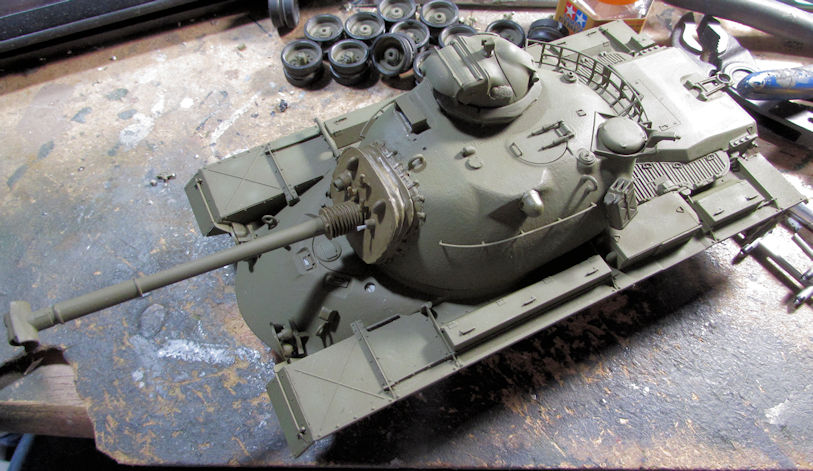 Moving on, I decided that that tracks for the FV-432 needed to be finished, so I did the other side on the track jig. I then test fit the first run I did on the one side: 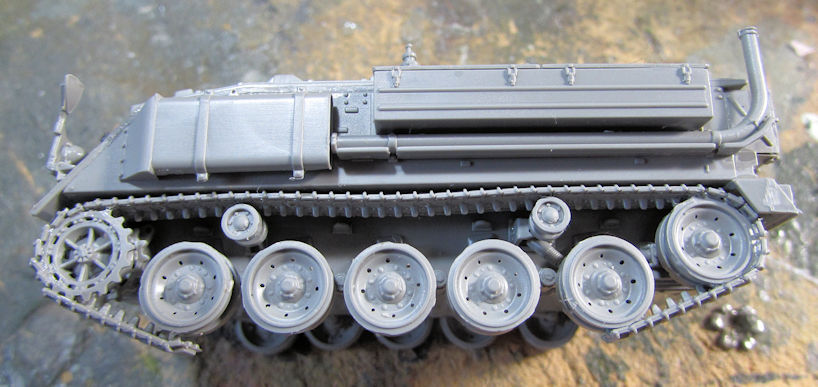 That was very fiddly and poorly done so I decided I better just do a complete track install. After some effort and adjustments, I got everything on: 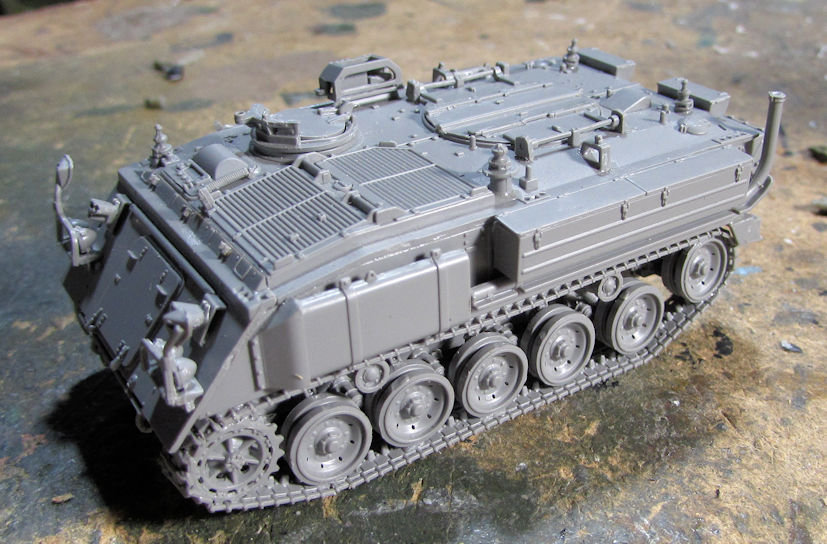 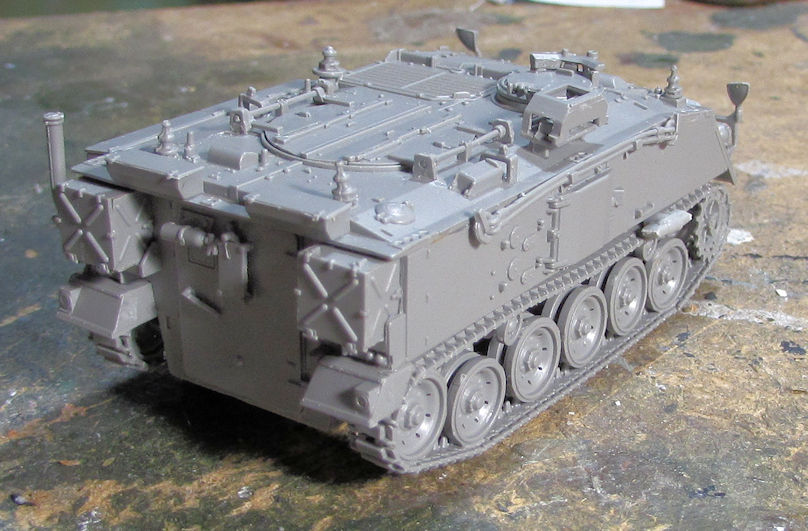 All that's left is to add all the photo-etch parts and then this can be painted. Since I was doing tracks, I moved on and did the tracks for the Chieftains, starting with the Mk.V. I assembled the first run of tracks on the one side of the jig: 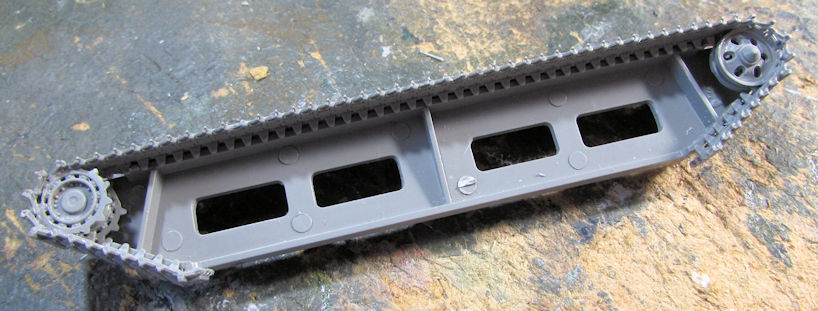 These larger ones were much easier to do. I like these jigs too because you can do the track runs on both sides which helps insure the tracks are all going the proper direction: 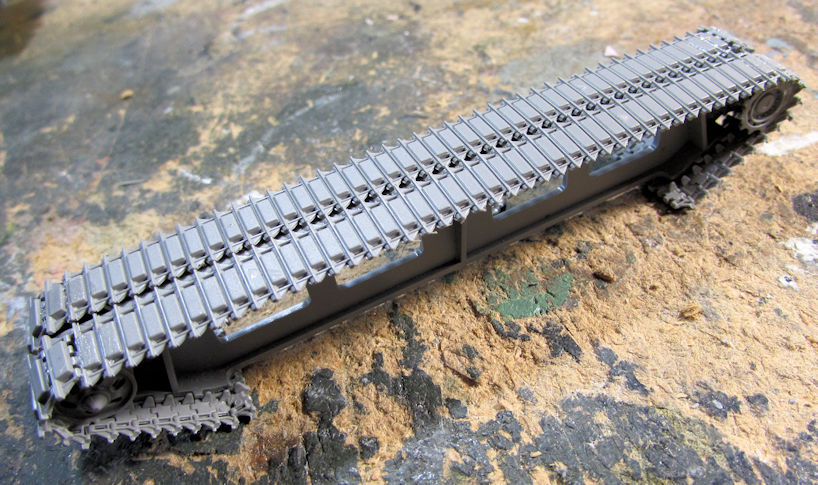 I hope to paint a basecoat at least on my Chieftains before I install these tracks. I started the tracks on the other two jigs I had for the Mk.10 and Mk.11 Chieftains but didn't shoot any pics of them. After all they look like the above pics. However, because I was doing wheels and tracks, I pulled down my M-109A6 and added the roadwheels and tracks to that: 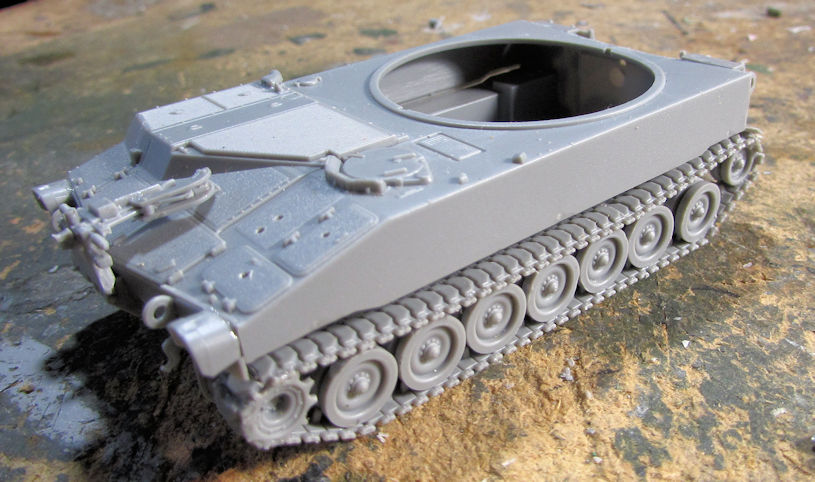 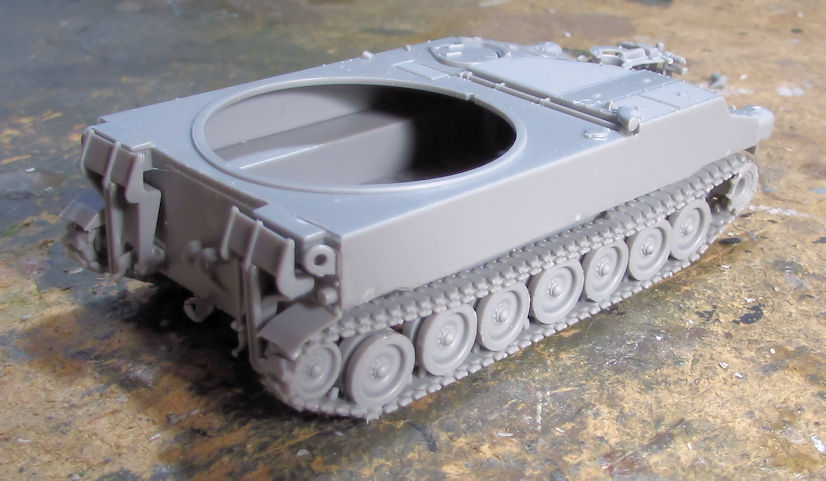 Afterward I added a few more bits and bobs to the turret of this vehicle. Here it is sitting on the hull with all the new tracks on it: 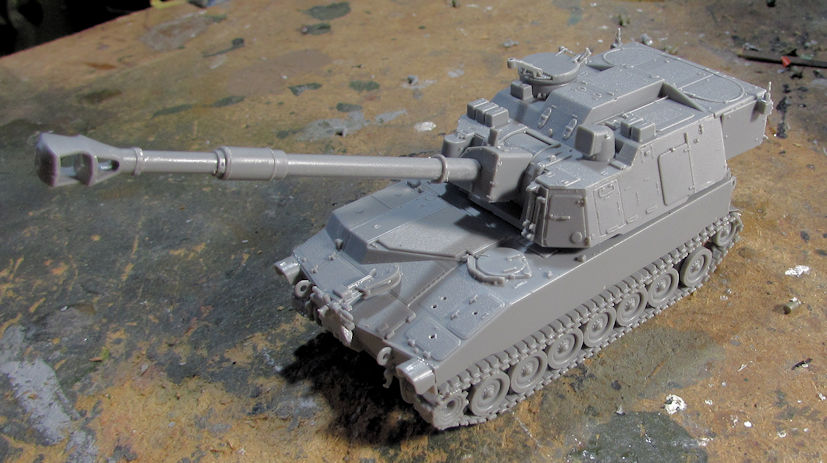 A few more bits and bobs, some baskets on the back of the turret and some photo-etch and this will be ready for paint as well... After that, my two Roden WWI buses came in and so I eagerly got started on one of them. I chose to do the civilian bus first. Of course the first thing to do was the suspension and chassis... such as it is: 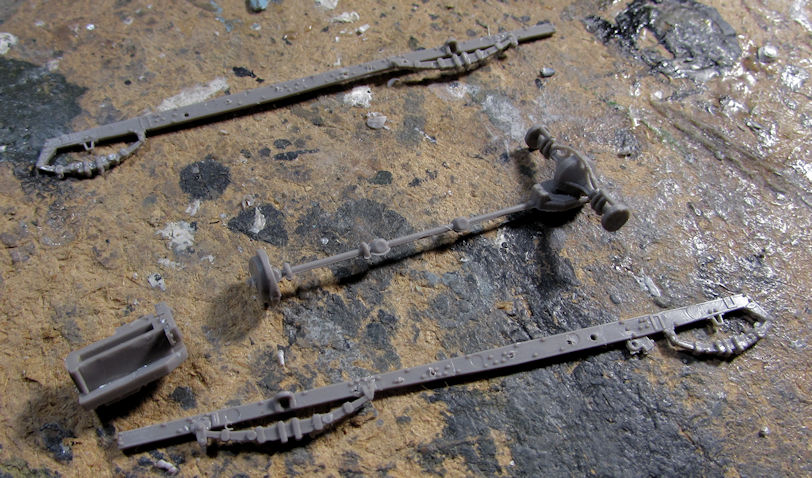 I then assembled the main body/lower passenger cabin: 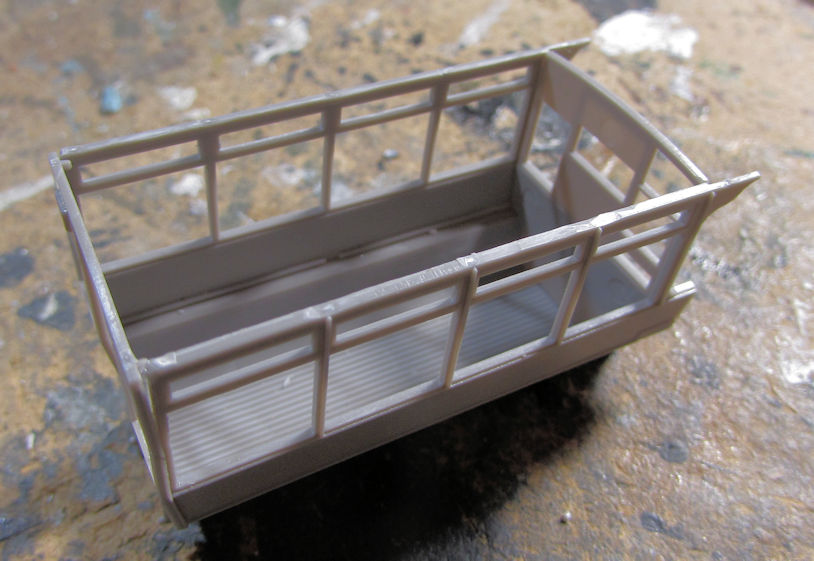 That is when I found out why there was so little on the suspension because it all gets added to the bottom of the main body: 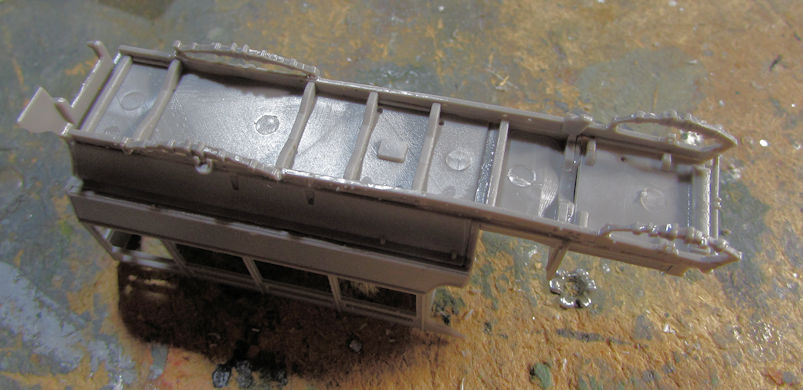 Afterward I finished the drivers seat and hood of this bus: 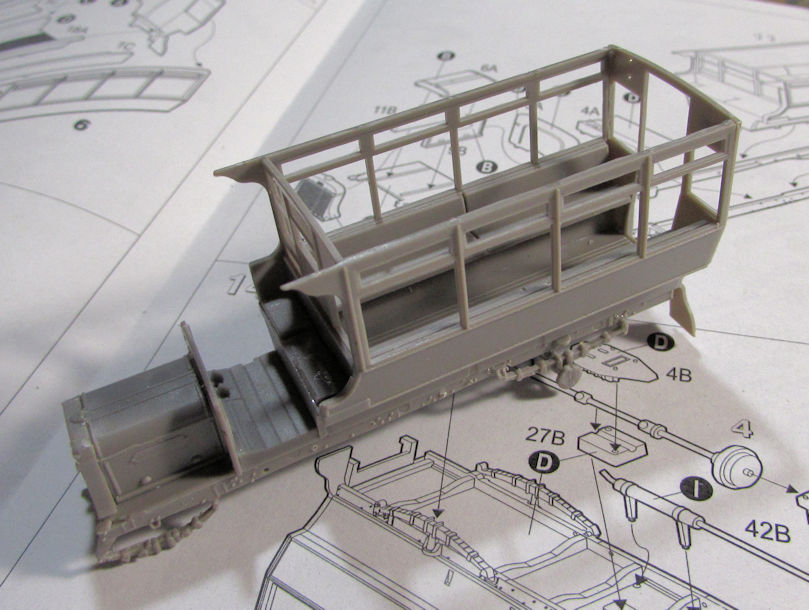 While that was set aside and drying, I assembled the upper passenger deck: 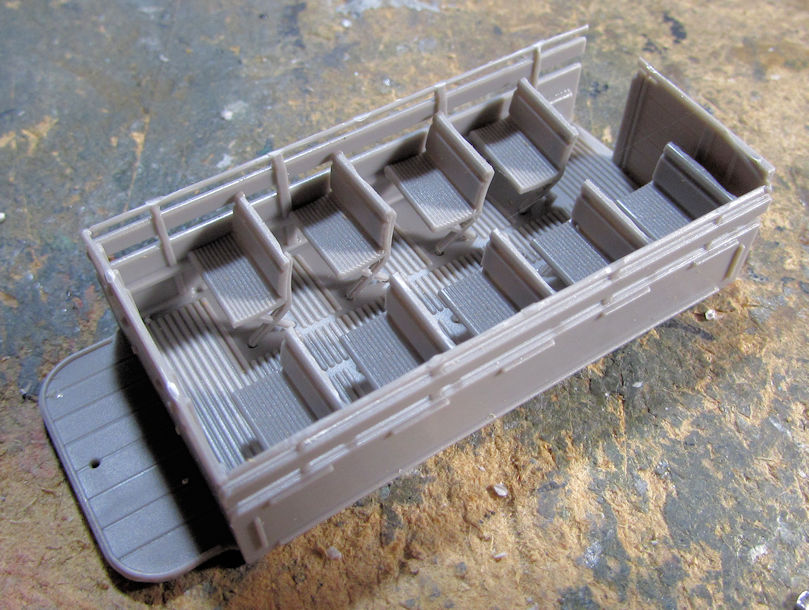 Here it is all mocked up to see what it will look like: 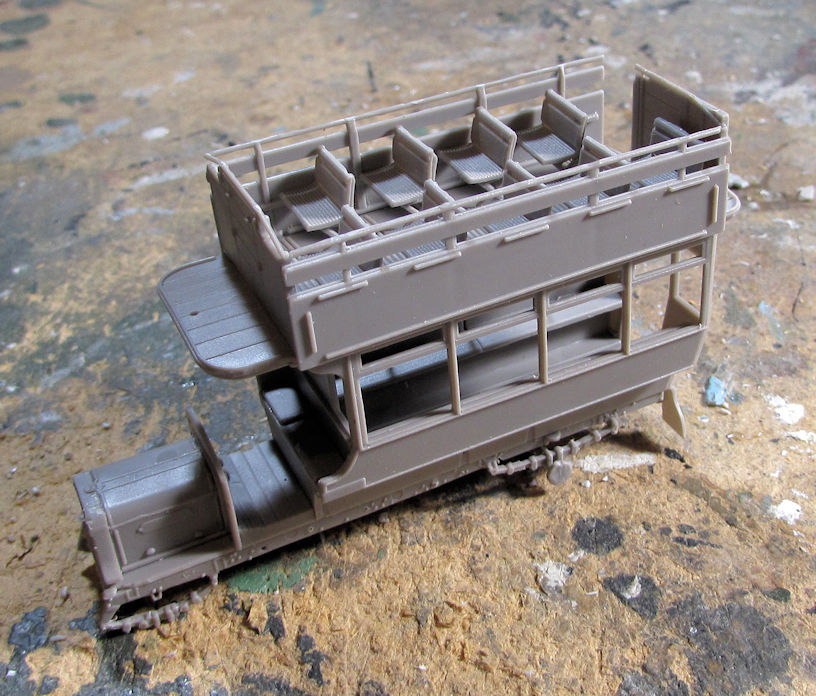 I like it! I'm leaving the upper deck off until I can get the interior of the lower part painted first. Then everything will be brought together. And that is my progress for the past day and a half. Thanks all for looking in! Comments are always welcome. |
|


 , memories are coming


