|
|
Post by PorcoRosso on Aug 27, 2020 7:28:58 GMT
Cheers Paul, Marco, Pete and, Ian. Much appreciated.
It only took a little filler. Had I put a bit more glue on the seam, the plastic that oozed out would have been sufficient to act as a filler.
I've sprayed some parts silver, hopefully I will put a couple of photos on later today.
|
|
|
|
Post by PorcoRosso on Sept 15, 2020 16:17:10 GMT
Hello gentleman, Sorry for the long delay since my last post, I've been a busy boy. With the end of the month approaching, I'd better get my fat arse in gear. I sprayed the main parts aluminium, and applied some decals. The decals are from Cartograf, and are up to their normal excellent quality. After looking at some photos online of the subject, I noticed the engine panels are more of a light aircraft grey, rather than silver. I've already painted these, so after the rigging on the fuselage has been done, I'll can glue them in place. Hopefully, that will be in the next couple of days.  |
|
|
|
Post by Paul B on Sept 15, 2020 16:31:30 GMT
As and when Joe  . But it does look like your fat arse moves pretty quick and brings quality with it too  |
|
|
|
Post by Snipersmudge on Sept 15, 2020 17:21:41 GMT
Looks very nice indeed mate  |
|
|
|
Post by PorcoRosso on Sept 17, 2020 14:19:52 GMT
Thank you much kindly Paul and, Pete. Muchly appreciated. I had a good old spraying session today. I also attached the control cables to the fuselage. These were positioned by scaling up the points show on the destructions. Then using a very near (vernier) to mark the holes, I drilled the spots. This allowed me to use a needle and EZ Line to pass straight through the fuselage and attach the line at each end. When using stupid glue (superglue), I use a trick an old shipwright with a glass leg and wooden eye showed me. Using a straw, blow on the point you've applied the glue to. The moisture from your breath quickens the reaction. I then put a little blob of white glue on to add a bit of strength. Just don't cover your model in gob! Hopefully, I can have a gluing up session over the next day or so.     |
|
|
|
Post by Paul B on Sept 17, 2020 14:28:09 GMT
LMFAO  , those are good tips Joe. Specially the last one . This is looking awesome fella, and you're certainly on the home stretch now  |
|
|
|
Post by Boots on Sept 17, 2020 19:21:28 GMT
That does look very smart indeed Joe and great tips as well  |
|
|
|
Post by dukemaddog on Sept 17, 2020 20:32:11 GMT
Amazing work! I did something similar on my Ford Tri-motor with the control lines. It really does make the model pop!
|
|
|
|
Post by Armorguy on Sept 18, 2020 9:03:59 GMT
A beautiful bird with great colours! The Spit... |
|
|
|
Post by Snipersmudge on Sept 18, 2020 15:00:11 GMT
Super work as ever Joe, the rigging looks great.
|
|
|
|
Post by PorcoRosso on Sept 21, 2020 13:46:00 GMT
Thank you Paul, Boots, Duke, Guy and, Pete. Much appreciated. I've glued the nose panels in position and the lower wings. On reflection, the panels look a little to much grey, and not silver enough. Ho hum, not to worry. I used knitting elastane for the rigging on the cabane struts as it's a little wider than EZ Line. I also used it for a couple of control lines underneath the fuselage. Once the windshields have been painted and glued in place, the top wing can be attached. After that, it's the undercarriage and propeller. Then once all in place, I can start the rigging.  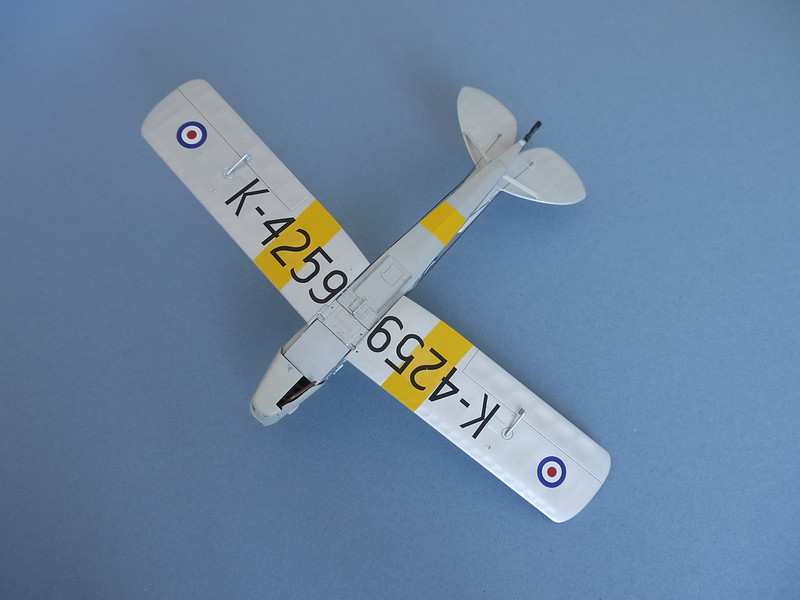 |
|
|
|
Post by Paul B on Sept 21, 2020 14:04:40 GMT
She's looking darned good from over here Joe . |
|
|
|
Post by Armorguy on Sept 21, 2020 15:01:08 GMT
It looks great with its rigging!
|
|
|
|
Post by Boots on Sept 21, 2020 19:12:37 GMT
Bootiful work Joe |
|
|
|
Post by SteveM on Sept 22, 2020 7:08:08 GMT
Moving nicely onwards buddy. I like the idea of the knitting elastic as the rigging was often different depending where it was used.
Some aircraft had ‘flying wire’ which was aerofoil in shape.
|
|
Si B
Plastic Connoisseur 
Posts: 1,455
|
Post by Si B on Sept 22, 2020 16:33:12 GMT
Tidy work there Joe  |
|
|
|
Post by Ian H. on Sept 22, 2020 20:36:04 GMT
Joe, your build looks excellent. You have sub-assembly modeling mastered.
|
|
|
|
Post by Snipersmudge on Sept 23, 2020 15:50:18 GMT
That is a cracker Joe, looks lovely.
|
|
|
|
Post by PorcoRosso on Sept 24, 2020 14:14:10 GMT
Thank you Paul, Boots, Duke, Guy, SteveM, Si B, Ian and, Pete. Cheers men. Just a quick update to show last few parts in place. On the home straight now with only the rigging to be done. If I don't get chance tomorrow, I'll do it over the weekend.  |
|
|
|
Post by Paul B on Sept 24, 2020 15:28:38 GMT
That looks stunning already Joe |
|


 .
.

 , those are good tips Joe. Specially the last one


