|
|
Post by dukemaddog on Oct 29, 2023 20:18:19 GMT
Thank you John! I appreciate the encouraging words. Using some techniques some others have described, I was able to close up the gap on the Packard top; it is almost ready for paint. The torpedo boat was a cinch to build; it seemed like it was already half built! Since it is 1/96 scale; it won't count towards my 1/72 scale torpedo boat collection, but it will count as a finished model. Stay tuned, some paint has already been shot, so more to come soon. As for the chariot, hopefully I'll have that done very soon.
Paul, thank you! It does feel great to see progress! Stay tuned, the chariot might be done in the next few days!
Thank you Bert! I'm glad you enjoyed the tour!
|
|
|
|
Post by Ian H. on Oct 31, 2023 13:53:28 GMT
Great work on your multitude of projects. That Chariot presentation looks awesome!
|
|
|
|
Post by dukemaddog on Nov 4, 2023 5:12:55 GMT
Thank you Ian! feel free to check out this next tour.... Well we have had a pretty productive week this past week, so now it's time to host another tour of Maddog Manufacturing. The trams are boarding now, so all aboard and remember to keep hands and feet inside at all times. As always, we start in the Hangar. We had a great opportunity to bring out the spray gun and so base paints were shot on all aircraft needing it topside. First were the two Spitfires:  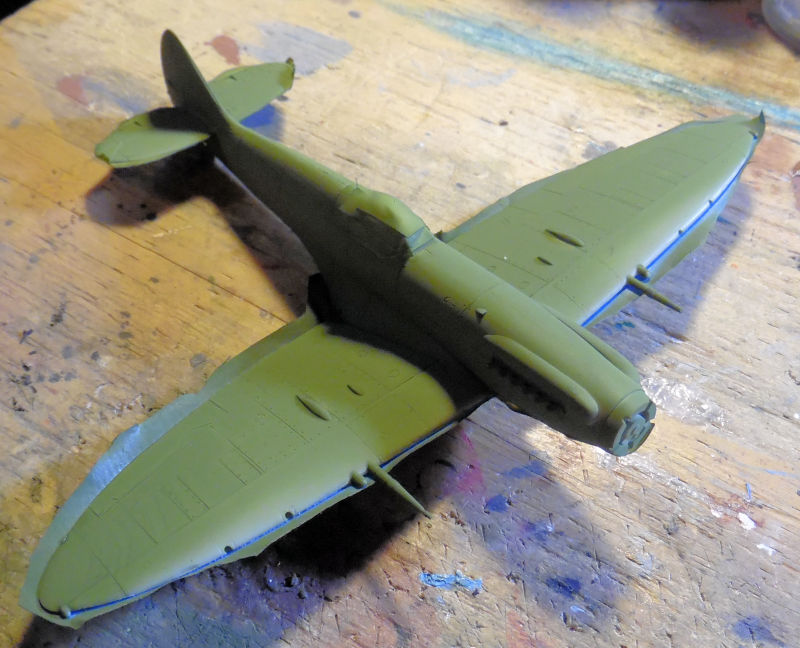 Then the Russian Be-4: 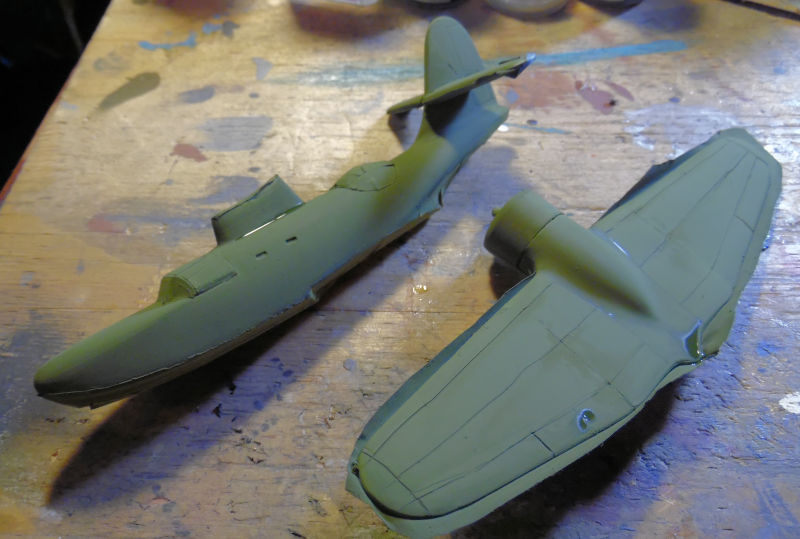 You can see the paint was a bit too diluted so we took another shot. The second shot was far better:  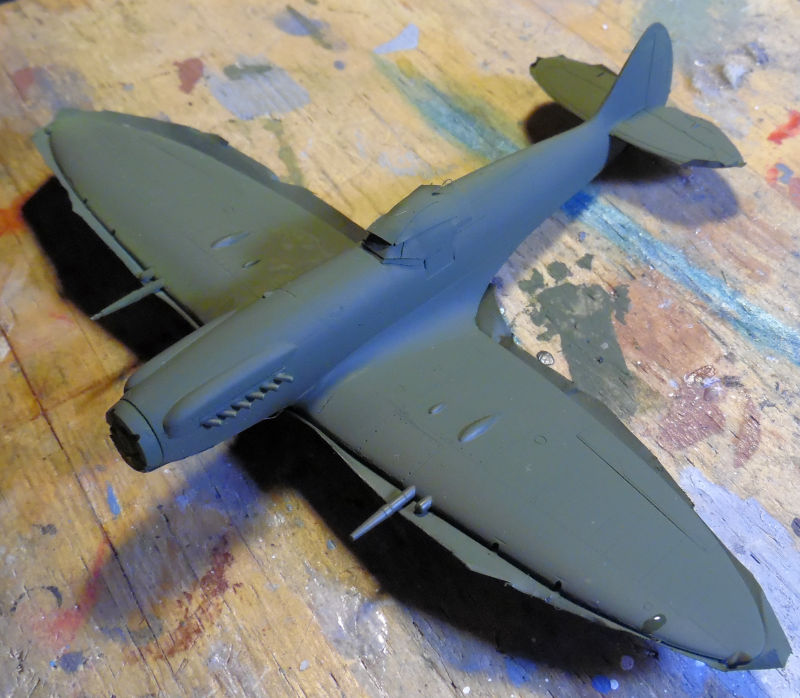 And the Be-4: 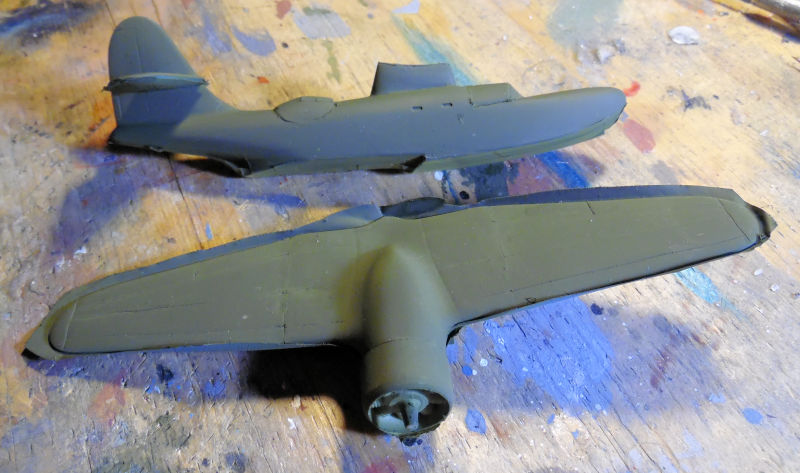 While we had the better paint in the sprayer, we also shot the Il-2M3: 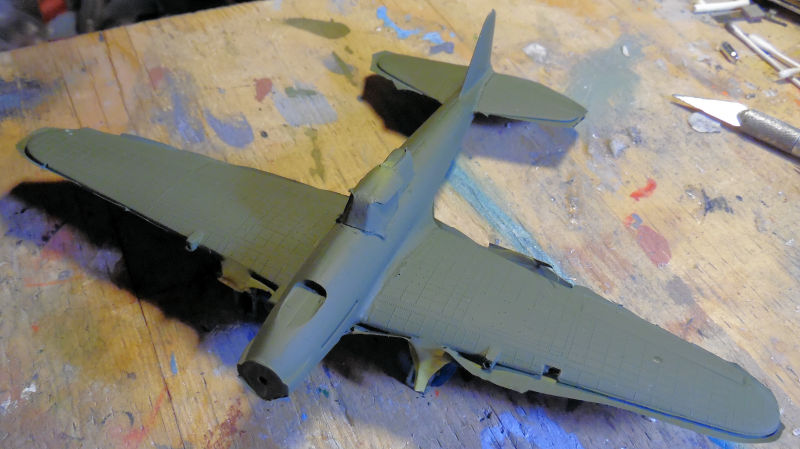 While all that was drying, we switched and shot the final Navy blue onto the Avenger: 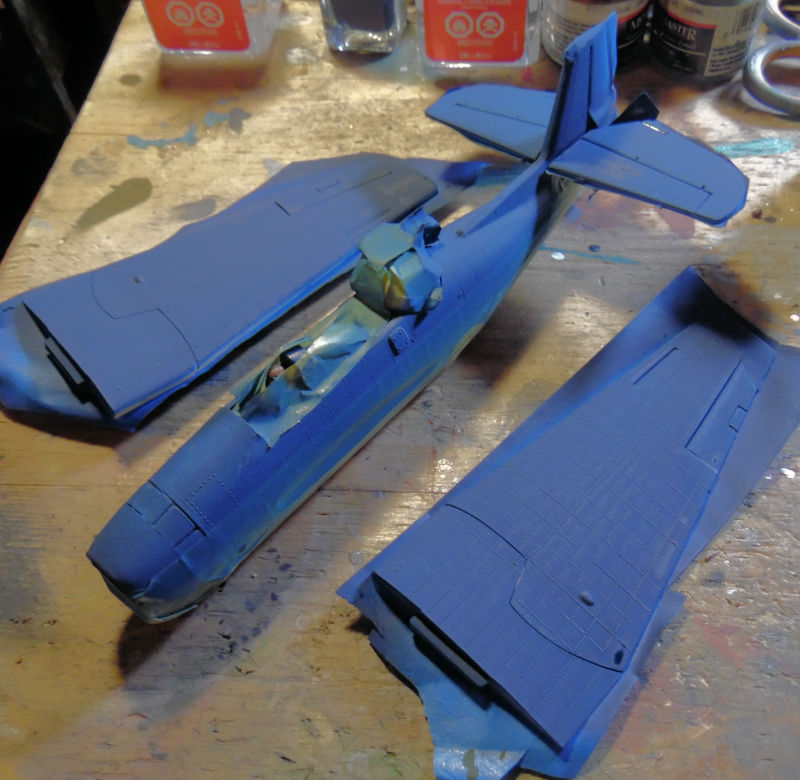 Later that masking came off that and now the Avenger is ready for clearcoat and decals: 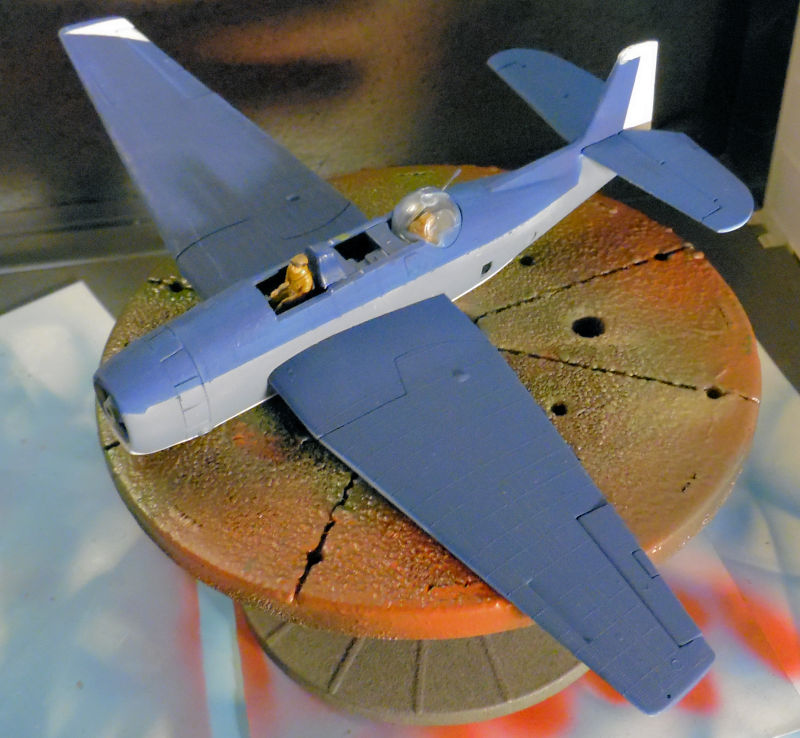 Personally, I do not know why the turret frosted like it did. I was certain the masking was sealed properly so I have no idea what happened. I will try to buff it out and shine it as best I can, but I am not going to go to outlandish lengths to make it as perfect as possible. So that is all that has been done in the Hangar so far. You can see everything has been set up for the remaining camouflage patterns before clearcoat and decals. There might be a few aircraft crossing the finish line this month! Since nothing of note has been happening in the Shipyards, we'll move on to the Motor Pool. Here in the Motor Pool quite a bit has been done. To start with, here in Bay One, we found an ancient ESCI kit of a Hetzer that we were trying to sell. The box was busted up, and the thing had no nibbles, even when priced at a buck. So, out it came and the basic first steps were made. You can see here the main lower hull was assembled, but when it came time for the front plate to be installed, it broke while we were cleaning it up. So this is where it stands now:  Moving on to the next bay, we have the first shot of green on the base of the Russian 280m tracked artillery piece. Like the aircraft, I didn't like it. Besides, certain pieces were left off so they had to be added before we shot it again. You can see it here with the gun dry-fit into place: 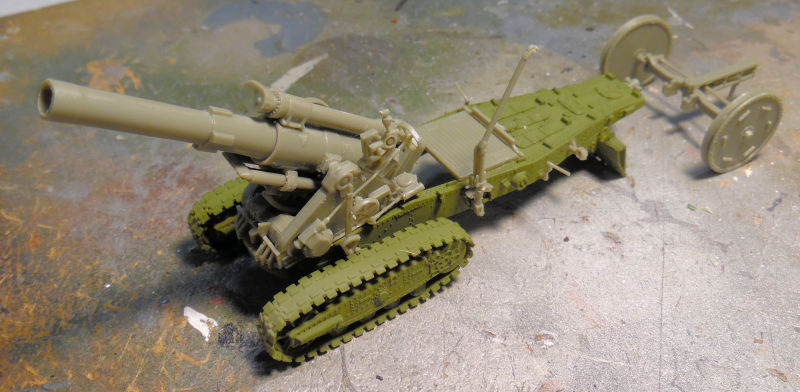 Later, the base part got it's second coat: 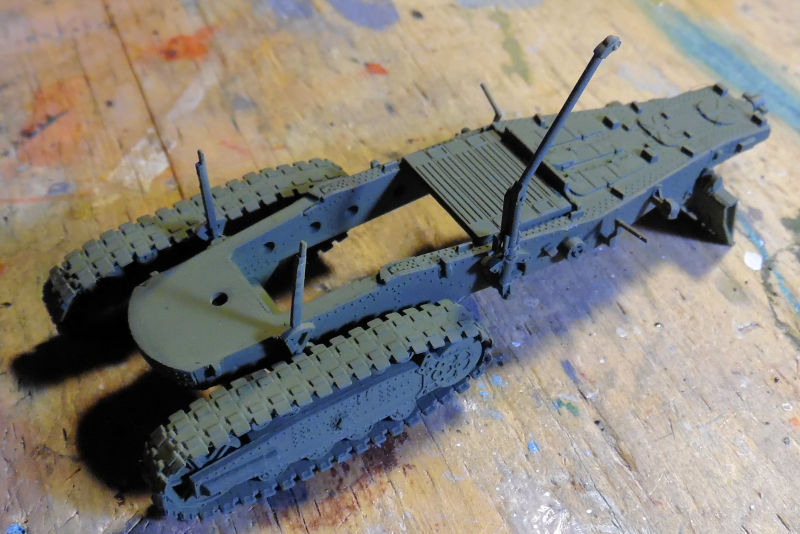 Meanwhile, I felt it was time for the second tracked artillery piece to be started so we pulled out that and assembled the main gun first: 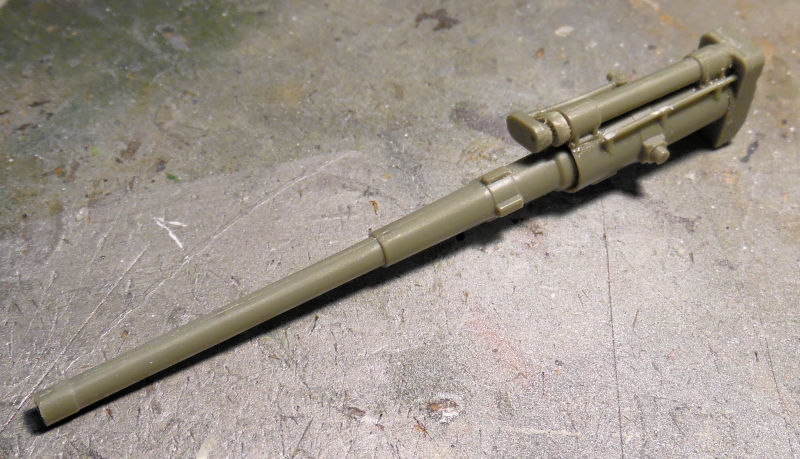 Later the base part was started, but a semi-vital piece is missing. I might just say 'screw it!' and move on anyway.... 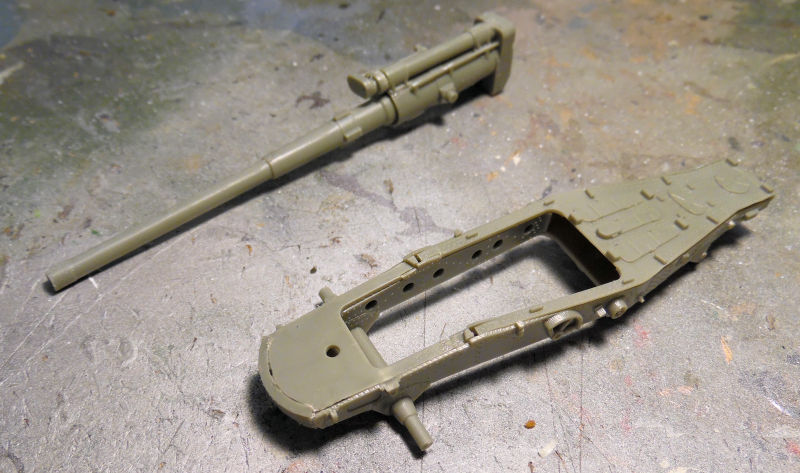 That is as far as we got on that one. In this next bay, we shot the base coat on the French DCA anti-aircraft system. It does NOT look this blue in person: 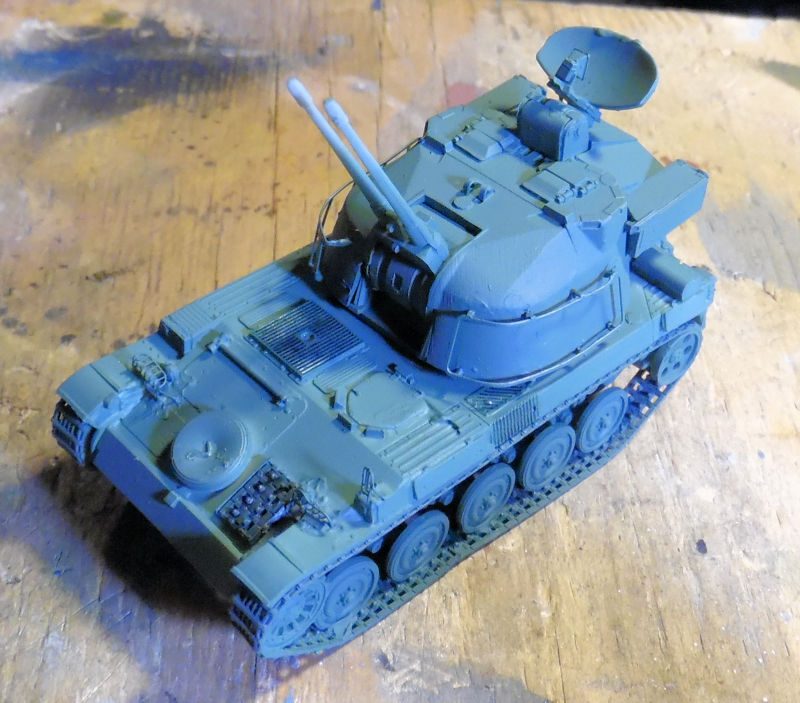 Later came clearcoat, a wash, and decals: 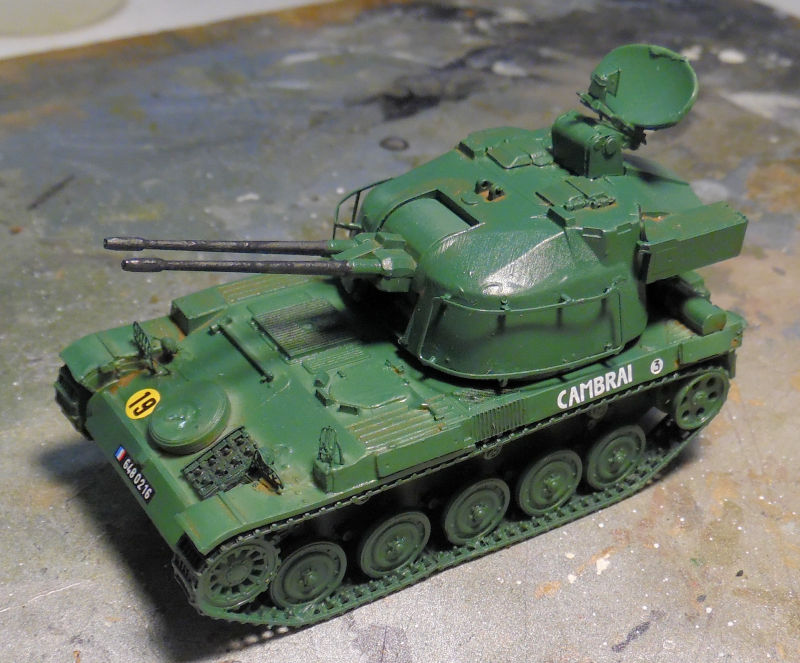 This one was later driven out onto the parade ground for breaking in by it's crew. In this next bay, we decided to move forward on the Sho't Kal Dalet by completing the basic turret. For some reason, this turret was far more rough than the Gimmel turret was: 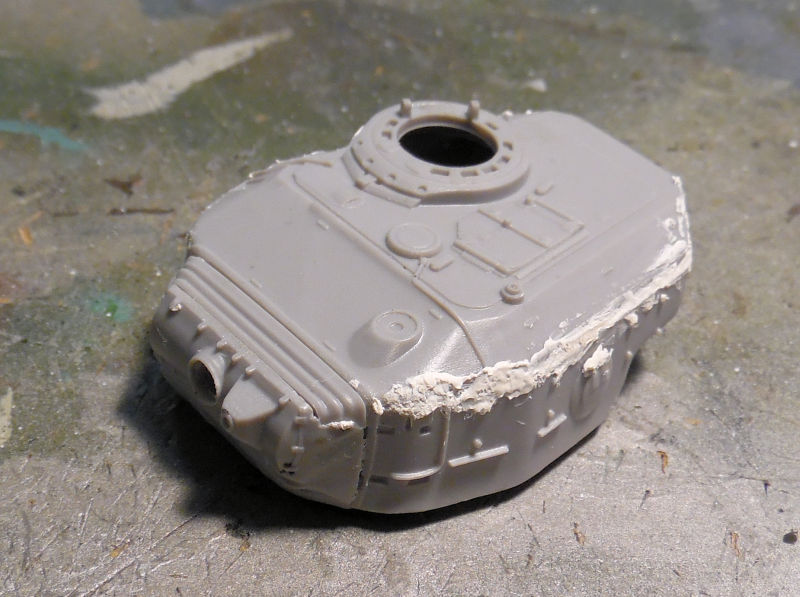 Later after some cleanup, the main gun was added to the turret and the fenders were added to the sides: 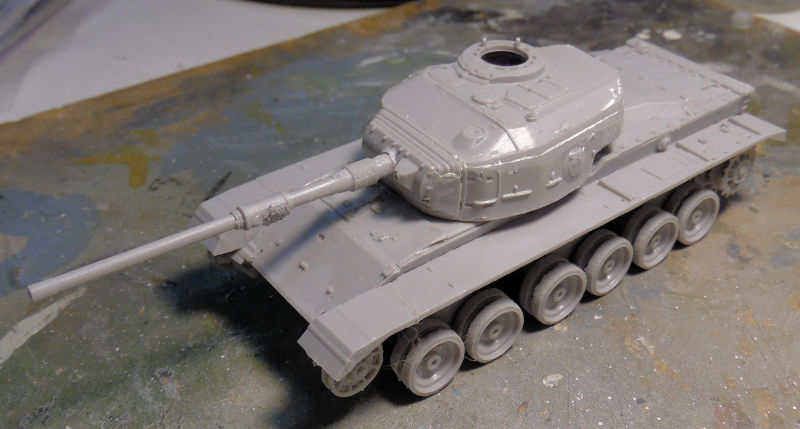 Now this is more or less caught up with the Gimmel. Moving on to the next bay, we have the M48-A5 Patton. The base had already been shot on, so the masking went on and the second color was shot: 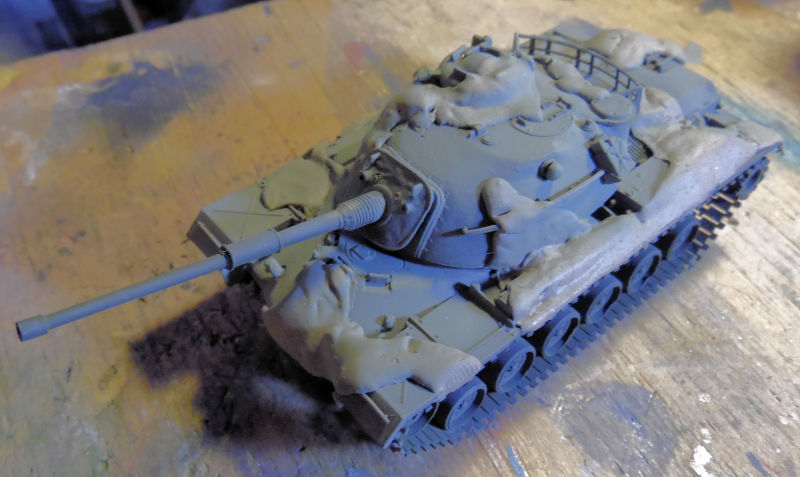 Additional Silly Putty was added to cover the second color when it was dry: 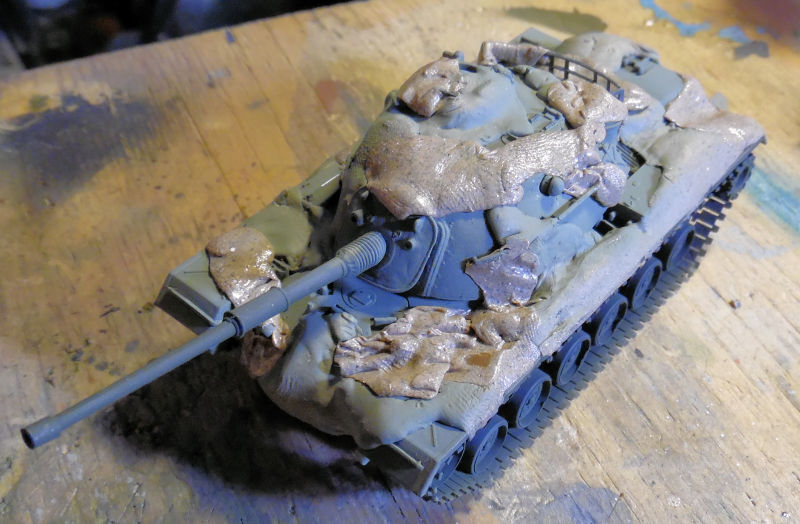 And the third color was shot: 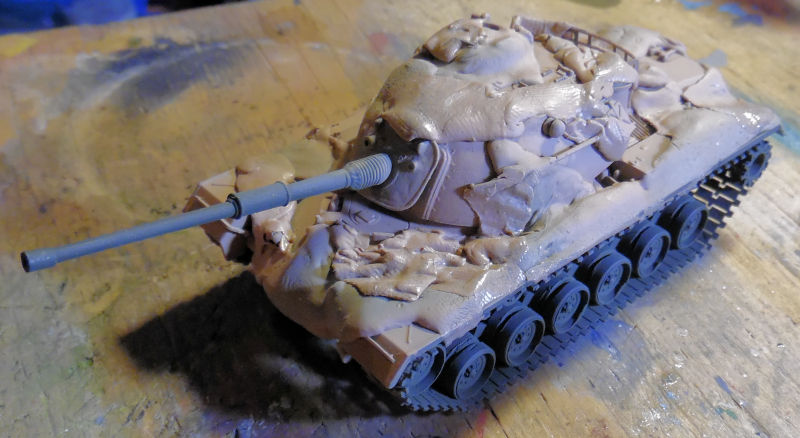 When it was dry, I hand painted some black shapes on the edges for the fourth color. They may be a bit hard to see in this pic, they look like shadows: 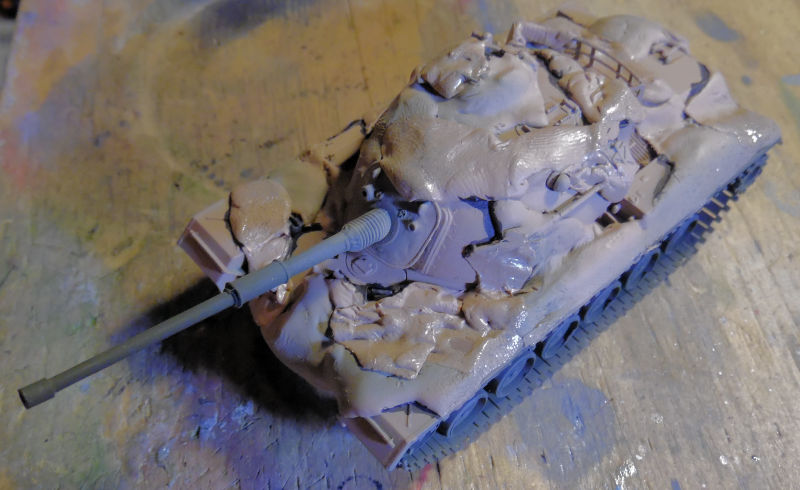 Finally, everything came off when it was all dry: 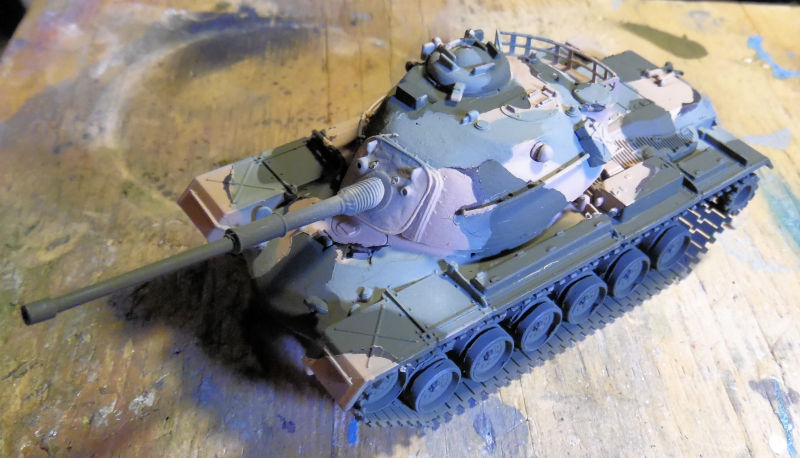 Later a clearcoat and decals went on: 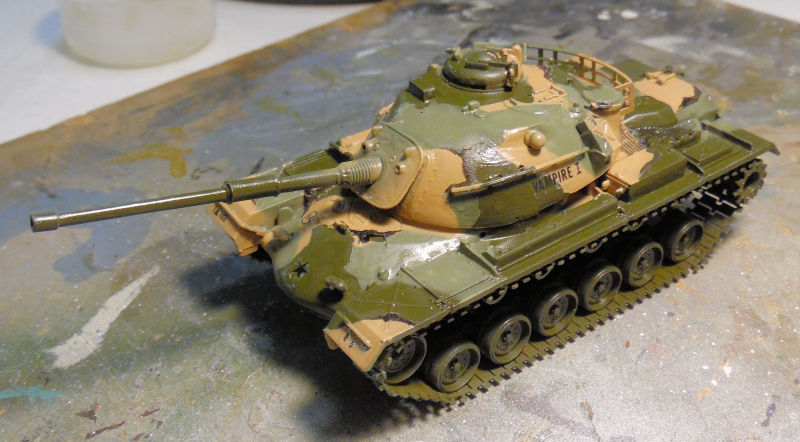 After that, some dullcoat was applied, and the final details were added and this was driven off by it's crew for familiarization.... In another bay over here, the M1070 gun truck finally had some progress done. Base paint was applied to the inside of the cab and the outside: 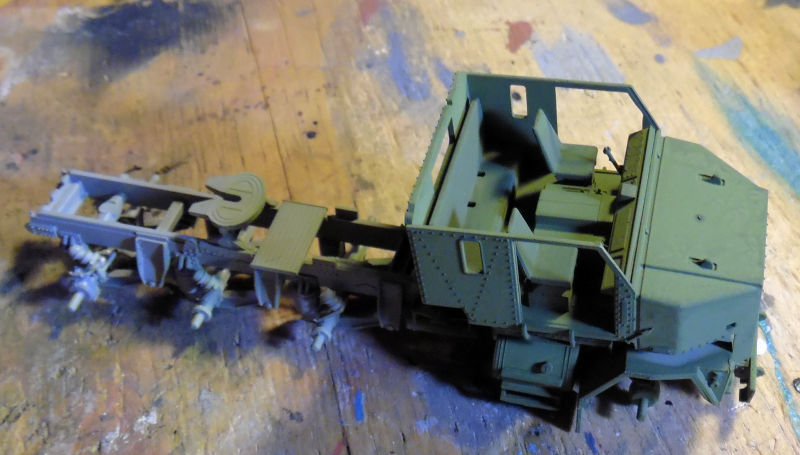 The windscreen and side doors were masked off, both inside and out: 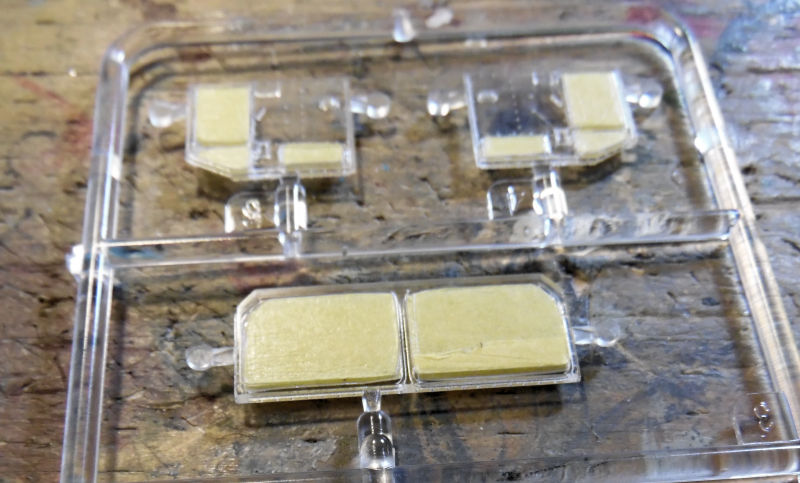 Finally, base paint was shot on the rear gunner's box, the clear parts and the other sub-assemblies, as well as a lighter OD on the anti-RPG panels: 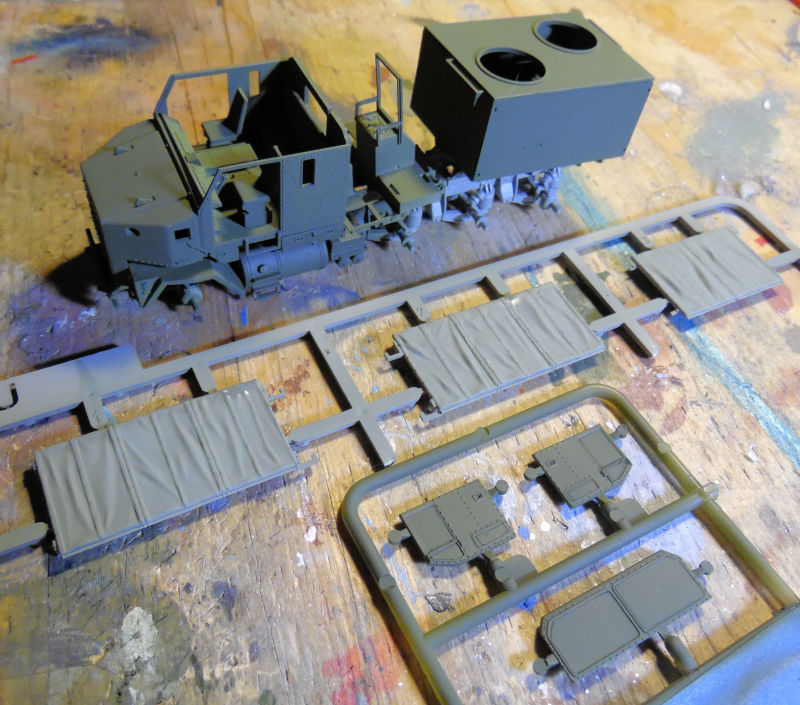 That is where we left that one, but there's more. While organizing my parts, I found a small machine gun turret for my T-28 kit. I had just put that kit up and so I found it again and was able to finally have the whole kit again! This tank had already been basecoated green before the turret got lost, and so now, I am finally able to finish this Shelf Queen after ten years! Silly Putty was added for the second color: 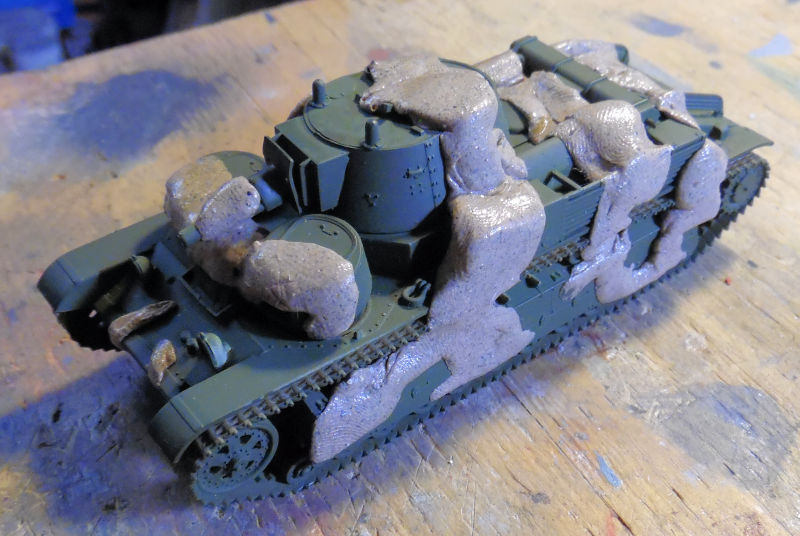 Then the tan was shot: 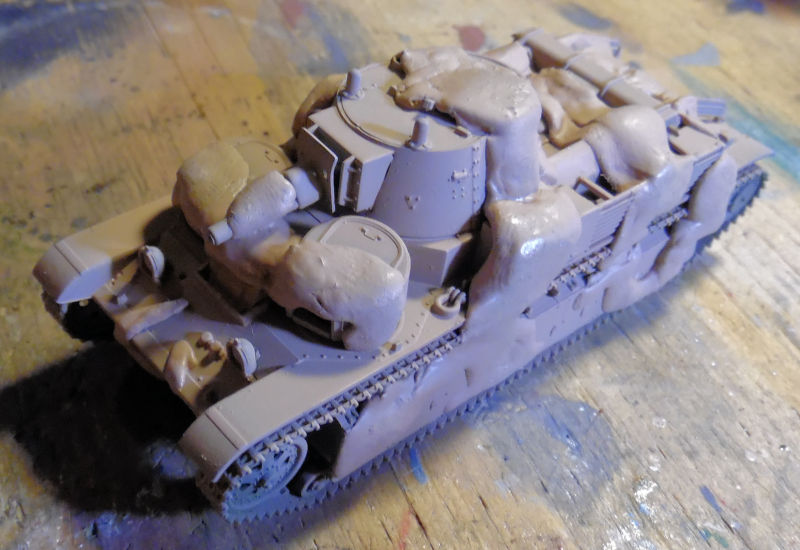 Finally the unmasking: 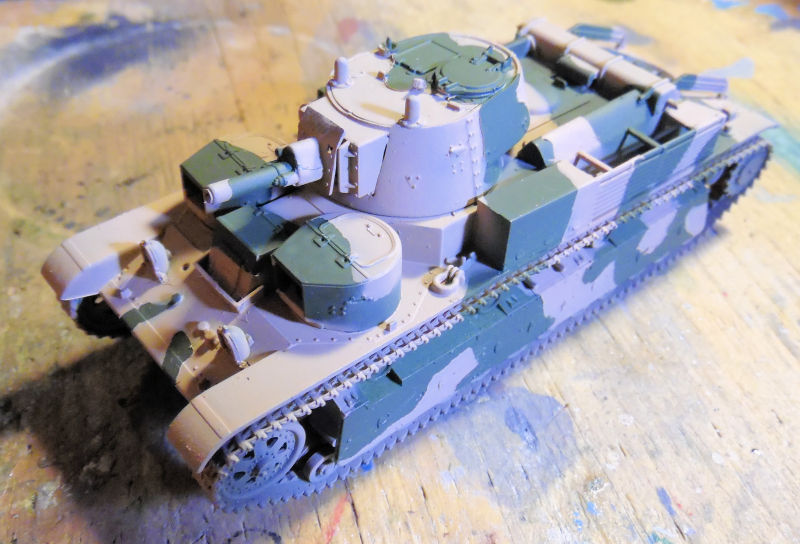 This one then got final details added and was then turned over to their crew for breaking in. That's all for today. Nothing esoteric this time, but still hopefully some interesting items in the tour. Thank you all for looking in, comments are welcome. |
|
|
|
Post by nito74 on Nov 4, 2023 7:26:37 GMT
That's a lot of work Duke !!
I really like the Patton and the Soviet Gun.
Can't wait to see all those aircraft lined up at Duke's Hangar
|
|
|
|
Post by Paul B on Nov 4, 2023 7:41:50 GMT
Excellent camo work there Duke  I might have to get some of that Silly Putty myself  |
|
|
|
Post by bwilt on Nov 4, 2023 13:14:04 GMT
Some nice things there, Patton, Avenger, gun truck 👍👍
|
|
|
|
Post by dukemaddog on Nov 4, 2023 22:19:38 GMT
John, thank you! I'm thrilled with the Patton as well, despite it's age. The Soviet gun is certainly giving me a fight.
Thank you Paul! I highly recommend the Silly Putty. The wad of Silly Putty I've been using is from six mini eggs and has been used for the past ten years of spraying. I still have an equivalent amount waiting in the wings! It's great stuff.
Bert, thank you! Stay tuned, more coming!
|
|
|
|
Post by Robbo on Nov 4, 2023 23:07:03 GMT
Them little planes are looking good don’t know where my love of aircraft has come from I really don’t
|
|
|
|
Post by Ian H. on Nov 5, 2023 13:57:25 GMT
Great work on the camo schemes here, Duke! That gun truck looks awesome and great to see a M48 project, as well.
|
|
|
|
Post by dukemaddog on Nov 17, 2023 23:01:38 GMT
Thank you Robbo! My love of aircraft comes from my father being in the US Air Force. Thank Ian! I appreciate it. The M48 is done as well, and the gun truck is not far behind. Here we are, two weeks later and I was able to get a lot done, more than expected. So much so that I will need to do two tours; one to the Hangar and then in the next post the tour will leave for the Motor Pool. So, all aboard the trams for the next tour through the Maddog Manufacturing Hangars.... In the first bay we have a shelf queen coming out again. This is the 1/72 scale Concorde SST we started about four years ago. The fit is atrocious and the wings have massive gaps. More attempts were made to close and fill those gaps as best as possible: 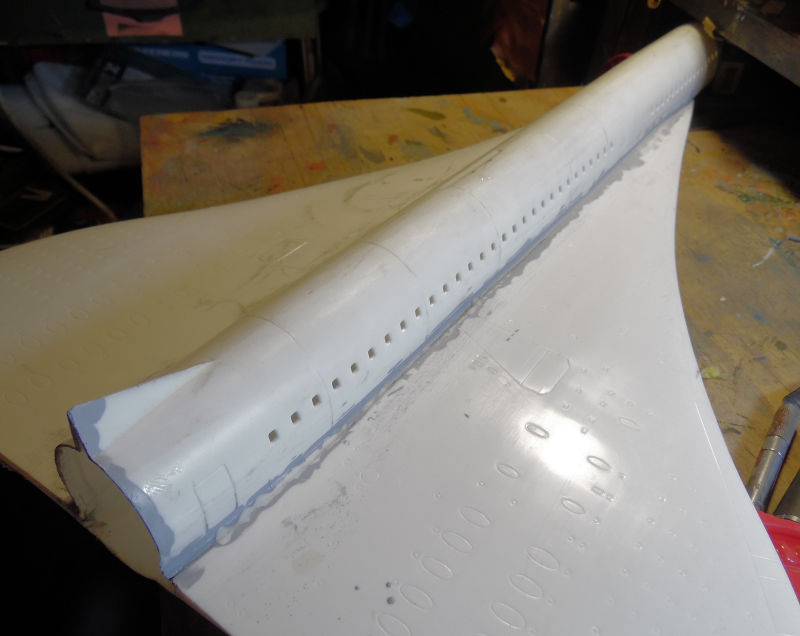  Even the bottom of this model had canyons to deal with: 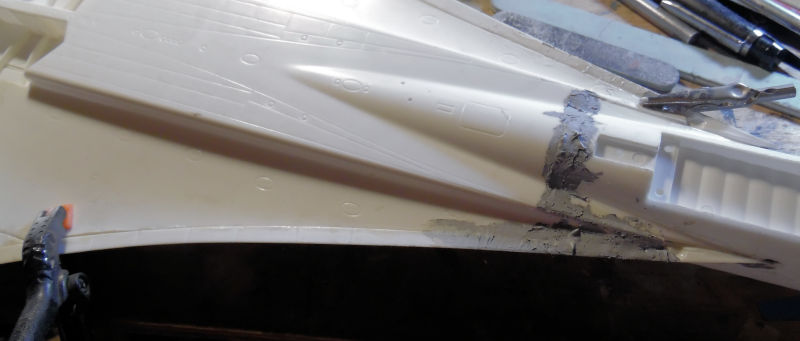 That's as far as we got on that so far. Next is the two Spitfires, both of them were masked with the Silly Putty and shot with the RAF Ocean Grey over the top: Mark IX: 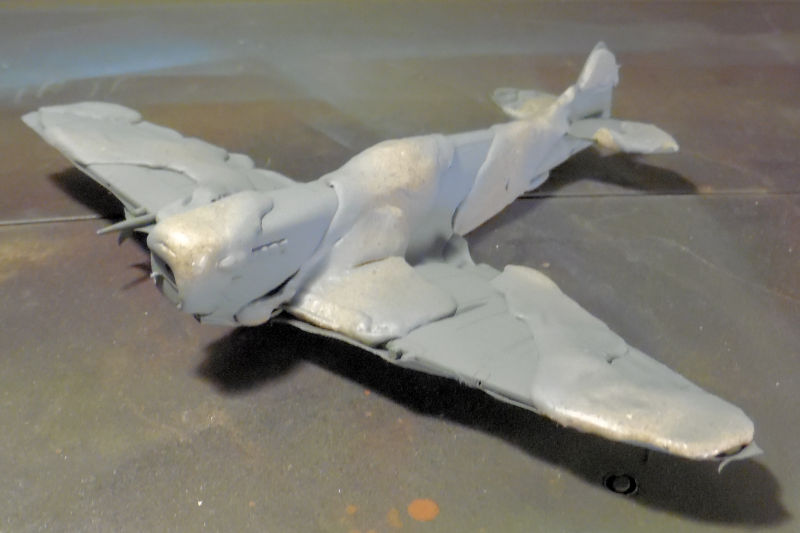 Mark XIV. I changed the pattern a little to allow me to cover that uneven splotch of green with the grey:  It was sprayed like the Mk.IX at the same time: 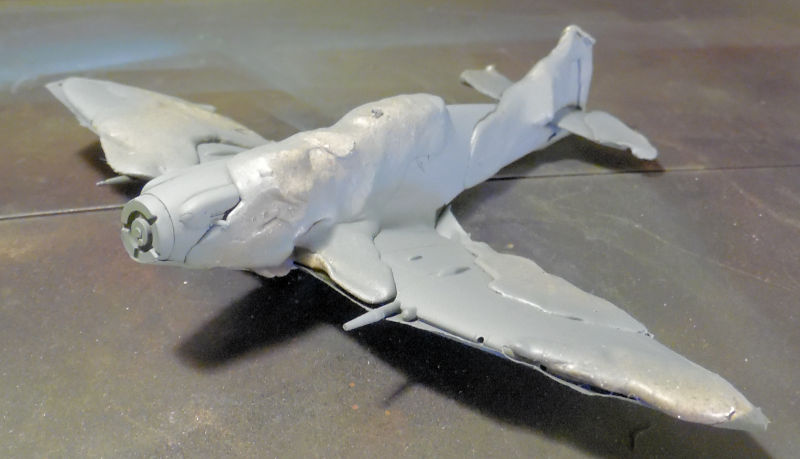 After awhile, the Silly Putty came off both of them. he Mk.IX is here: 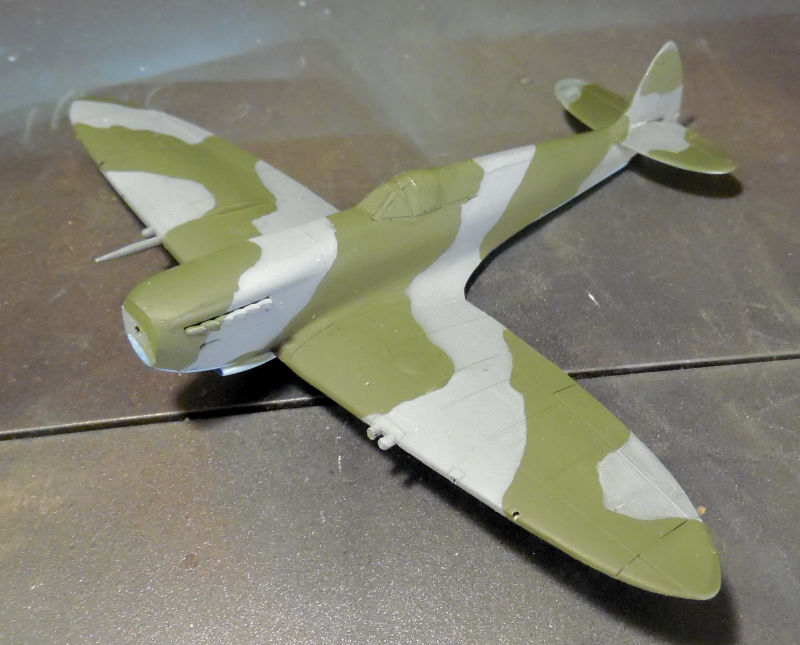 ...and the Mk.XIV is here: 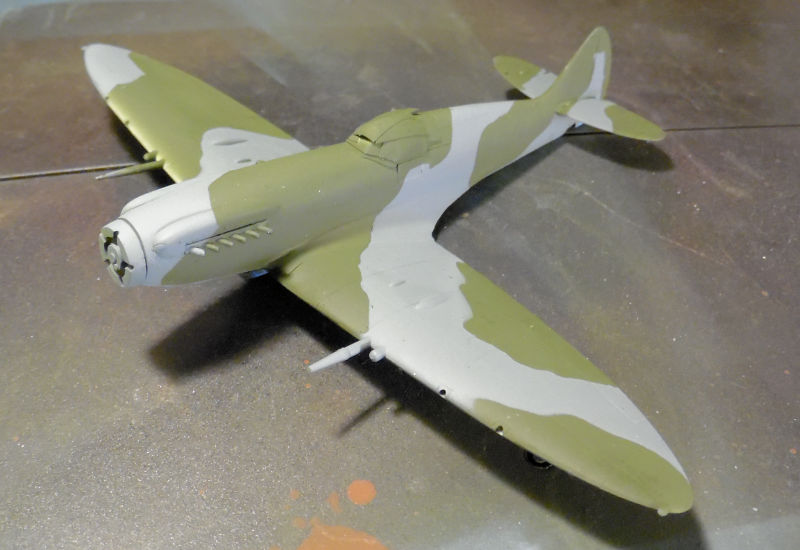 Believe me, the paint is much darker than these pics show. You can see that here after I shot gloss clear over them to prepare for decals:   While all that was going on, we also masked off the Russia Il-2M3 Shtormovik with the Silly Putty and sprayed with the second color:  Later that Silly Putty came off and we were ready for clear coat: 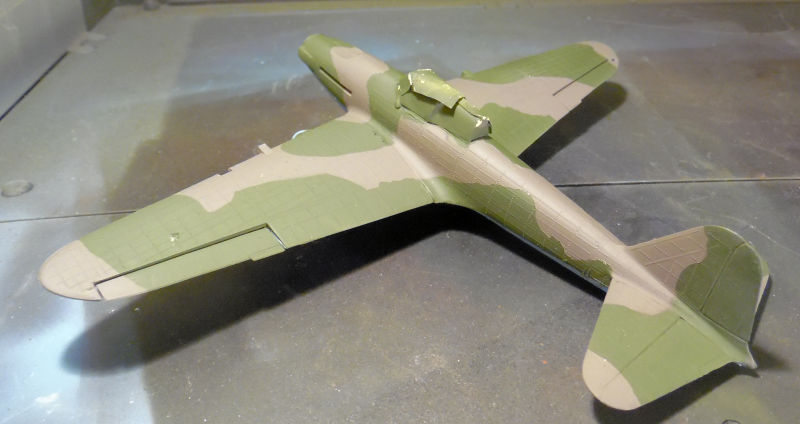 Here it is after the clear coat: 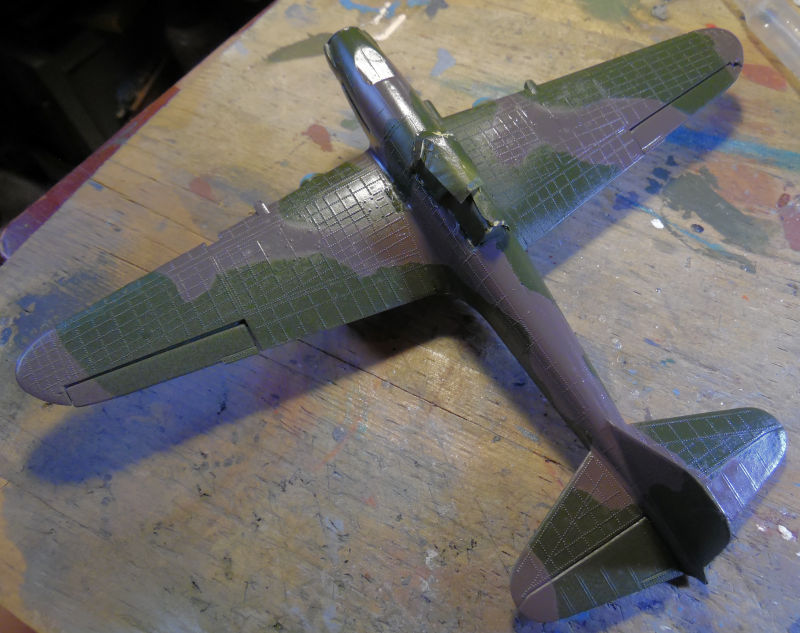 Again, that is more representative of the real colors we sprayed. Moving on to the next bay, I was not happy with the main wing on the Russian Be-4. Therefore, we put about a quarter tube of Tamiya Putty on top and bottom where the discrepancies were: 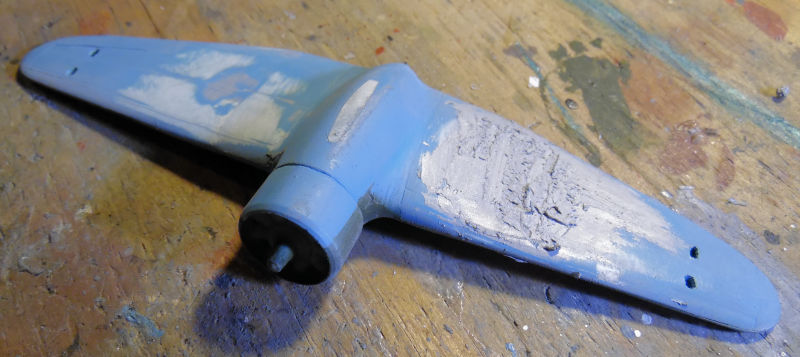 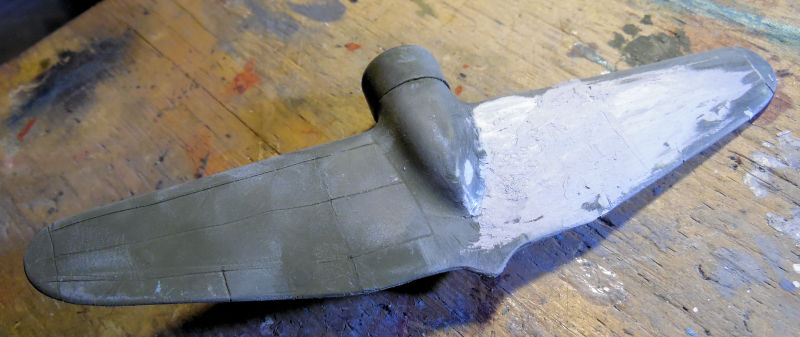 Later, this was sanded smooth, another coat of putty added and finally repainted:  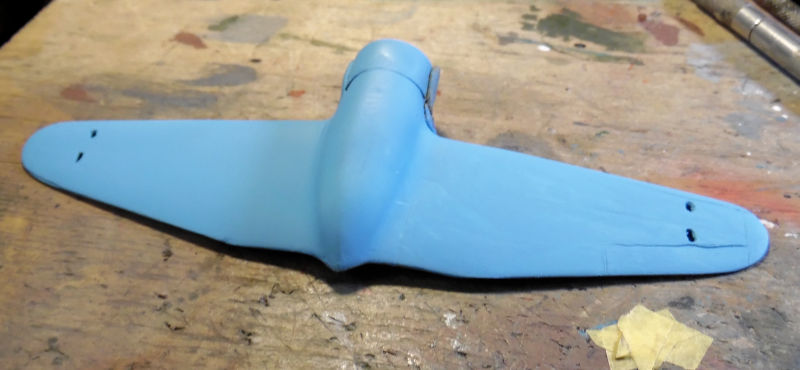 That wing has since been clear coated and the decals have been added. That one should be done fairly soon. Our next tour of the Motor Pool starts in a bit. Meanwhile, comments are welcome; thanks all for stopping in! |
|
|
|
Post by dukemaddog on Nov 17, 2023 23:02:07 GMT
And now for our tour of the Motor Pool at Maddog Manufacturing. A considerable amount of progress has been made here. Let's start here with the civilian Ford Stakebed truck, which has been painted with the cream on the cab and truck bed: 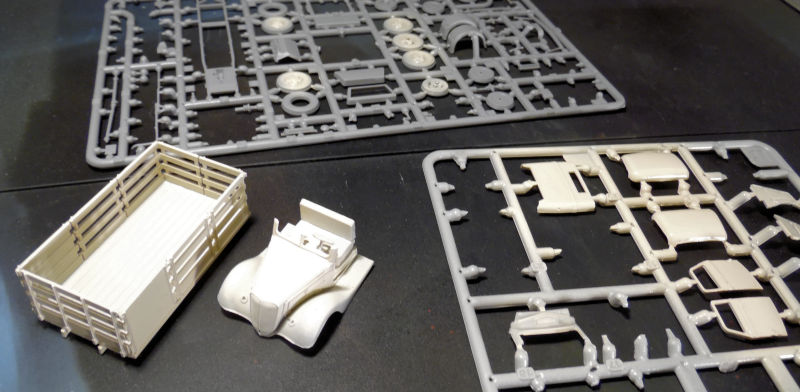 Later the red trim was added after everything was masked off: 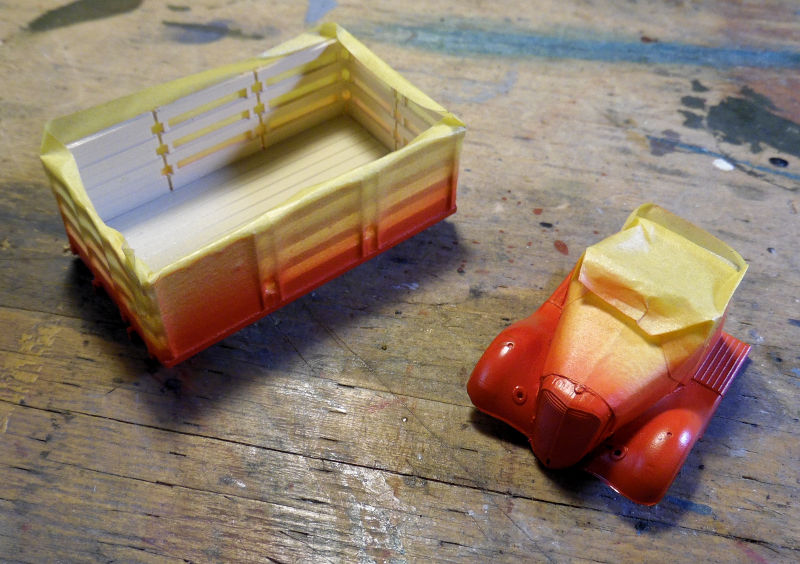 That is where we left this right now. Moving on to the next bay we have another Shelf Queen, started about six years ago. Finally found all the missing parts and got all the rest of the main parts installed: 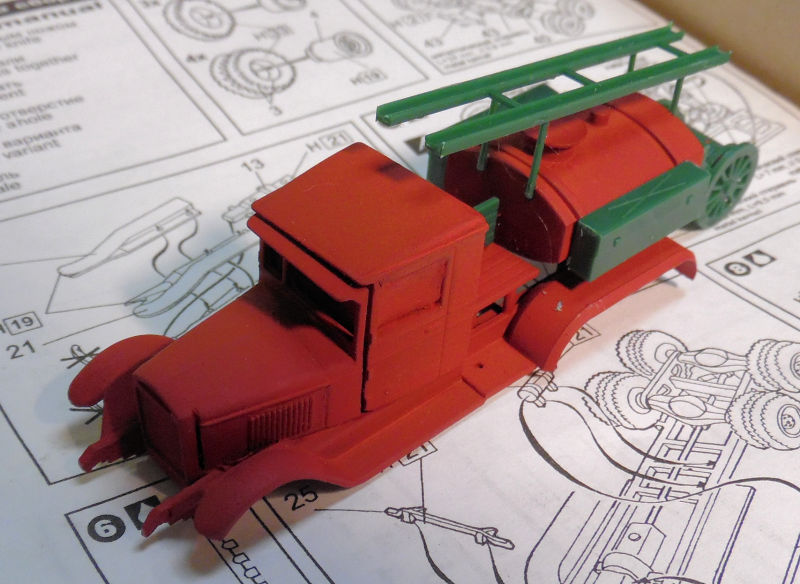 Later this truck also got a coat of red, making this almost ready to be declared finished: 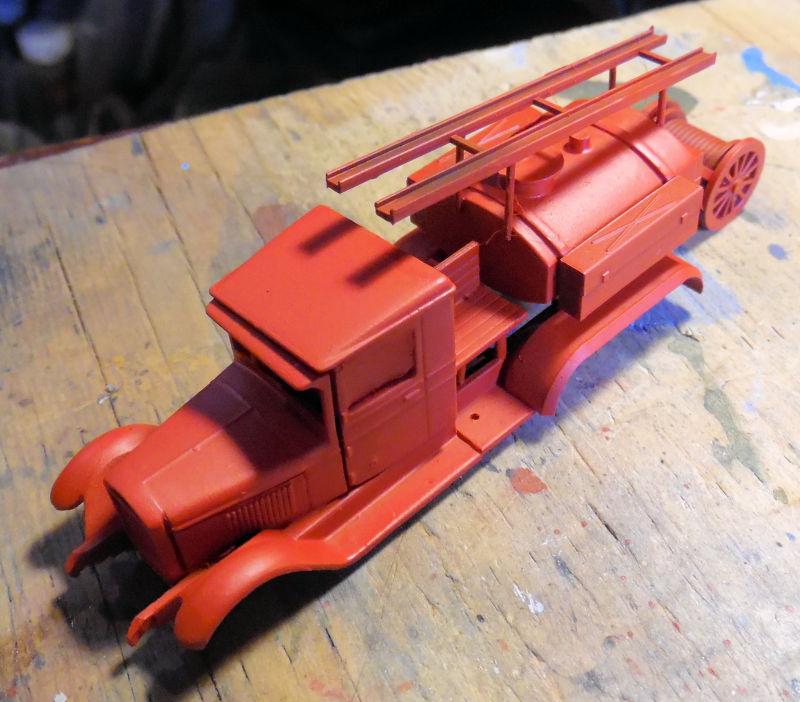 Moving to the next bay we find the Russian tracked 280mm gun. The main gun has been glued to the carriage and almost all the final details have been added. Some parts and sub assemblies have gone missing, but we're going to continue to work on this until all is found:  Later the photo etch was added, bringing this closer to being done:  Next to this is the Russian tracked 152mm gun. This was started later, but we now have it catching up to the 280mm gun. First we installed the main gun in the trunnions, and made the hydraulics that raise and lower the gun: 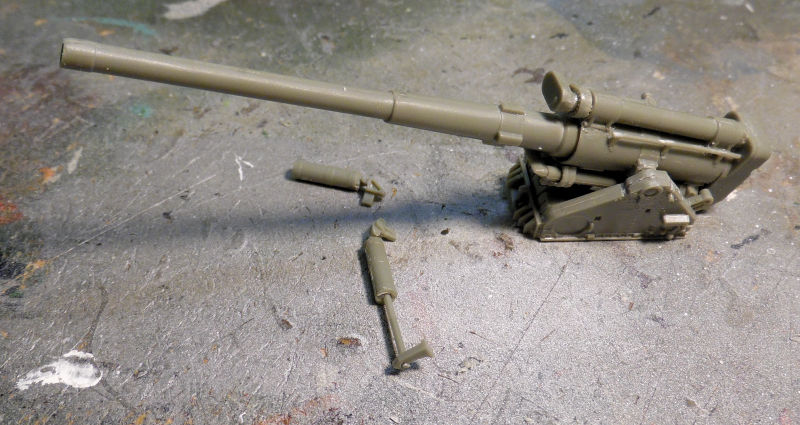 We added more details to the main carriage, cemented down the gun and also finished off most of the details on the trunnions, bringing this to the photo etch stage: 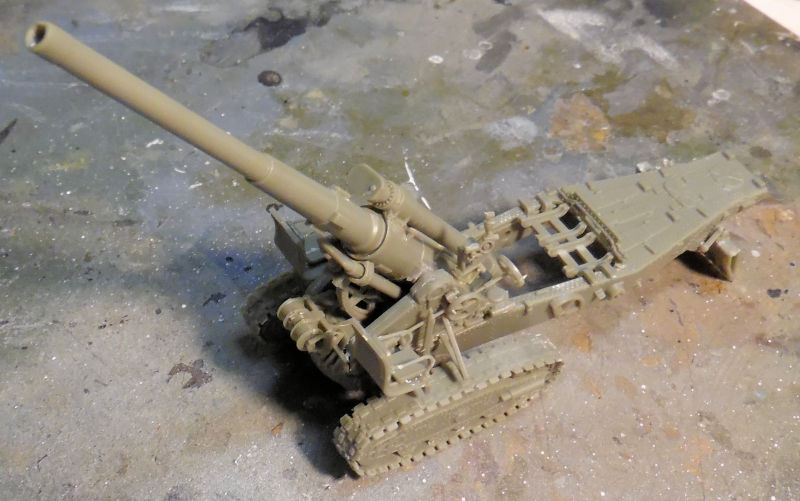 Photo etch and some final details added next and this was ready for paint: 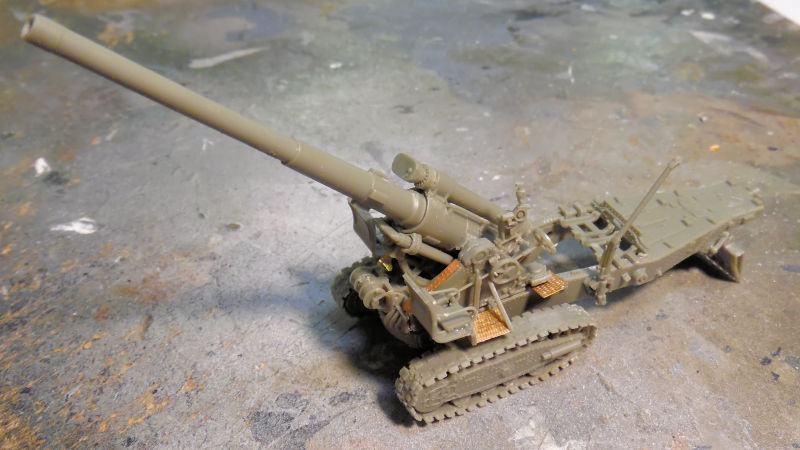 After everything had sufficiently dried, we shot a base of Russian Green on this. It shows much lighter in this pic than it does in real life: 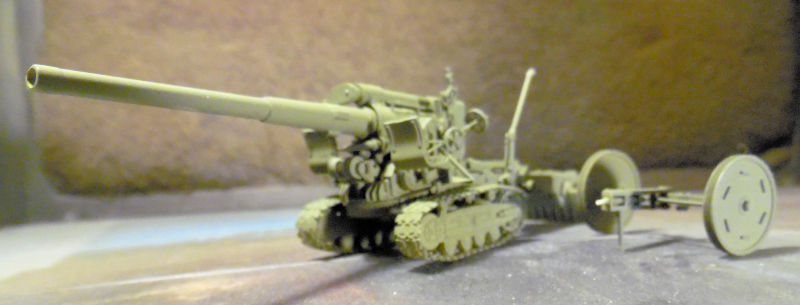 The same had been shot on the 280mm gun but I apparently forgot to take pics of that. Moving on, we found another Shelf Queen, this one only two years old. It's the Modelcollect SCUD D TEL that needed some more green paint on additional parts that had been added after it was painted: 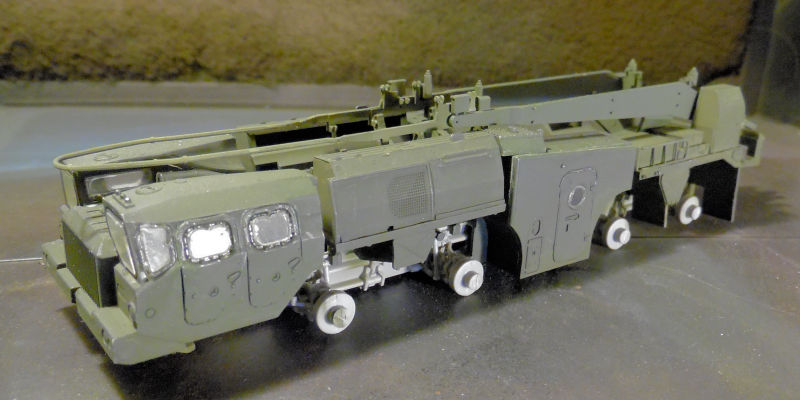 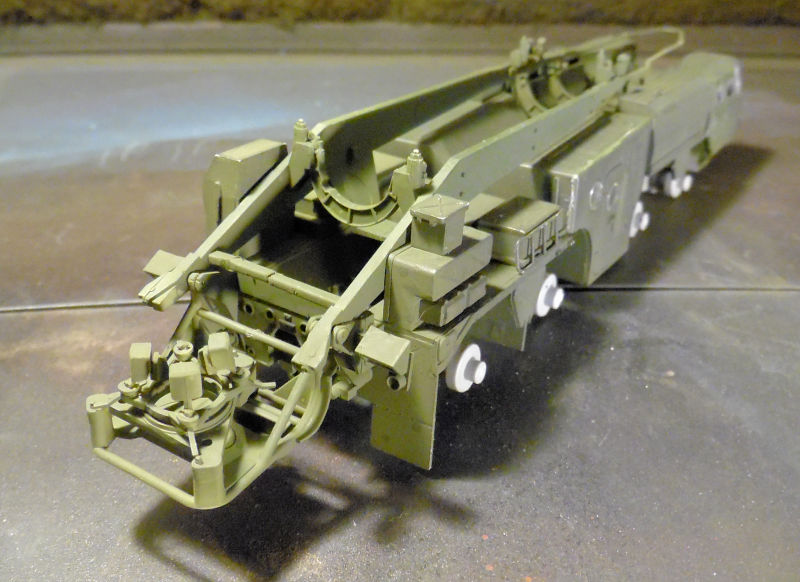 ' I was going to camouflage this, but I don't want to hassle with re-masking all the windows again. We might hand brush the pattern on it, I'm still trying to decide. Meanwhile, this is ready for further progress.... In the next bay, we have the two Israeli Centurions. This first one, the Sho't Kal Gimmel; got all the detail parts on the main hull and we started on some of the details on the turret:  Later we finished all the details on the turret. Here it is all set and ready for photo etch: 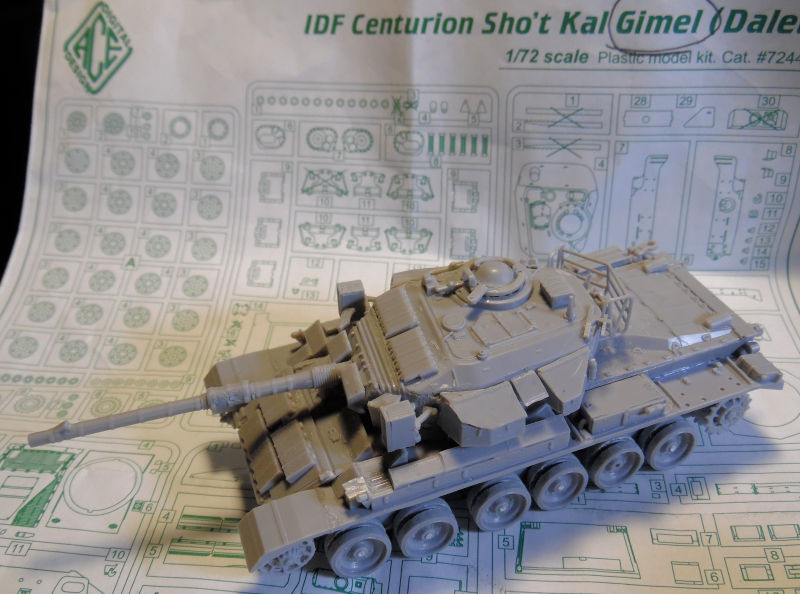 Interestingly enough; the photo etch sheet for this kit is missing. So, we continued to work on the Centurion Sho't Kal Dalet. Again, most of the turret and all of the hull details were added, just as with the Gimmel: 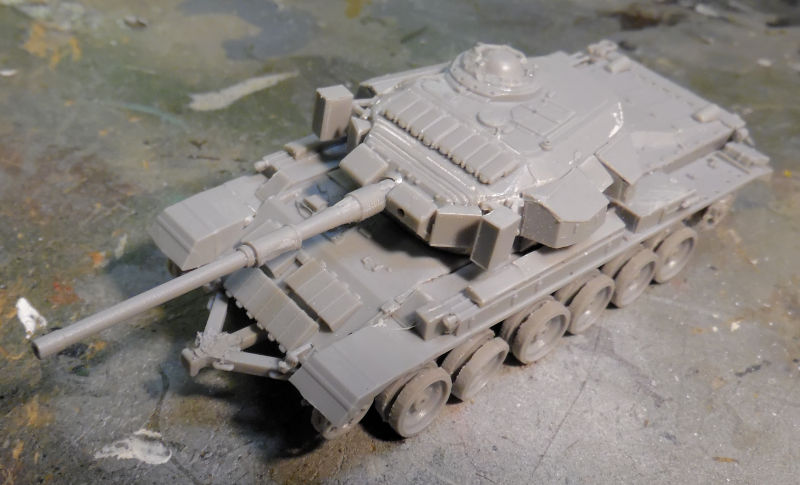 Later the turret was done completely: 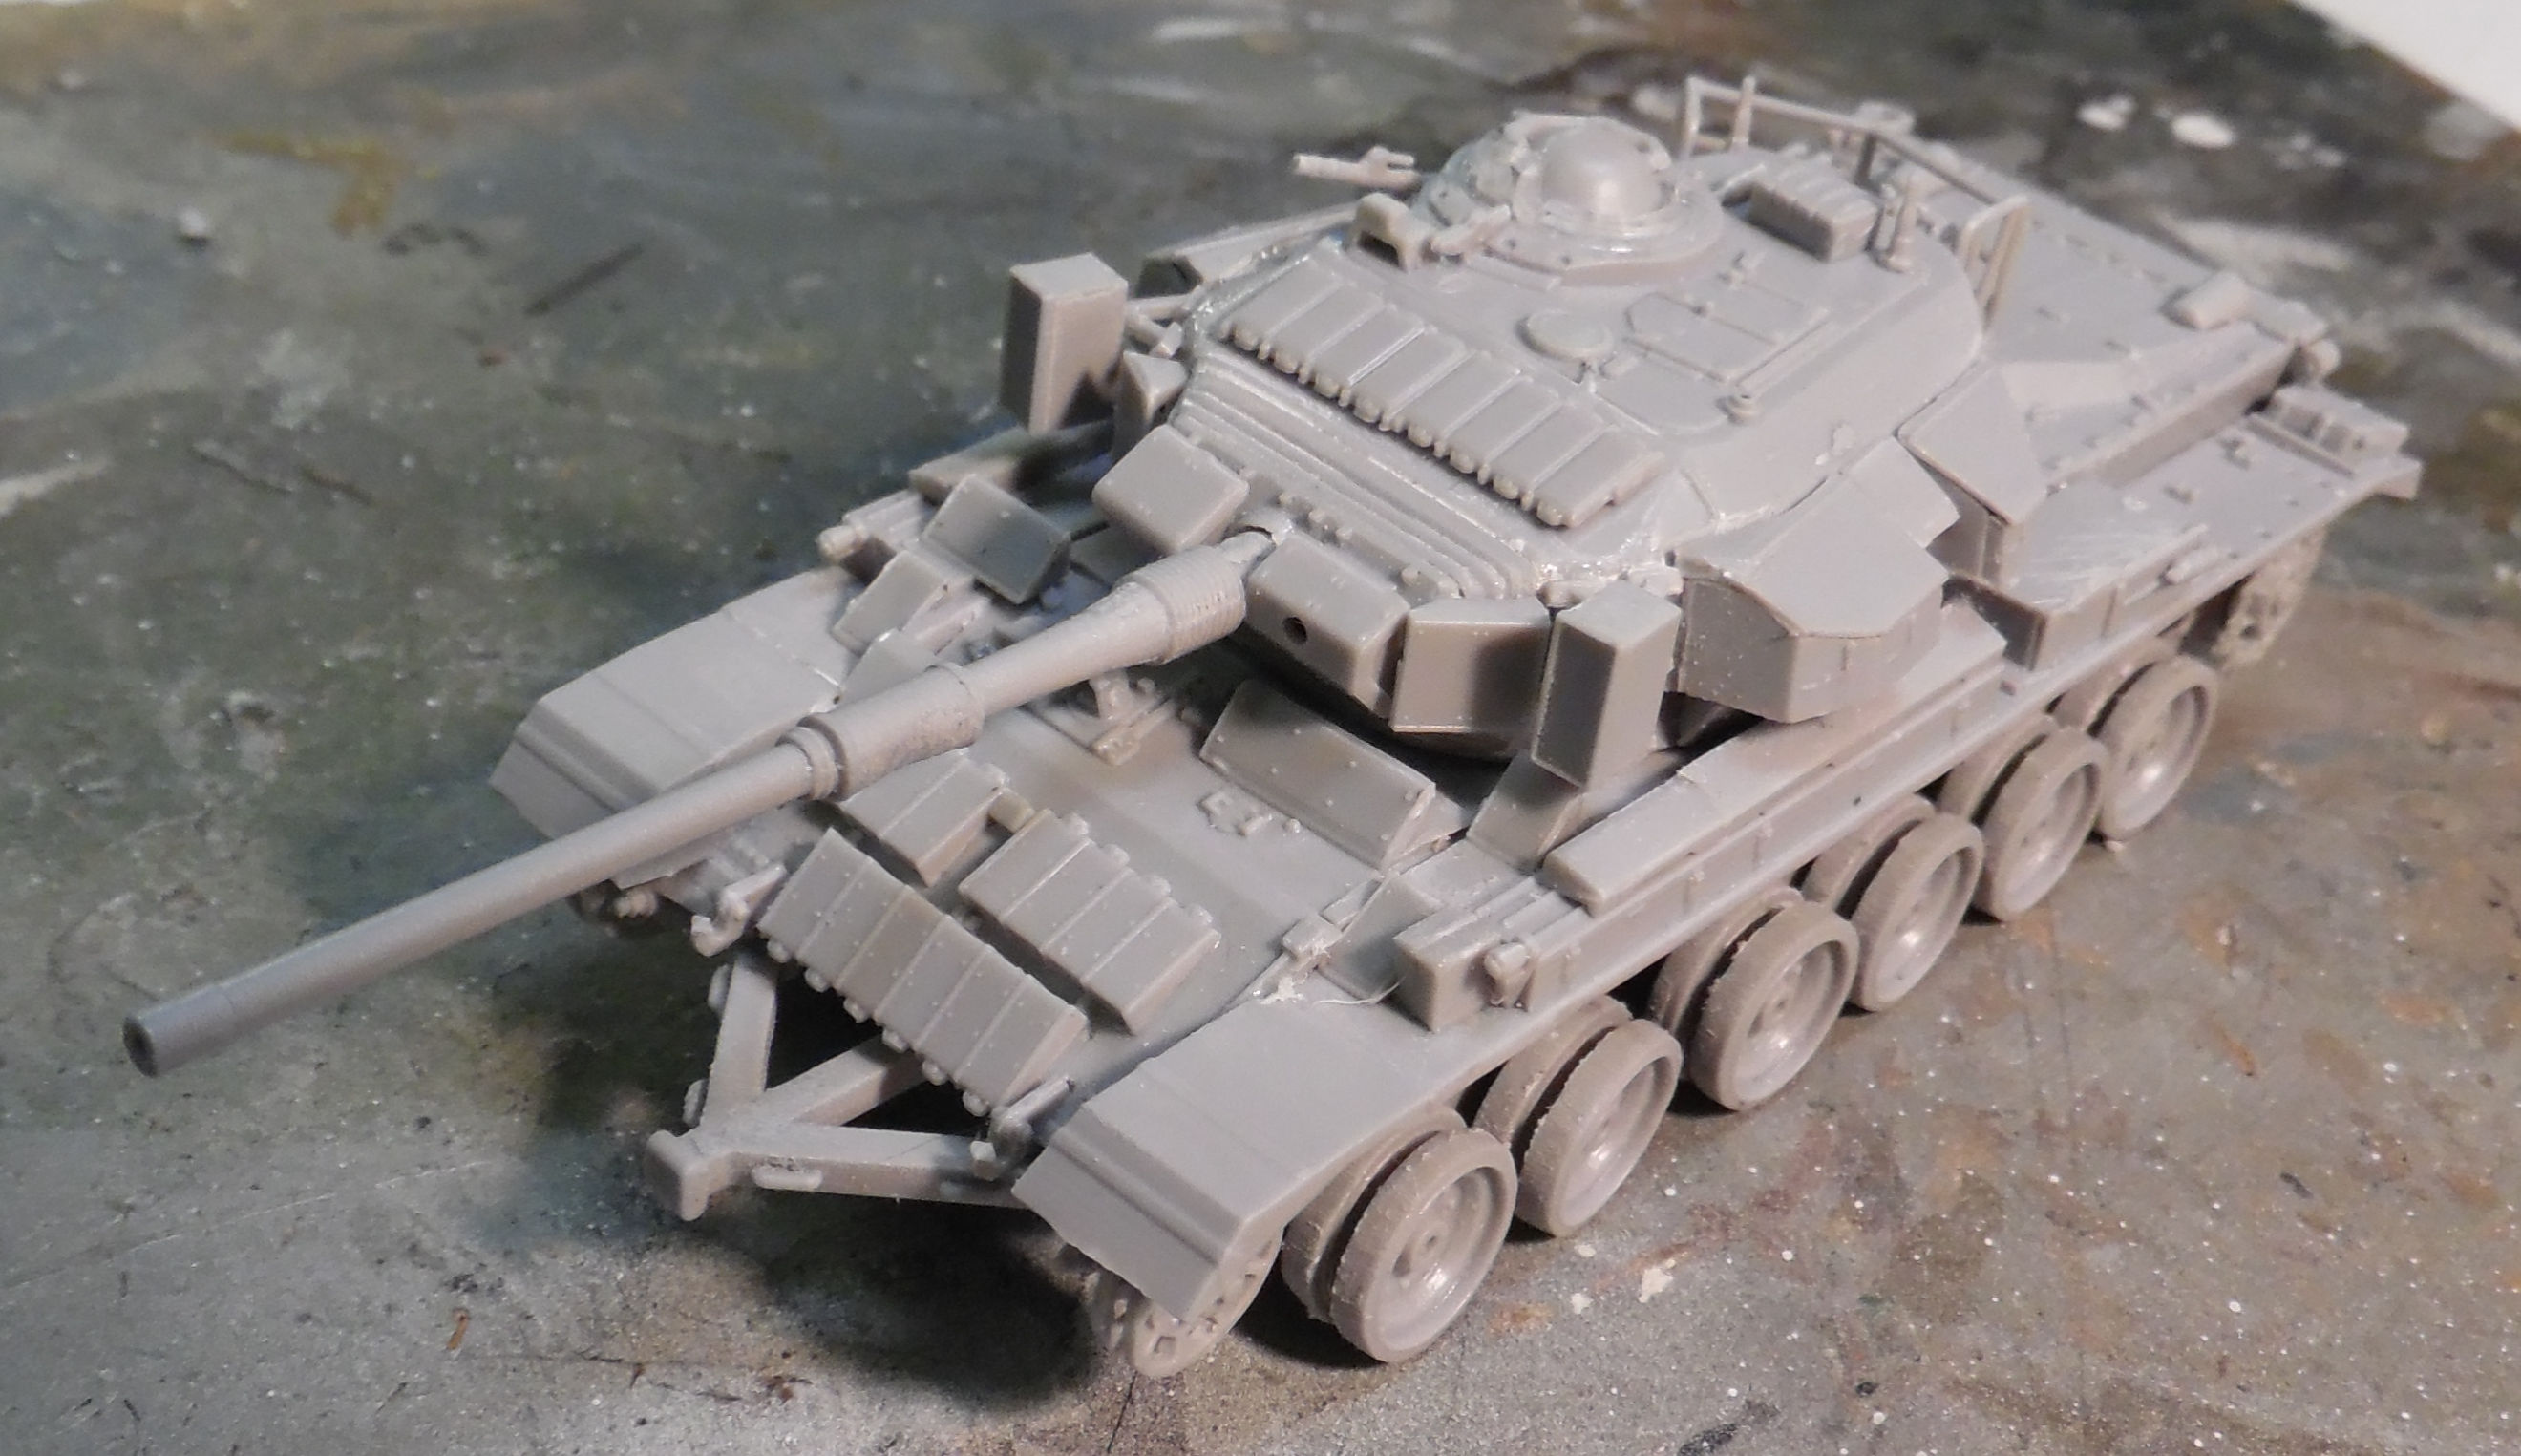 That thing on the front of this tank is a battering ram. Some Dalets had them so I added this to mine to help differentiate between them. We had the photo etch for this one so almost all the photo etch was added to this: 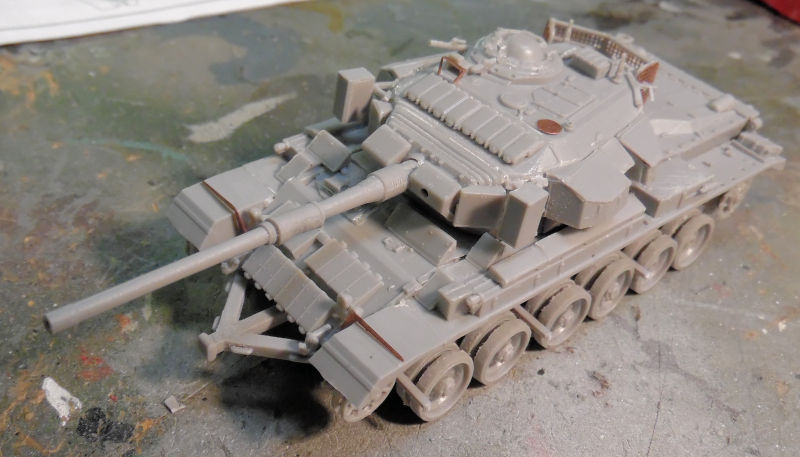 Once everything was dry, we shot a base of Green Drab on this tank. It is still wet in this picture: 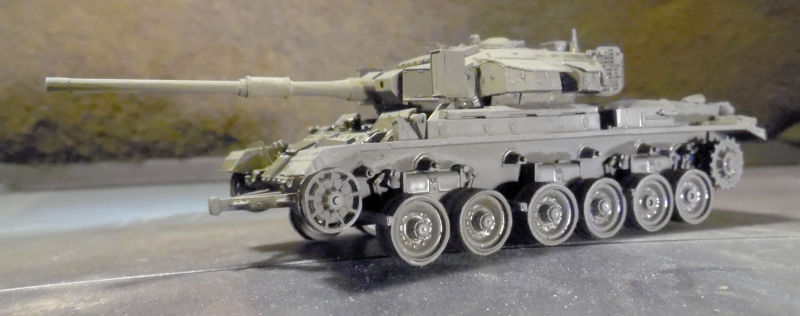  After this completely dried, we applied a light coat of Israeli Sand Grey over the top, modulating the color for added ascetics. It is real hard to see in this picture, but I assure you it is there: 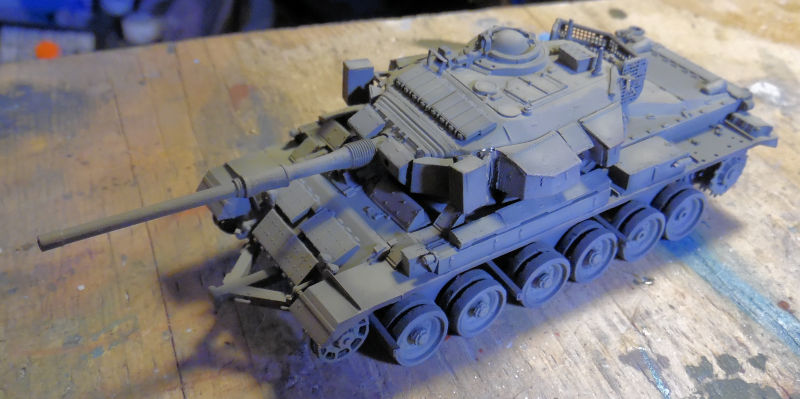 That is where we stopped on these, next up is the most difficult Armory ZSU-23-4 Shilka. First, we did the simple part; adding almost all the detail parts to the upper hull: 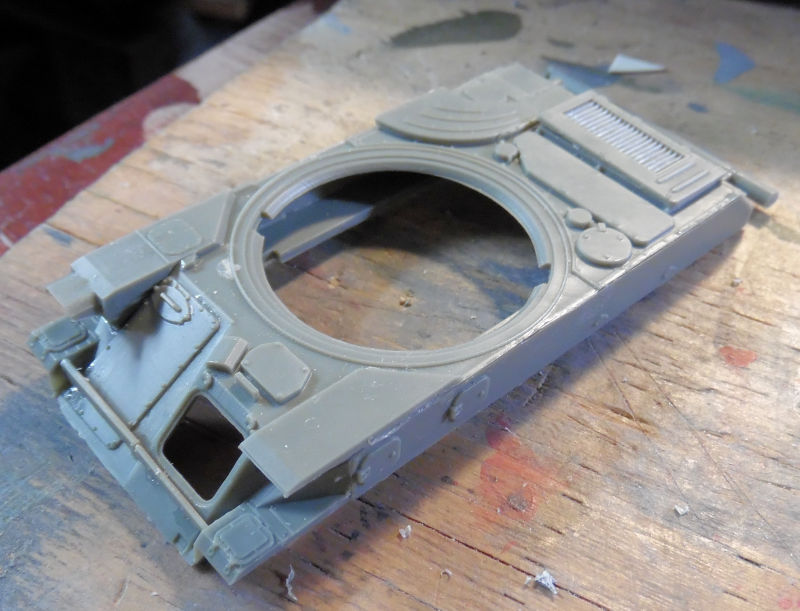 Then we built the quad guns. They were built on two carriages, two each per carriage: 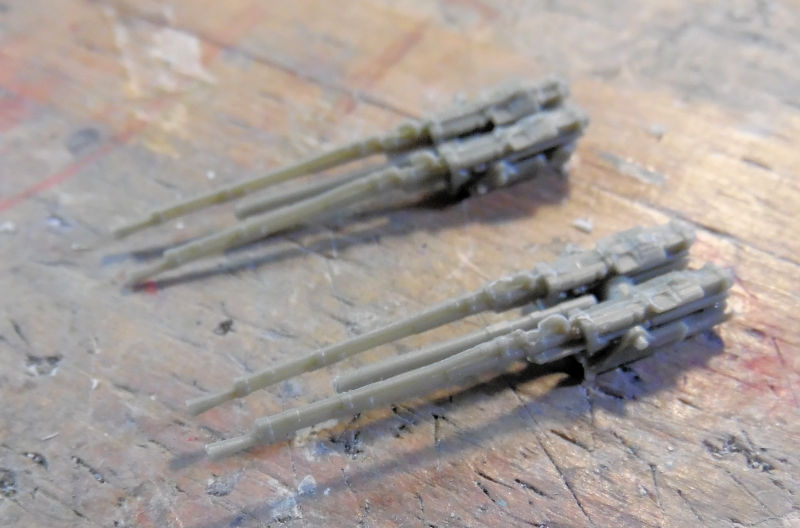 Now, adding these to the turret was a nightmare. There were three parts that you needed to glue together that were so delicate that if you looked at them wrong, they broke....and they were the mounting plates for these guns! So, after three and a half hours of finagling and fighting with this, we finally had this done: 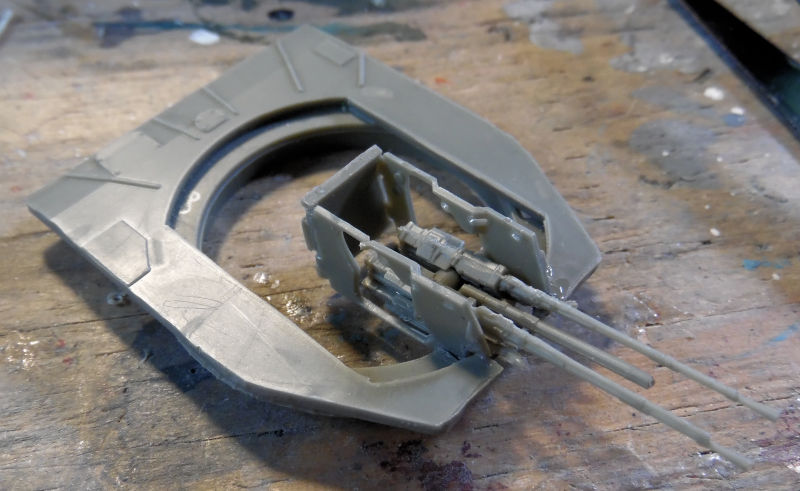 Note the one gun wasn't straight. We fixed that but when we went to add the second set of guns; we ended up with this: 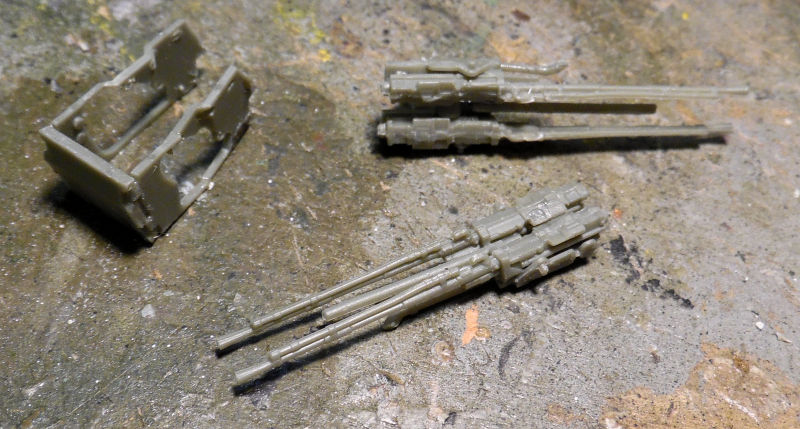 Yep! Everything fell apart, blowing away three and a half hours of work. While I fought to recover from that frustration, we finished off most of the details on the turret: 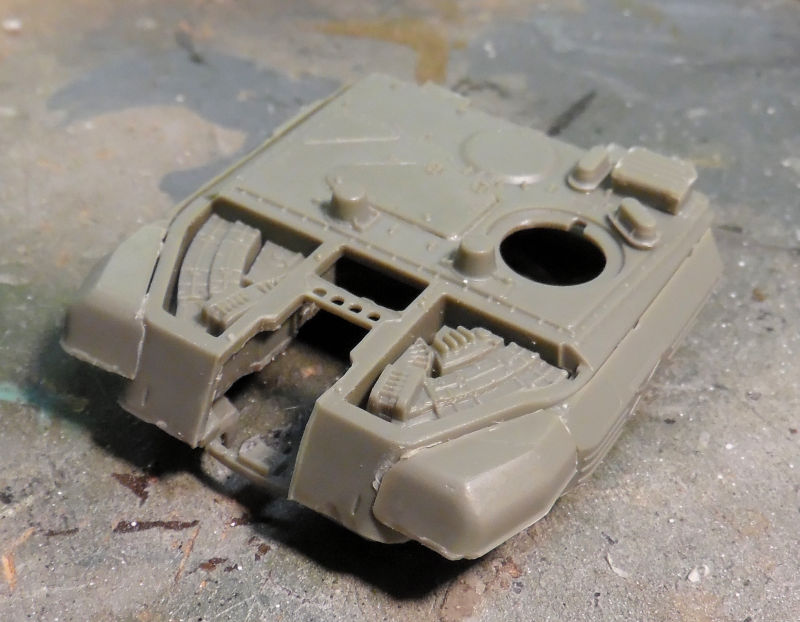 I figured it would be easier for us if these were added before the guns went on reducing the risk they break. After about another hour and a half of work on the guns, we finally managed to get them installed.....and more importantly, looking correct! 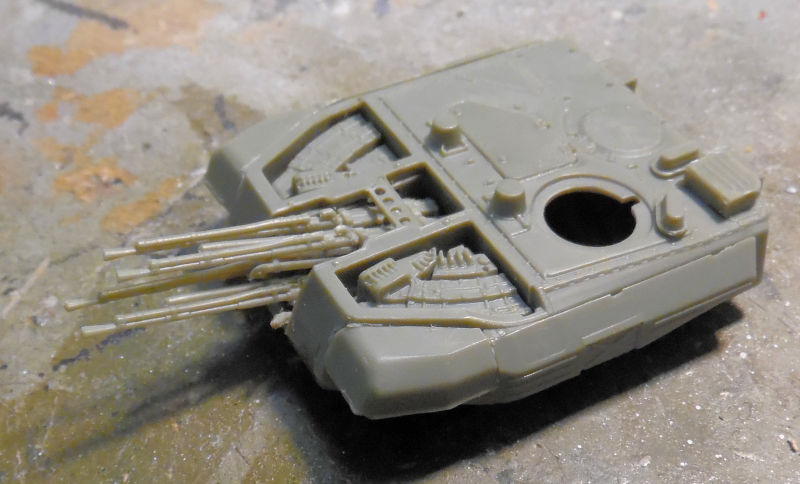 Here's a final shot of the upper and lower hulls together (yes the lower hull is under there!) and the turret mounted on the top: 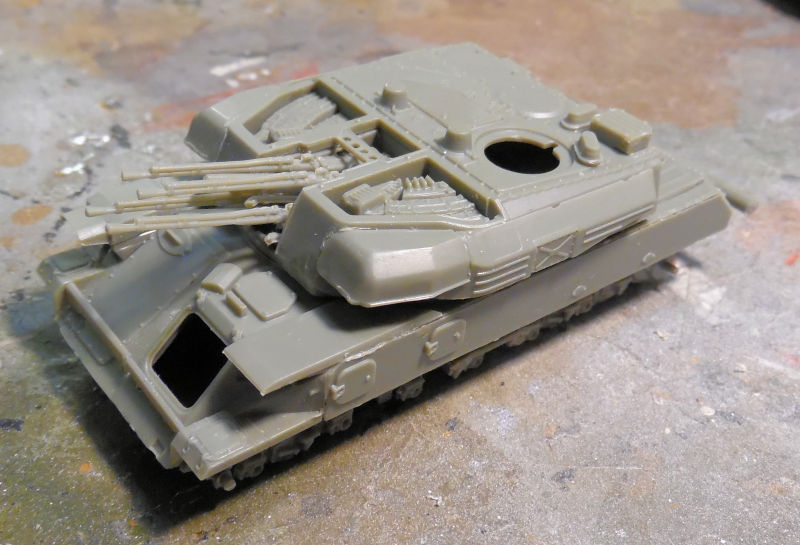 That was as far as I wanted to go with that one! It says cooling hoses are supposed to be added and shows a diagram, but after fighting this so hard; those will not be added. Finally in this last bay we have the M1070 gun truck. First off, the last details were assembled and everything was cemented down to the chassis: 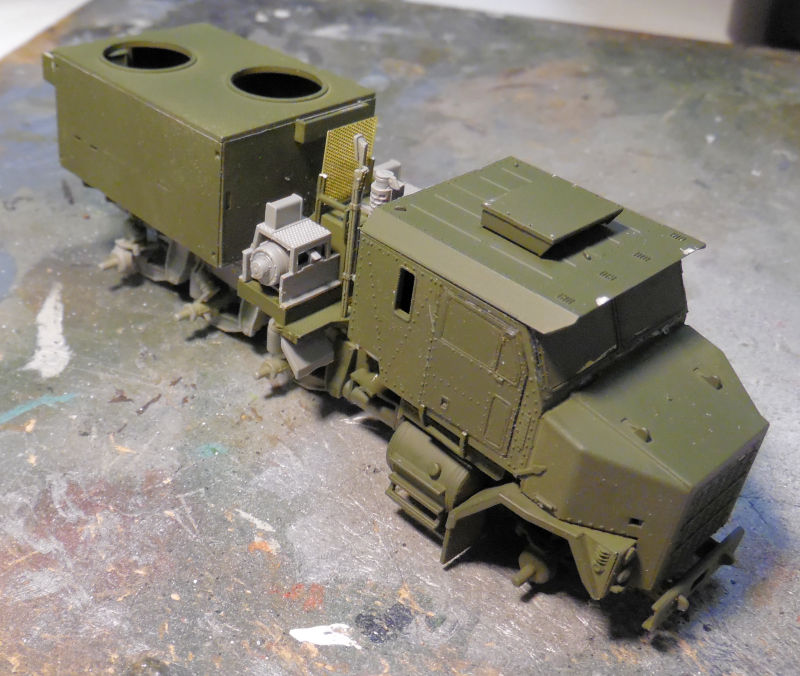 Next another full shot of green was added: 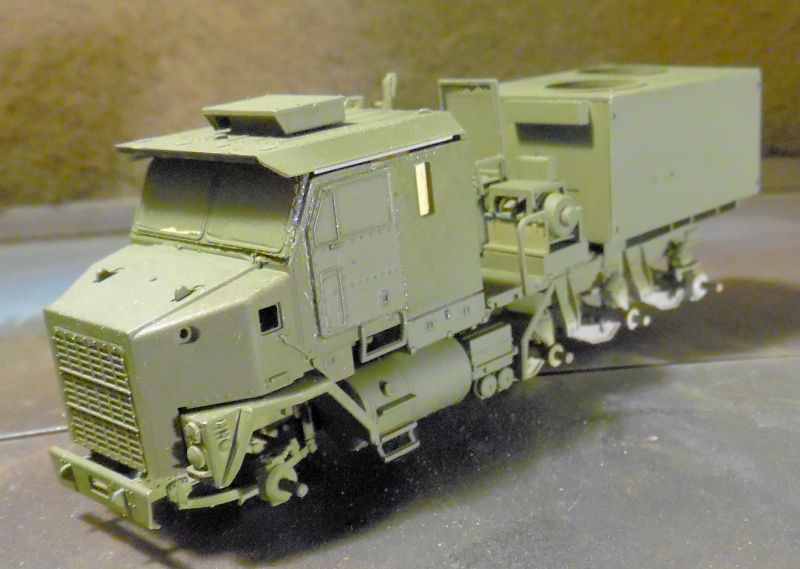 Afterward, we freehanded a camouflage pattern on this, and sprayed the gun box a rusted metal color:  We're gonna be clear coating this for decals soon, and then finish off the final details. And that is the extended tour of Maddog Manufacturing Motor Pool. Thank you all for stopping in and remember that comments are welcome. |
|
|
|
Post by Ian H. on Nov 18, 2023 0:43:31 GMT
Oh yeah! Great work on your builds. You had your hands full with that Be-4 section but great job getting it smoothed up. Those Russian artillery pieces are so impressive looking.
|
|
|
|
Post by bwilt on Nov 18, 2023 9:26:10 GMT
That is a ot of work you did, and you had your hands full with that Shilka, but you sure got it solved!
|
|
|
|
Post by Paul B on Nov 18, 2023 14:28:24 GMT
Don't know where to start, so I'll just excellent job all round The camo on the Spit, the 152 arty, the Cent and the ZSU have stuck out mostly I think  |
|
|
|
Post by dukemaddog on Nov 18, 2023 23:39:33 GMT
Thank you guys for all the motivating comments! I am hoping some of these pass the finish line this week!
|
|
|
|
Post by nito74 on Nov 20, 2023 16:26:37 GMT
Looking great Duke !!
Fantastic line up my friend !
|
|
|
|
Post by dukemaddog on Nov 20, 2023 19:00:57 GMT
Thank you John!I'm glad you stopped in!
|
|
|
|
Post by dukemaddog on Nov 27, 2023 7:52:53 GMT
I have a lot to be thankful for this past Thanksgiving Day week, some of which is the progress we made on some of these models that have been fighting me. So much has been done that it's time for another tour. We have kept the Shipyards idle again, so this tour will start in the Hangar to show the progress made on a couple projects. First, we got the decals on the Russian Shtormovik: 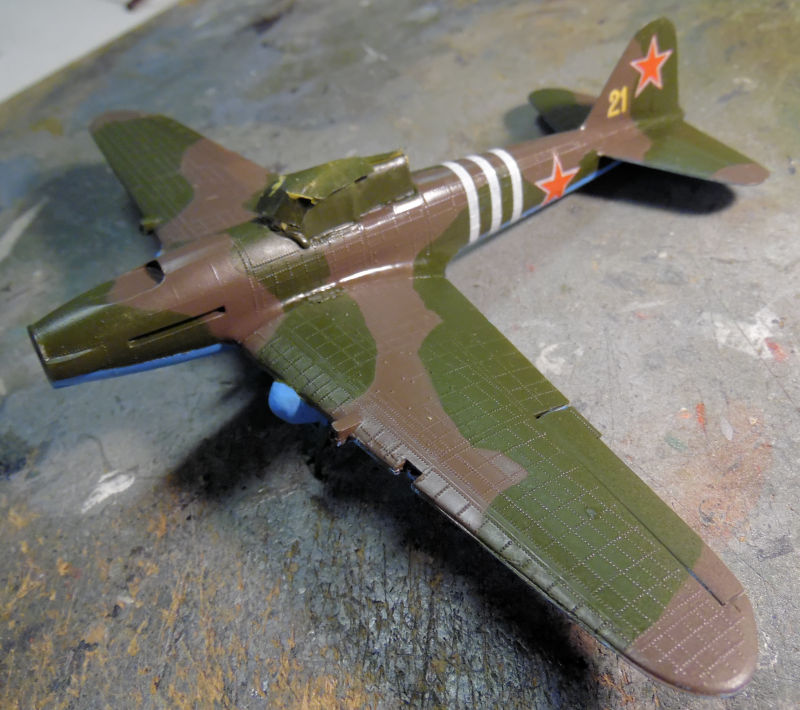 They went on surprisingly well considering the extensive age of the decals. Now all that is left is the final details before this can be called done. Next, we discovered that the support struts for the wing on the Russian Be-4 were far too short due to the fact that we had to raise the center pylon to keep the propeller from chopping off the nose. So we cut some new ones from strip styrene: 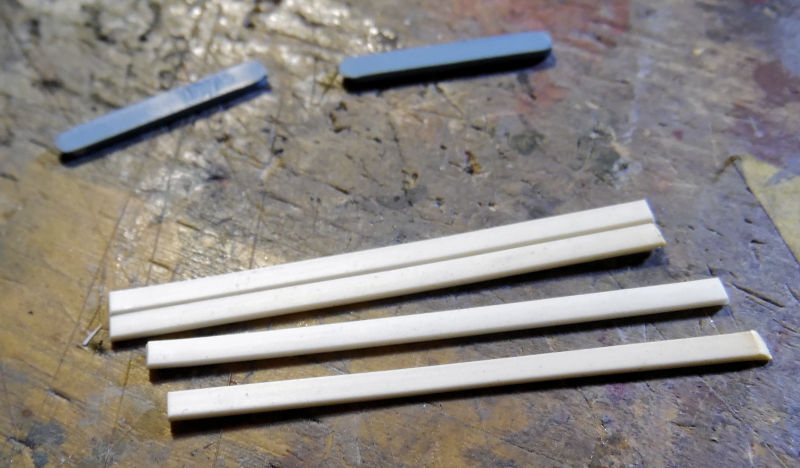 The originals are in blue above the four strips. Then; using Silly Putty to hold the fuselage in place upside down, we glued the wing to the fuselage and added the struts:  In retrospect, we should have done the same with the outrigger pontoons. I may still do that later.... Moving on, the Spitfire VIII got the decals applied as well: 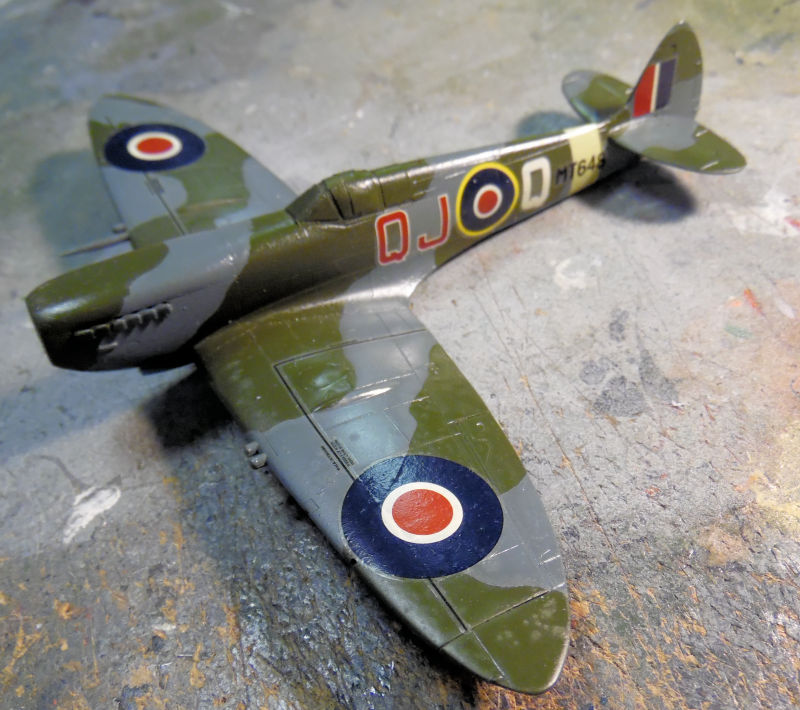 Yes, they silvered quite badly, so that was addressed and the main landing gear and the tail wheel were installed: 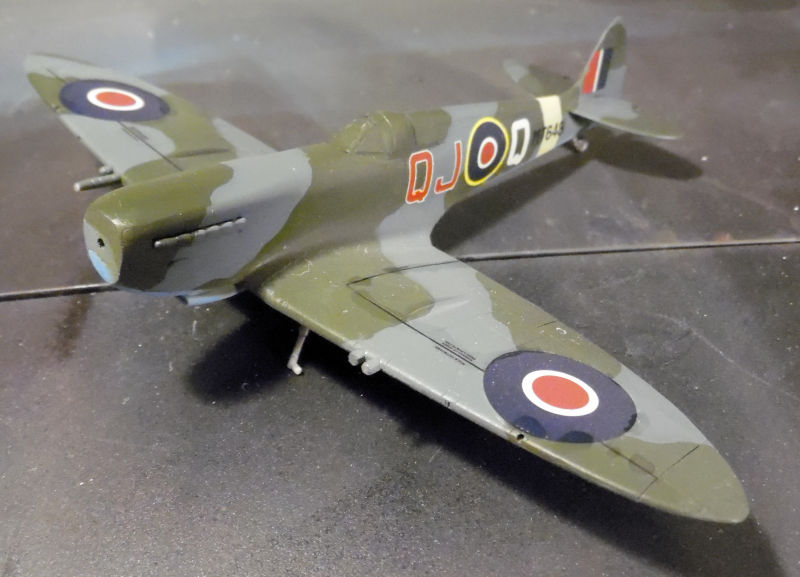 Getting close on that one. That closes out the tour of the Hangar; as mentioned it was a short one. Now on to the Motor Pool where a lot has been happening. Here in the Motor Pool, we were rocking out getting things done. First, I decided we needed to get a couple of the Shelf Queens out if the Motor Pool and delivered to their respective forces. We started with the Russian fire truck that had been sitting for a couple years. It's an old PST kit which says a lot. It started out getting a new coat of red paint: 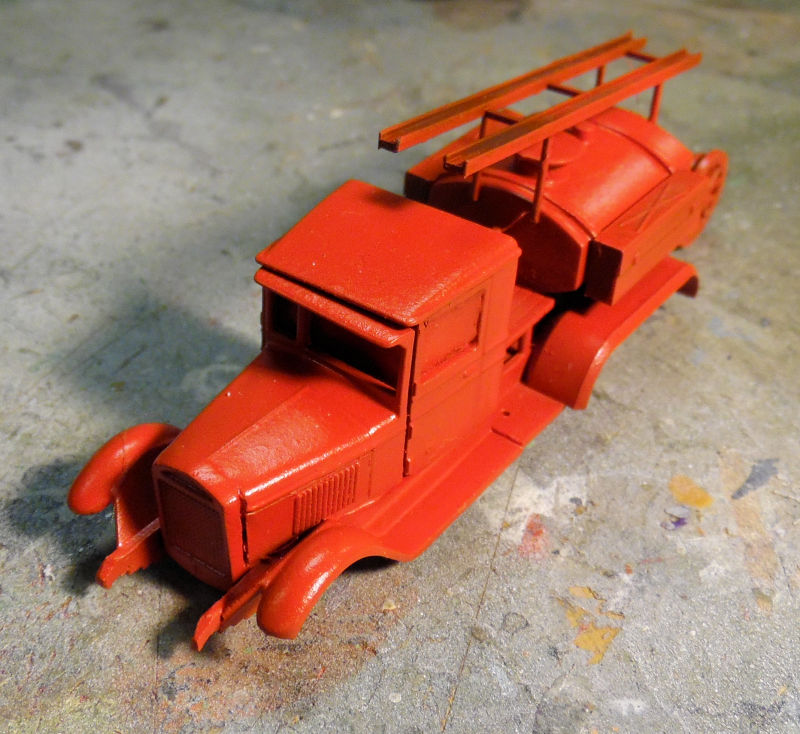 Next the wheels and some additional parts were added after which some more paint was done on some of the larger new additions: 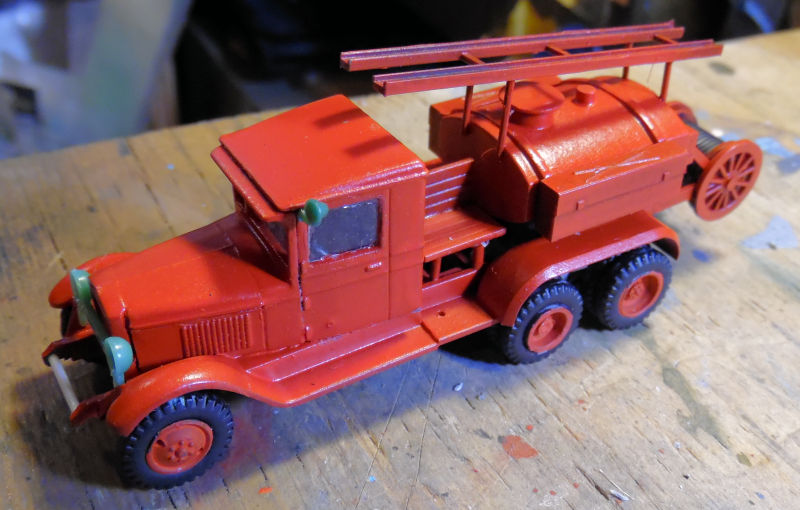 The new parts were painted and other details were painted up as well: 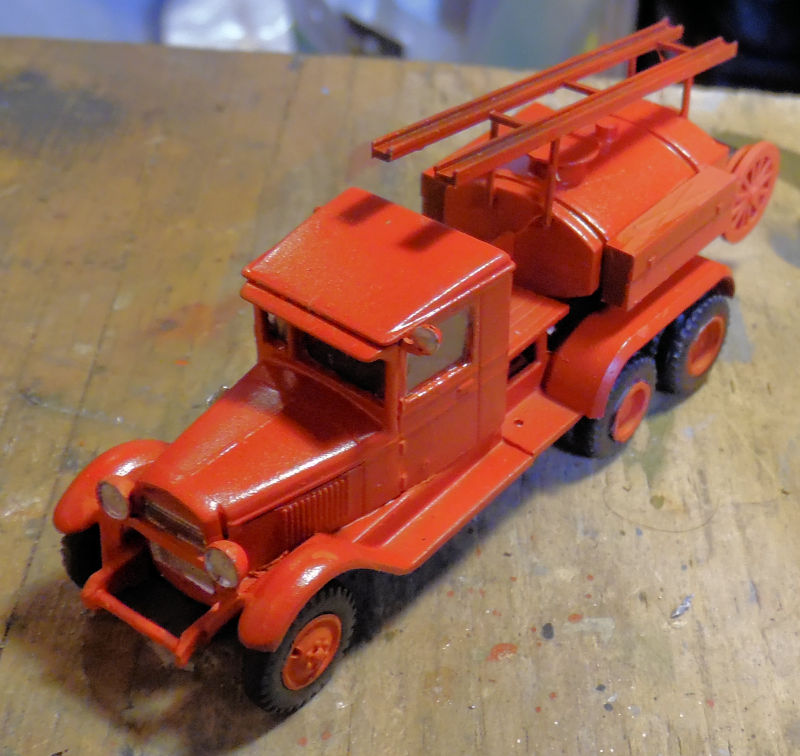 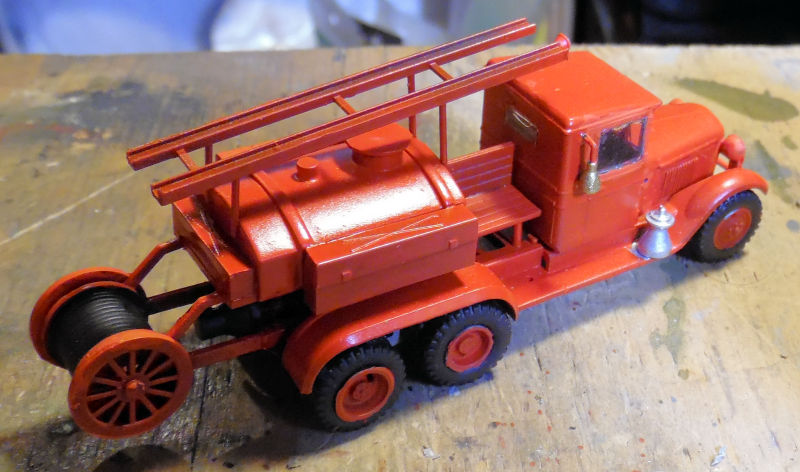 That one quickly arrived at the dispersal depot after that. Another Shelf Queen that had sat for three or more years was my Russian SCUD D. I had wanted to finish it alongside the SCUD C I was building in conjunction with it, but the serious lack of the proper parts for the C means it will take too long and there was no reason the-D should sit in limbo with it. First, a couple additional colors were added for a three-tone camouflage pattern; it was hand brushed as I wanted this done quickly and there were too many delicate parts on the launcher arms for Silly Putty: 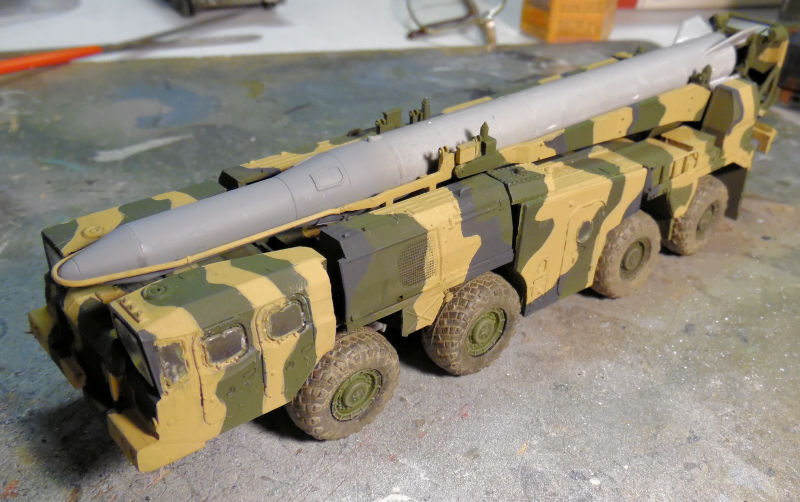 You can see wheels were added as well. The missile was just dry fit for looks. Later the missile was painted, the vehicle was weathered and later some small decals were added after this next pic was taken: 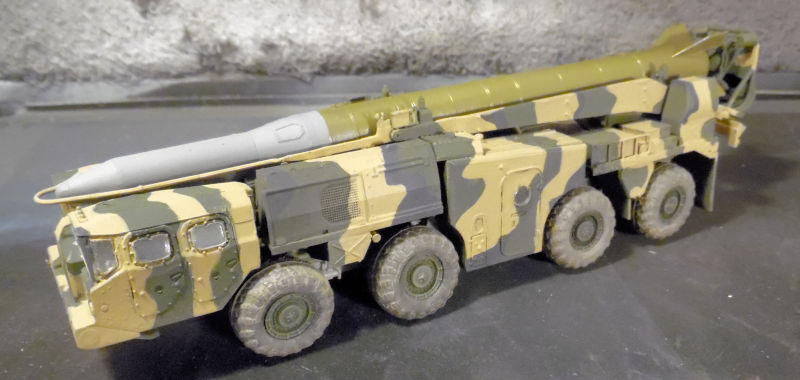 This one was sent to the dispersal depot after the last detail parts were added. Concerning the two Russian tracked heavy guns; one was sent to the dispersal depot despite missing a few parts. They are not immediately noticeable, so until the missing parts turn up, it is being delivered. The second one, the 152mm gun was going to be delivered too, but the aiming scope was crooked. When we went to straighten it out, it broke off and disappeared. Since I was already so tired of these two guns taking up space, I scratched a new scope which is highly inaccurate, but screw it! It stays unless and until the right part reappears: 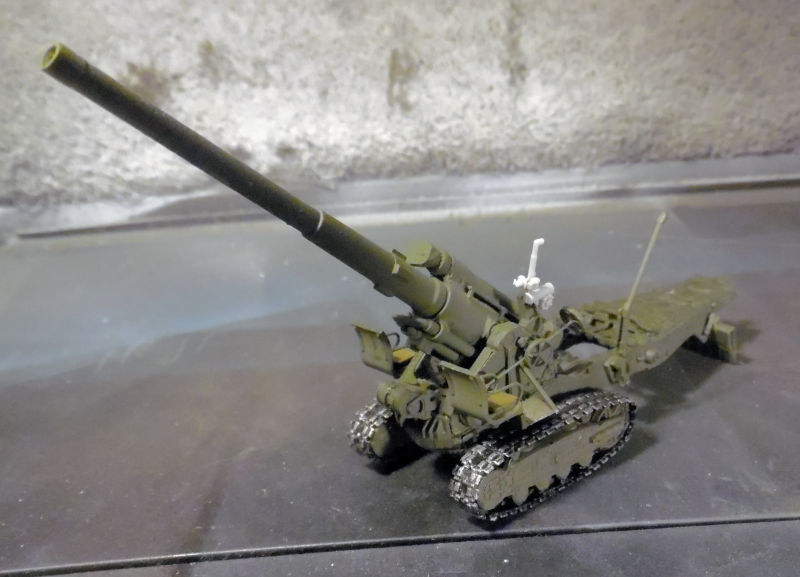 Moving on to the next bay, we found the photo etch for the Israeli Sho't Kal Gimel, so it was added to the turret and hull. Here you can see the basket part is partially glued and was glued the rest of the way after the glue dried: 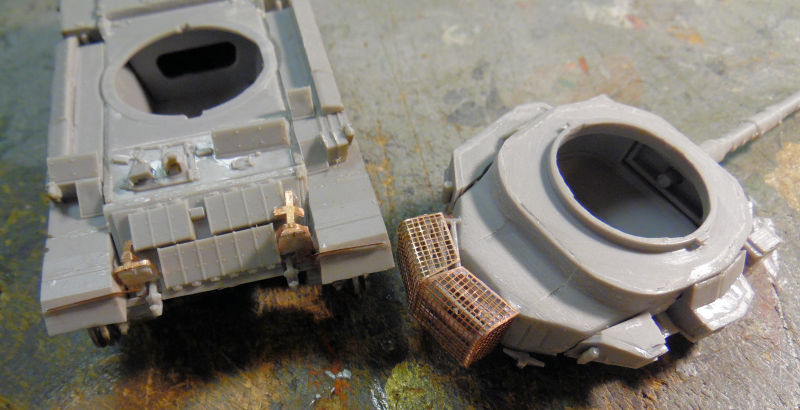 The Gimel then got her side skirts on and a coat of paint: 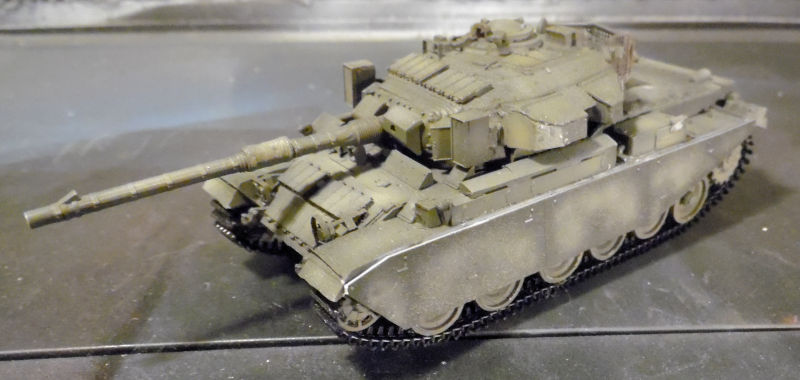 The Dalet, meanwhile, had her tracks installed. Yes, I used the Pactra cement on the black vinyl tracks and it held them together perfectly, as if they were made of styrene: 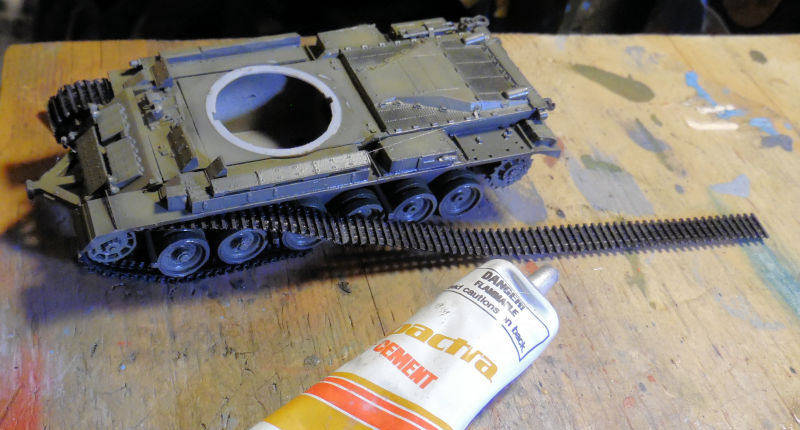 With that, it didn't take long to get both tracks on: 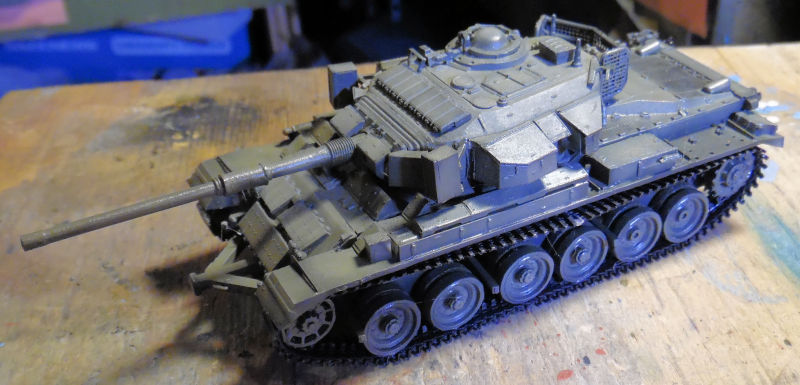 Later the Dalet got some additional photo etch added that had not been installed before: 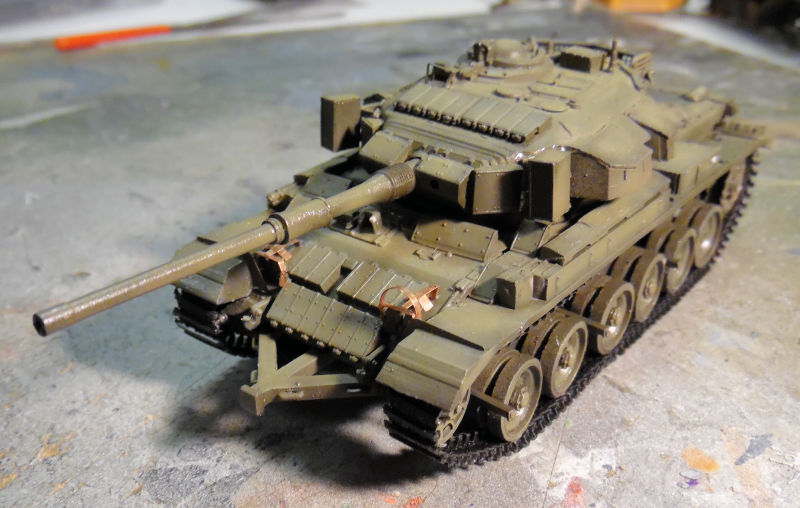 Back to the Gimel, we installed the crew machine guns and added the barrel decals: 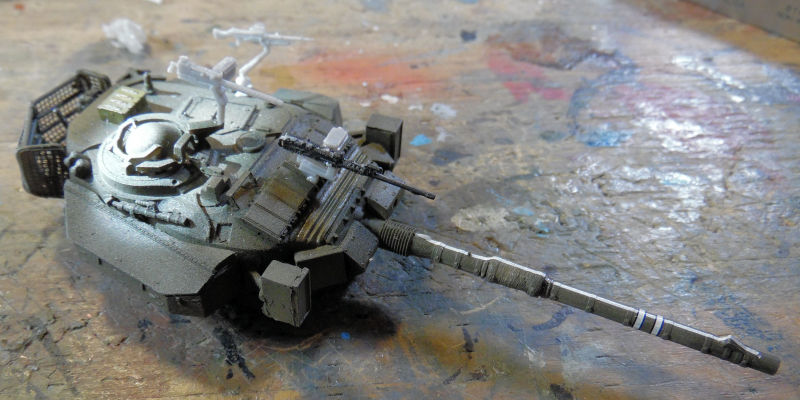 The decals were also applied to the rest of the tank and the detail parts painted. This allowed us to send the Gimel to the Dispersal Depot. Finally, in this last bay, we assembled all the major components to the chassis and then painted the camouflage pattern on this cab. It was freehanded with an airbrush because I was just getting lazy at this point and wanted this truck finished: 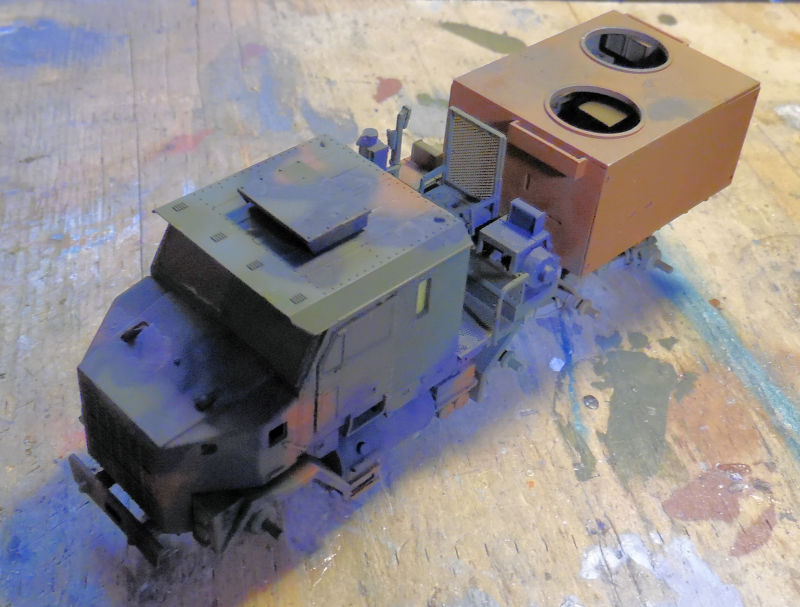 After a clearcoat, the decals were applied:  While they were drying, we went to work on the gun stations. They were fairly quick and easy to do, despite having a lot of parts: 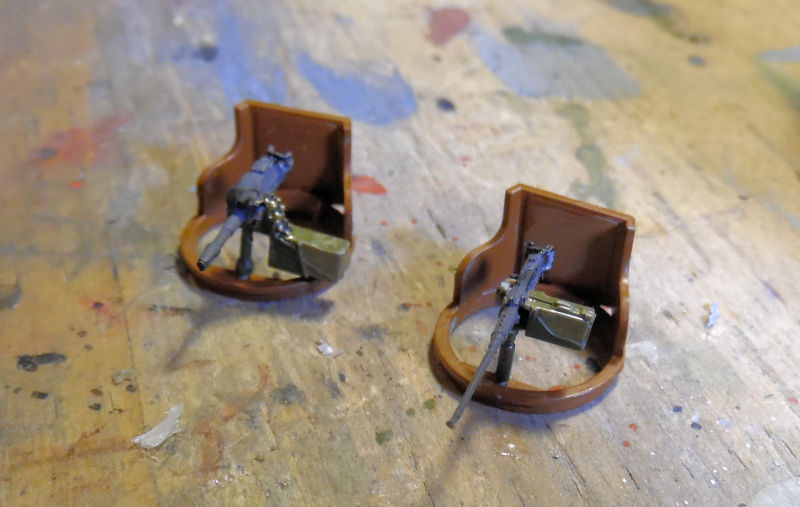 Some of the last final details were added, including the anti-RPG sheets, the wheels and several additional detail parts:  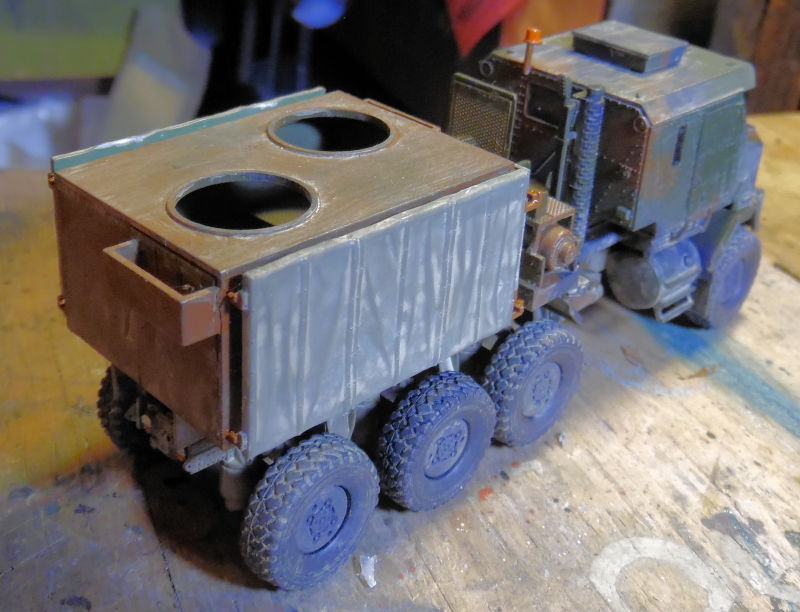 After completing the rear view mirrors, this truck was also sent to the Dispersal Depot. Thank you all for coming in and seeing the latest progress. Pics will be forthcoming of all the completed models, stay tuned for them later. Meanwhile, comments are welcome, thank you for joining this latest tour. |
|
|
|
Post by Paul B on Nov 27, 2023 8:37:37 GMT
The Gimmel and Dalet are coming along nicely and I am really getting an itch to make one myself  The Spit and Sturmovik are looking awesome too |
|
|
|
Post by JEFF on Nov 27, 2023 15:39:41 GMT
You just keep pounding them out,Duke.  The gun truck is my fav in this lot. |
|


