|
|
Post by dukemaddog on Feb 1, 2022 21:48:19 GMT
Wow, loosing track of how many builds you have been doing at the same time...
Thanks! Sometimes I am too!!
|
|
|
|
Post by dukemaddog on Mar 9, 2022 22:46:50 GMT
Here is my latest update on my work at Maddog Manufacturing. First, I want to let everyone know why it took me so long to get any progress done and posted. Back in the second week of February, we had to move from one storage unit to a smaller one. In the process of moving, I dropped a 200 lb +/- block of wood on my right foot. Naturally it swelled up, but only as far as my shoe would allow. The bad thing was, I had to go back the next day and finish moving out since that was the last day to get out of the old one. Only by the grace of God and His strength did I succeed with this foot as it was. I then kept it iced and propped up all day the next day. We went to Urgent Care where X-rays were taken and again by the grace of God there were no breaks or fractures. Still, it took me almost a full month to get back to where I could walk and drive. Since there was no place to prop my foot up and keep it iced in the hobby room; I was unable to do anything on my workbench all that month of time. Now that I've recovered enough, it is time to re-start my tours of Maddog Manufacturing. The trams have all been tuned up and are ready to go. All aboard! This past Monday night we had a Hobby Night at the St. Crispin's Hall. I brought quite a number of things down to the hall to work on and try to regain the momentum I'd lost. Starting in the hanger, we have these projects... The first thing I wanted to show was the Swedish Vampire. It finally got decals on it. Again, they look like total crap because they are the ancient kit decals which did not want to stay flat. I had to convince them with Tamiya Extra Thin cement. I could have passed on using them, but I had no spares that could work, nor did I know when I'd be able to afford to get replacements. So in order to call this one further done, I used what I had: 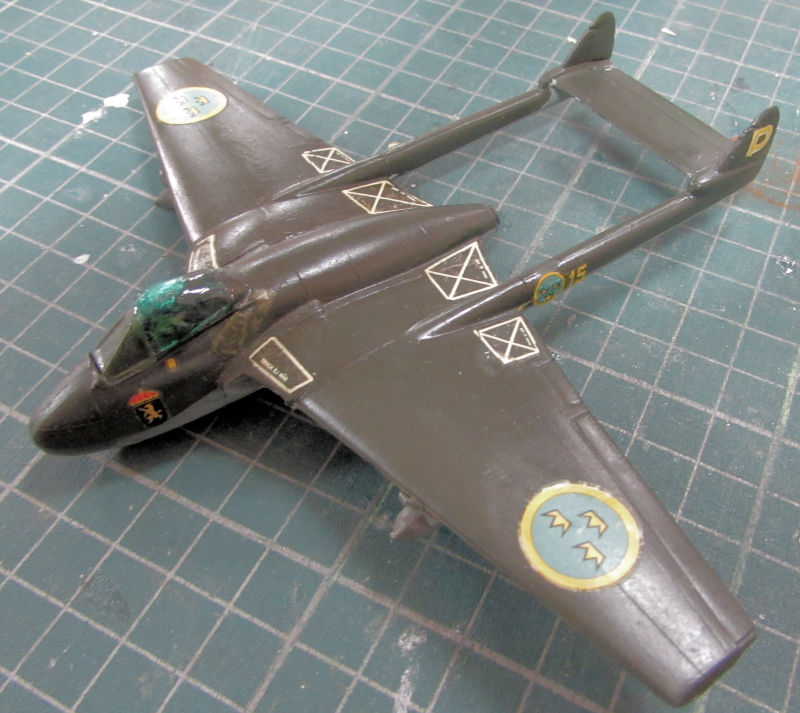 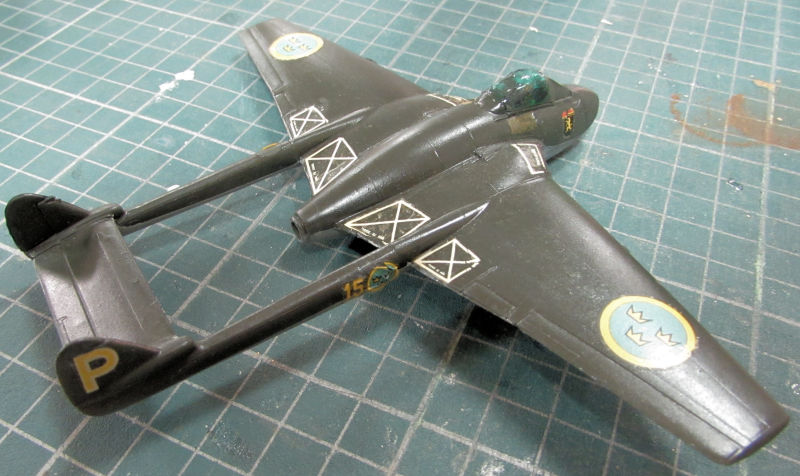 After that, it was time to move on. This time I got something started. This is the Atlantis re-pop of the ancient Aurora(?) kit of the AH-56 Cheyenne attack helicopter. This is certainly one odd looking bird. First thing it tells you to do is cement the fuselage together, trapping the forward mini gun and rotor in between them. Okaaaaay... 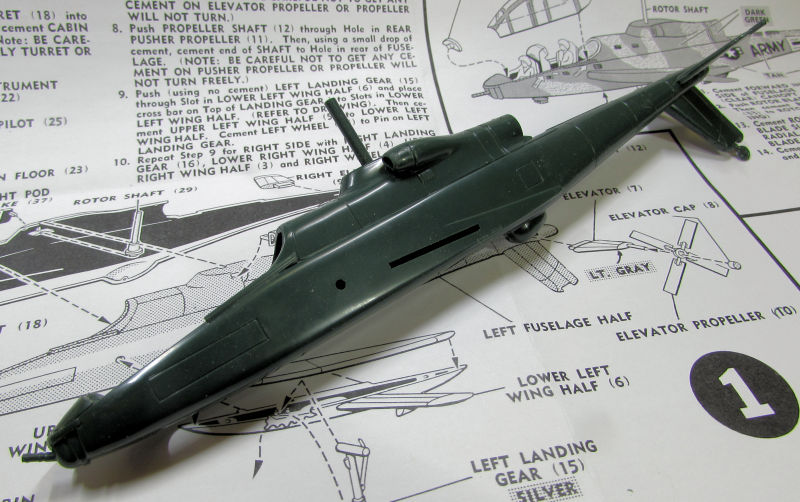 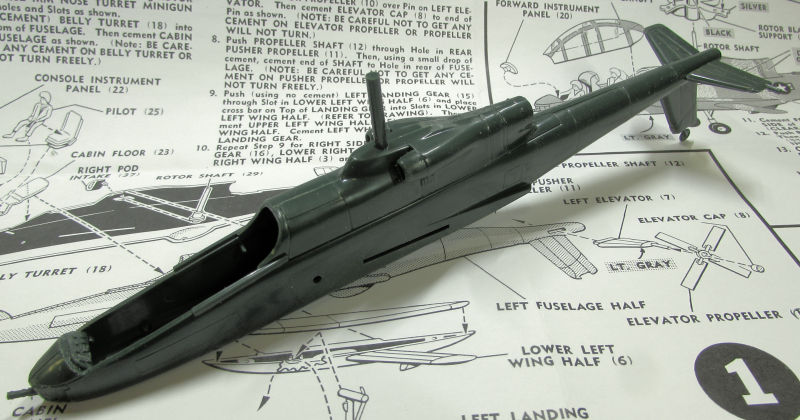 After that I got started on the cockpit and pilots. This is a simple cockpit so it went together well: 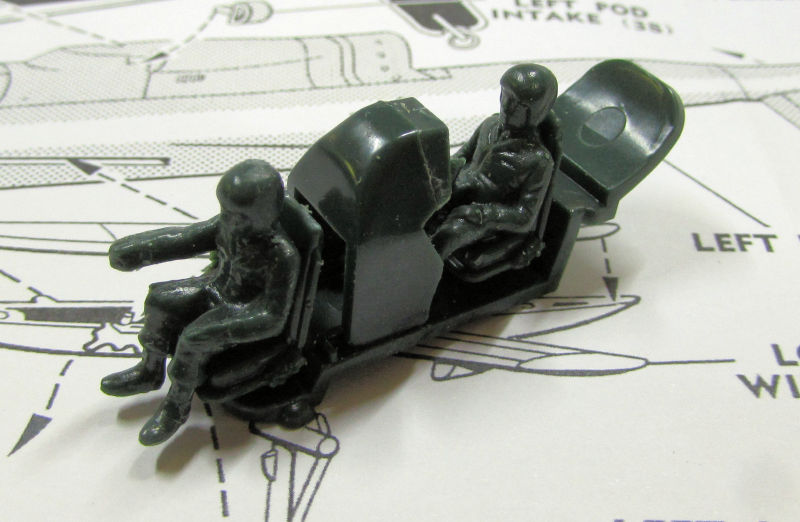 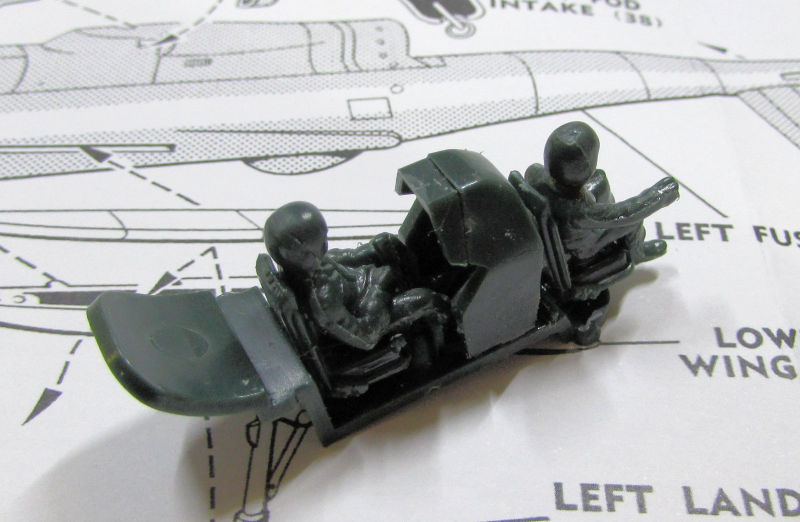 There's still some sink marks and other details to fix before painting this, but I like how it looks. After that was done, I set it aside and added the horizontal stabilizers to the back of the helicopter. I then assembled the landing gear sponsons and attached wings and cemented everything to the fuselage. The landing gear are actually designed to retract. Cool! Looking good so far. The cockpit seen next to this just pops right in, so this will be easy to do once I get it all painted: 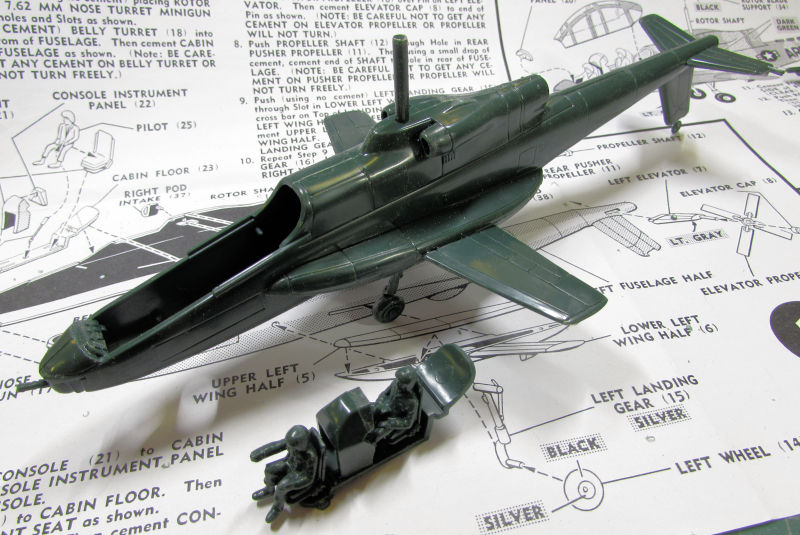 While that was all drying, I assembled the main rotors. These were a little tough, but I got them done. I do like how sturdy they are at the base of the blades. Later when they had dried enough I popped the cockpit in place in the fuselage and added the main rotor to see how this bird is looking: 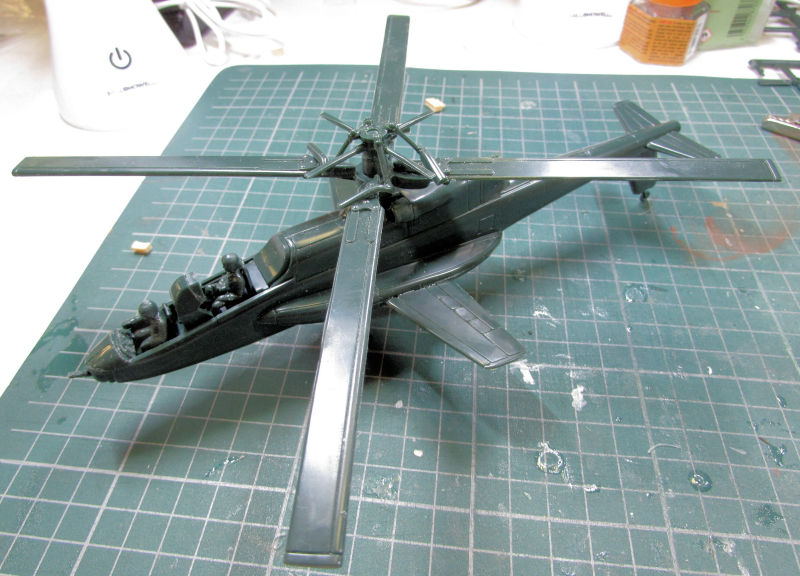 The cockpit and rotors come off so I'll be able to paint them separately. That's as far as I got now. Hopefully I'll have time and opportunity to get this painted..... along with the other 17 models that need paint! Moving on to my shipyards, we laid the keel for this one.... This is another model I'd been wanting to start. This is the Revell Swift Boat that I got for Christmas. Of course I'm slapping myself in the head for not entering this into the "Charlie Still Don't Surf" campaign here. Anyway, this went so fast I got this far before I remembered to take pics: 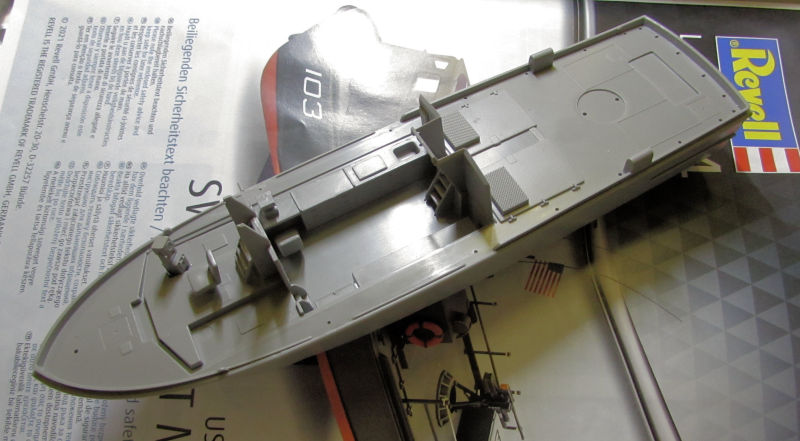 I gotta get that interior painted before I go on. Now on to the motor pool and maintenance yard Finally I got this little thing started. I got it over a decade and a half ago and left it sitting on the workbench because I didn't feel comfortable enough to do all that P/E as I was just starting out using it. Having done so many models with P/E since then that I felt it was time to get it off the bench. This is a 1/72 scale German field maintenance heavy crane used for lifting turrets and engines. I still did a pretty crappy job despite my experience; this was so difficult to keep in place without bending cross members: Here is the first half done. After that I moved on to something else to relieve the stress of working with this tiny model: 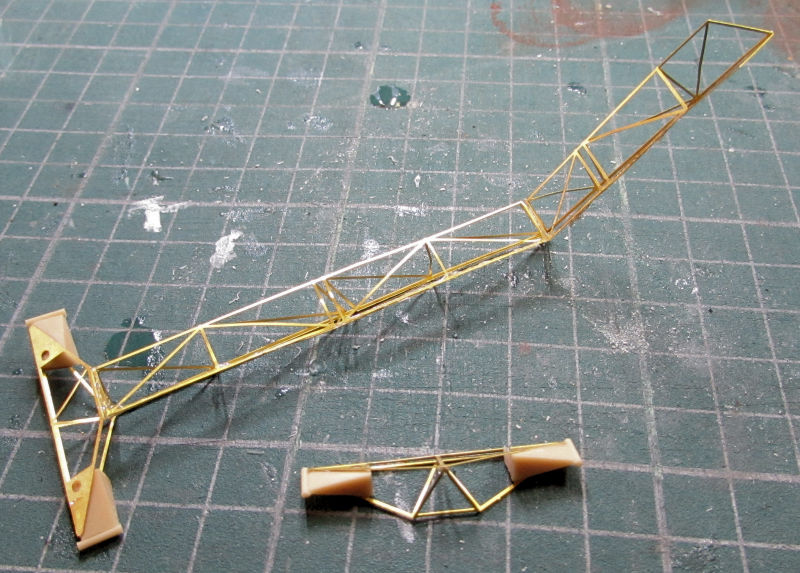 Later I came back and finished this off:  Now to figure out how to paint it. both colors and technique! Those chains re-defined the word "delicate" and I'm surprised I didn't break them even more than the one time I did! Okay, now that that was done, I decided to have some fun. I started my British Crusader AA tank and got this far before I remembered to shoot pics: 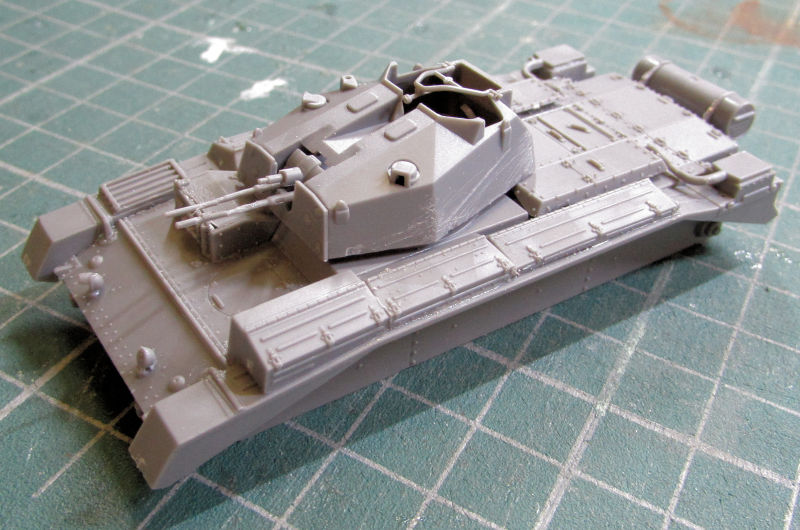 Those gun barrels will go once I can source some new metal ones for this kit and raise the funds to buy them. Until then, this little beastie will keep those so I can move forward. Anyway, that is all I have for now. Hopefully this week I'll be able to find some time to shoot paint. Thanks all for joining this latest tour and comments are always welcome. |
|
|
|
Post by Ian H. on Mar 10, 2022 1:07:39 GMT
Great work on your kits, Duke! That crane must have been tough but it looks excellent. Cool to see a Vampire in the hangar, too. Also, I hope your foot gets better.
|
|
|
|
Post by Paul B on Mar 10, 2022 4:55:14 GMT
 You need a medal just for the maintenance crane  |
|
|
|
Post by tommygunn on Mar 10, 2022 7:22:14 GMT
Yes, at 1/72, great result.
|
|
|
|
Post by PorcoRosso on Mar 10, 2022 10:40:11 GMT
Very impressive Duke.
|
|
|
|
Post by Armorguy on Mar 10, 2022 12:29:41 GMT
That crane makes me nervous, still superb to see you managed to build it in such a nice way
|
|
|
|
Post by Boots on Mar 10, 2022 20:48:36 GMT
That crane sends shivers down my spine just looking at it.....let alone making it!!  , top work Mark  |
|
|
|
Post by dukemaddog on Mar 10, 2022 21:35:48 GMT
Thank you Ian! That crane was indeed a difficult build. I also love having the Vampire done. I've been wanting a Swedish one for awhile now. Couldn't find any aftermarket decals to replace the kit ones so I moved on with them anyway. The foot is much better so far, thank you for that.
Thank you Paul! Maybe one for perseverance. However, combat pay seems more appropriate! LOL!
Thank you Tommy!
Thank you Joe!
Thank you Guy! It still makes me nervous; I just hope I can get it painted without destroying it.
Thank you Boots! I appreciate the compliments, but the distance from the camera hides a lot of the flaws. The long seams on those delicate metal parts are not as smooth and even as they should be. Still, I didn't expect to win anything in a contest with this; I just wanted to build it and possibly put it on a base.
|
|
|
|
Post by Snipersmudge on Mar 11, 2022 8:43:59 GMT
Oh my word! Some serious skills on that etched crane old chap, makes me break out into a cold sweat just looking at it!
|
|
|
|
Post by dukemaddog on Mar 11, 2022 17:33:01 GMT
Thanks Pete! That crane is still pretty crudely built; photos don't show it that much. Yeah, I don't think I was breathing the whole time I worked on it. Cold sweat too.
|
|
|
|
Post by SteveM on Mar 12, 2022 8:10:01 GMT
That's an excellent collection of very different builds there Duke!
|
|
|
|
Post by Ian H. on Mar 14, 2022 0:42:19 GMT
Duke, any plans to depict that beautiful crane with a piece of armor in a dio/vignette?
|
|
|
|
Post by dukemaddog on Mar 14, 2022 21:00:49 GMT
Thank you Steve! I do like to keep a variety going....
Ian, I do, as that crane can only be displayed properly in that kind of setting. I'm still trying to gel the idea though, starting with what I can use based on what extras I have like a separate engine in the Spares Box, or a tank with interior. It might be awhile. I've not been thinking that far ahead as I'm trying to decide how to paint this.
|
|
|
|
Post by dukemaddog on Mar 24, 2022 1:35:33 GMT
Now that my foot is finally healed enough to walk on without having to ice it all the time, I was able to get a few hours in the hobby room in between getting caught up with all the other things that were neglected. Here is what I was able to do, so all aboard the trams again for this new tour of Maddog Manufacturing! First off, while I was re-organizing the room and re-packing many of my spare parts in a new container I got , I finally found the missing propeller to the Fokker Friendship! It was in that container marked "Propellers, Blades and Rotors": 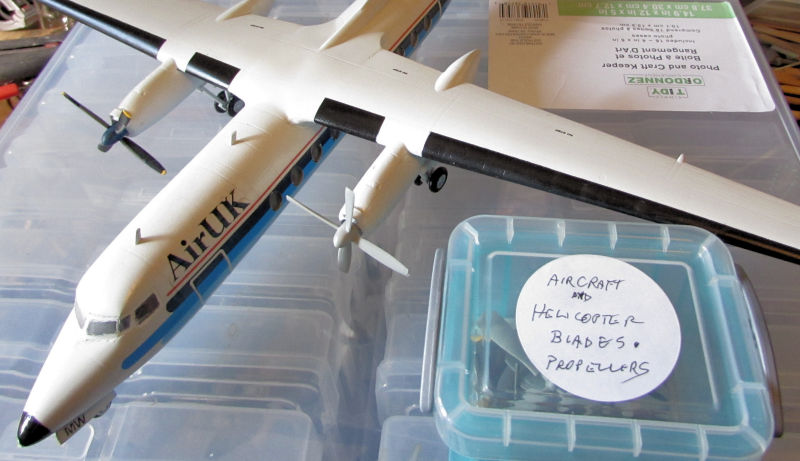 Naturally I had to paint it like the other one so I got started: 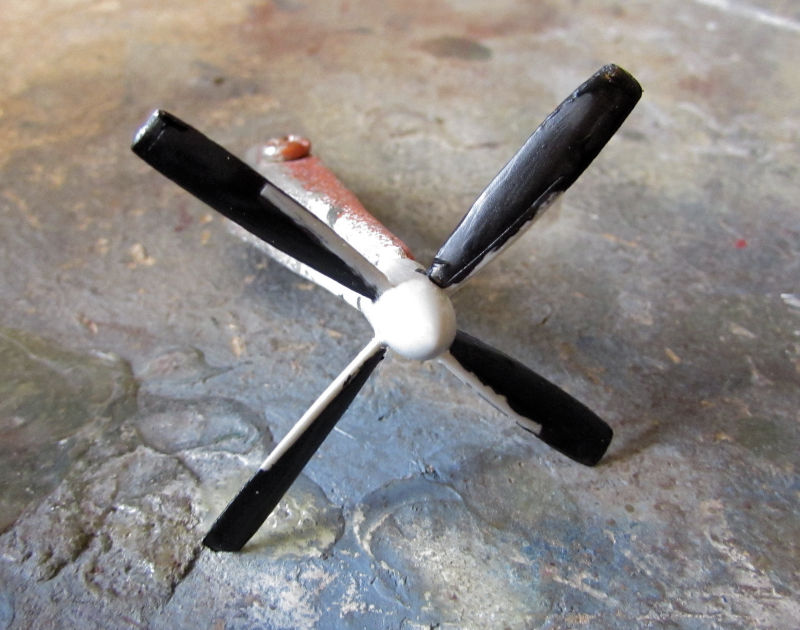 I cleaned that up a bit and finished the painting of the whole thing: 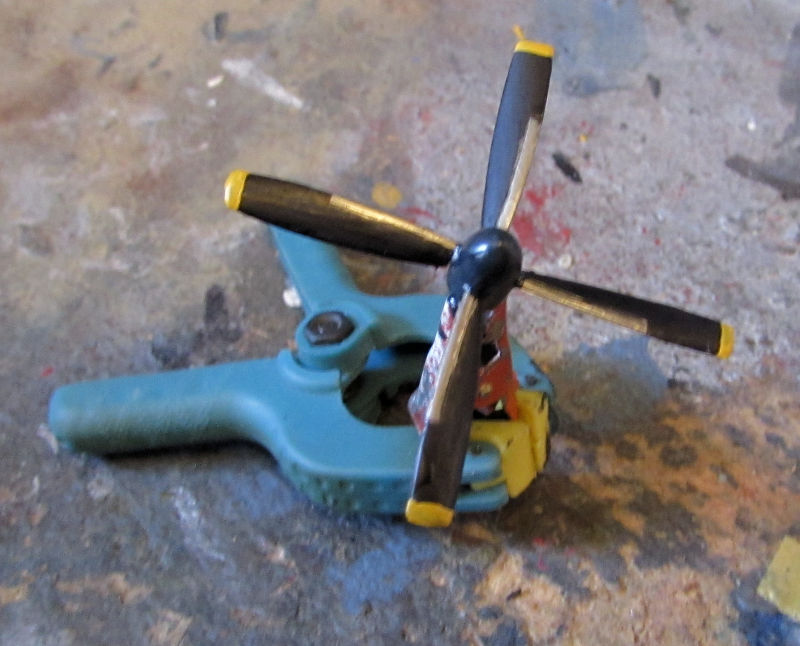 Now that I got that finished, I'll post my new pics of the finished plane in the Aircraft section... After that, I decided to see how the pews looked so I punched one out and assembled it. Pretty cool: 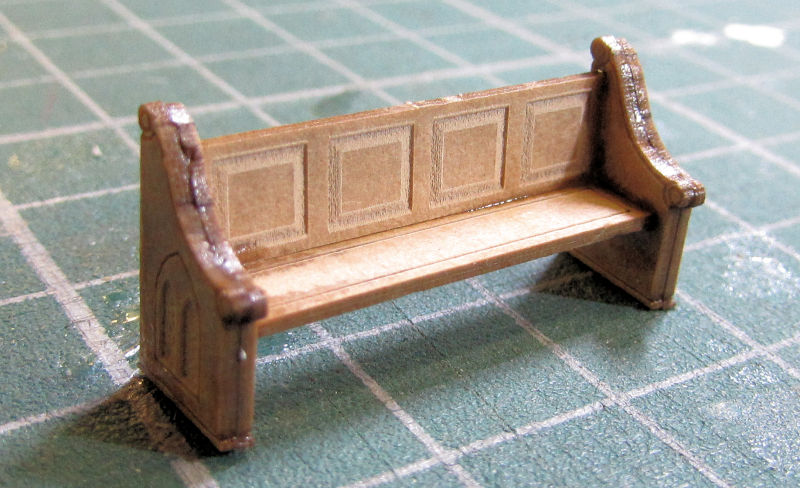 Each square on the mat is 1 inch in size if I recall. That will give you some idea of how small that is. Moving on to our Hanger, here is the work I did on the Marine Harrier to prepare it for paint. First after masking the canopy, I added the extra part in front of the wing; dry fitting the whole assembly and gluing it together on the fuselage but not to the fuselage. That is why you see it removed here. I also was able to pull the front exhaust cans off thanks to poly caps inside. The rear ones wouldn't come out so I taped them with the rest of the things I needed to mask: 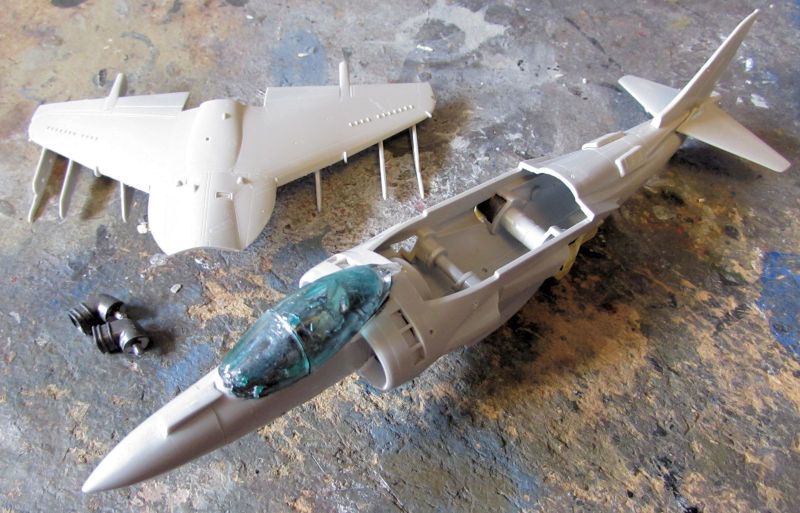 I then dry-fit it together again to have it ready to shoot when I break out the airbrush: 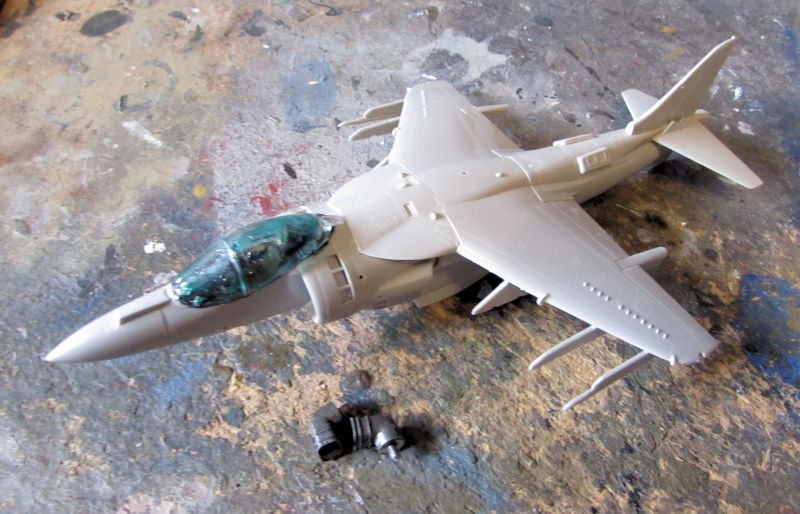 My next project was the F-117 that I'm building to replace the one that was stolen. I'd had it all assembled already so I flipped it over and shot white in the gear bays and bomb bay. I used a rattle can, that is why it is everywhere. I also had shot the landing gear parts, the inner gear doors and the inner bomb bay doors: 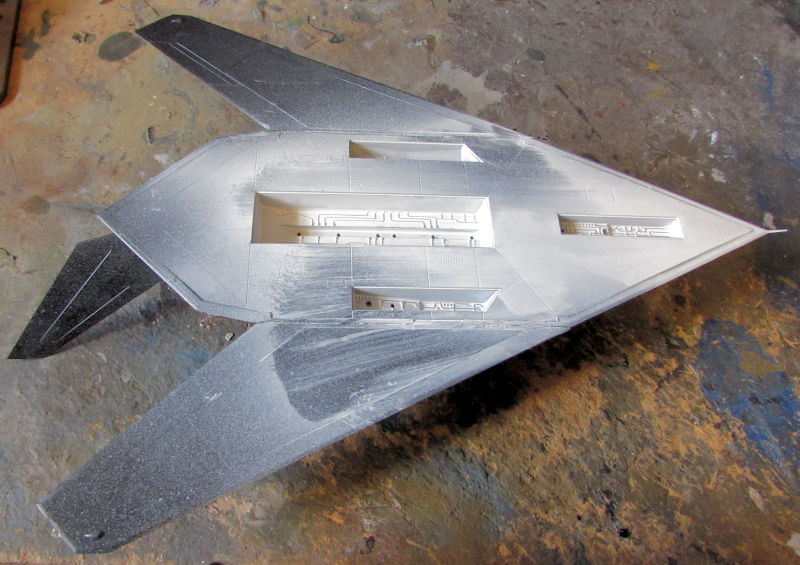 After that dried overnight, I placed the gear doors and bomb bay doors in place without glue and shot the flat black all over the bottom of this plane: 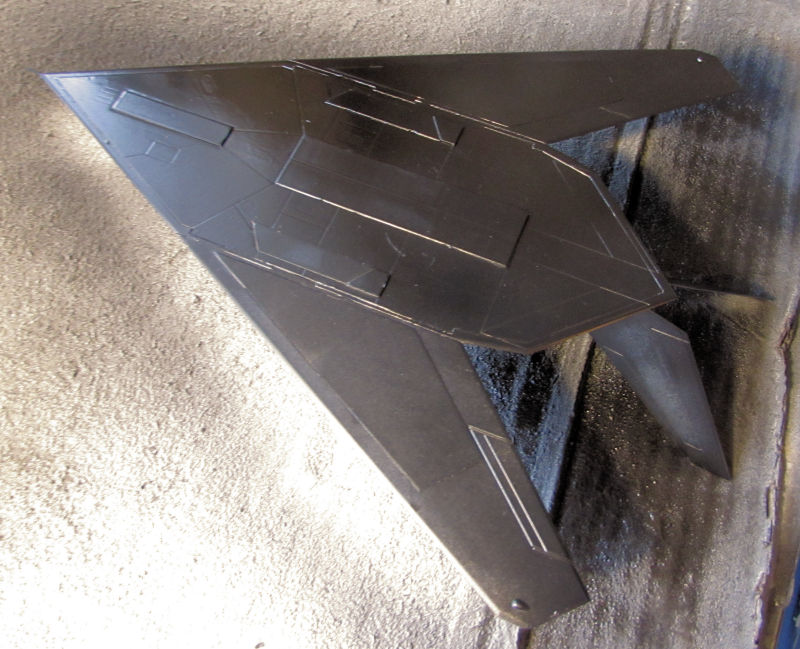 Yes, they are raised, but I'm building this with everything open so I'm not worried about it. Once that was dry, I flipped it again and shot the top with the flat black: 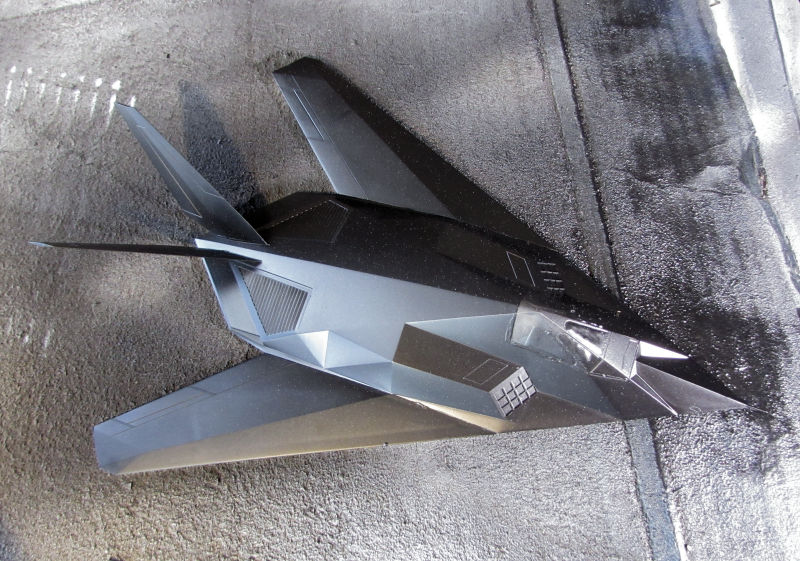 I love how the doors underneath stayed in place! Next up is a detour to the shipyards again because I laid the keel on a new landing craft, this time an LCM from the Dragon 2in1 kit. I now have three landing craft under construction that I need to get done: 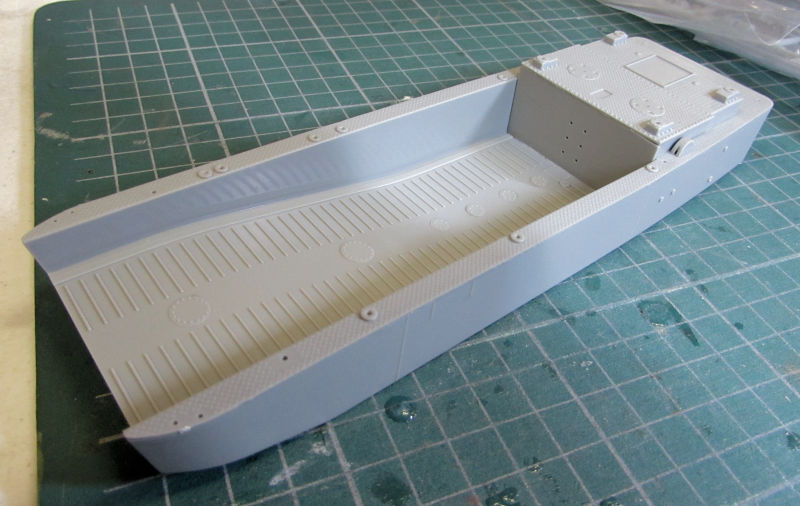 While here, we can check out the Emden. I didn't do much to it, simply taping off the hull and painting the black boot stripe on it: 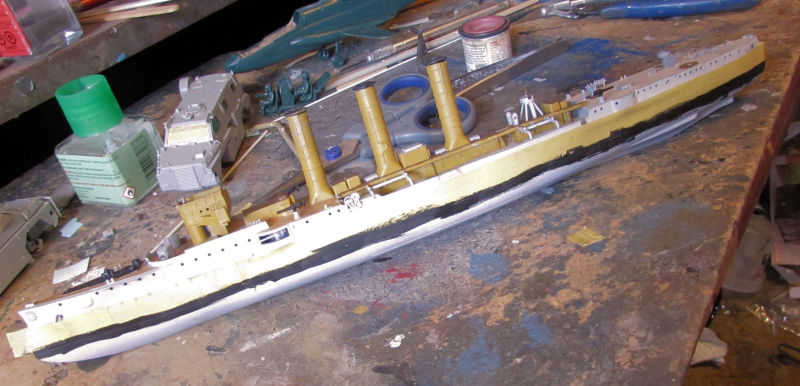 Later I taped that boot stripe off, masking it for the lower hull paint. I searched around a bit and finally found what I believe to be a suitable enough hull red by Humbrol. Hopefully I'll be able to get it painted soon. Now that we've seen that, it's on to the Motor Pool section to see the latest vehicles under construction. First off, I decided to start one more of my birthday presents, the Roden pakwagen. The instructions have you start with the gun: 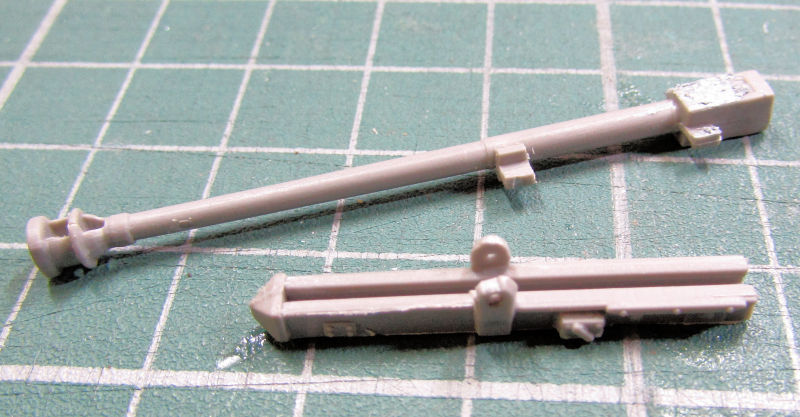 This was quite fiddly, but with a little careful sanding; I was able to slip that gun into the cradle without needing to glue it as you see here. I also added the rest of the details for the gun cradle: 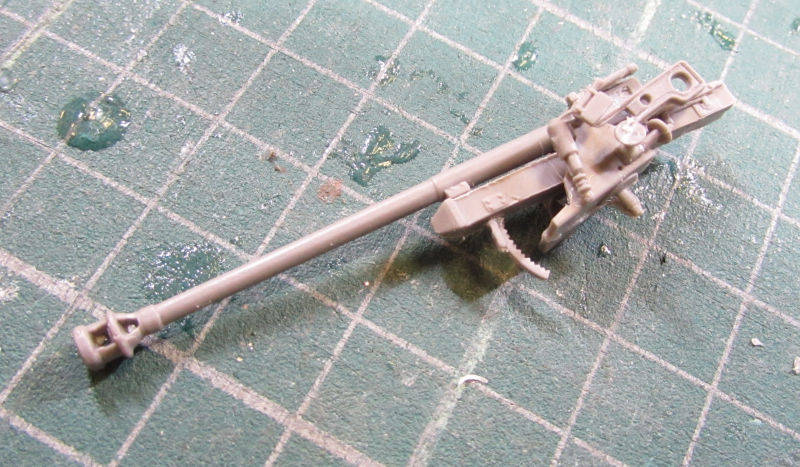 Finally the gun shield went on, but not without a fight. This was nearly impossible to keep properly positioned without five hands, but I managed to get it looking right.... so far: 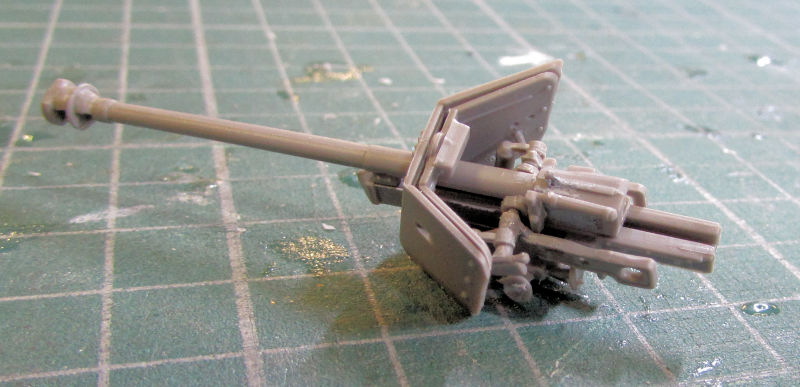 After that, I built the fenders. Simple assembly. I simply had to add all those doors to them:  I then glued them onto the lower hull and added the interior details:  After that, I got the side walls on the top hull: 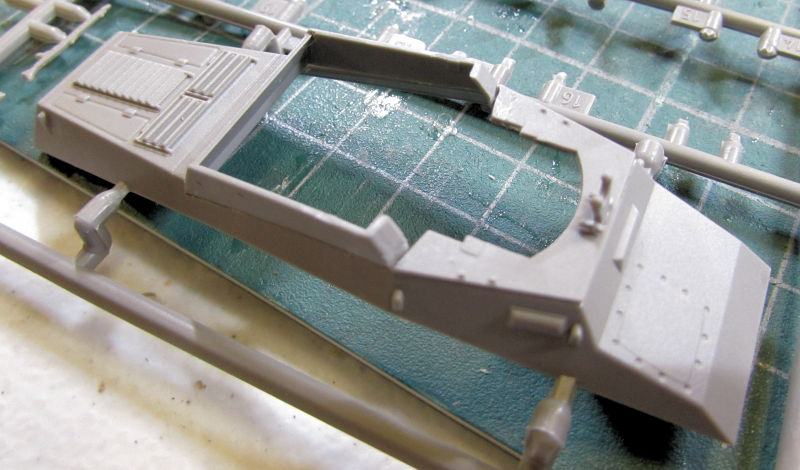 That's probably going to need some filler.... Moving on, I started a little Japanese mortar towing truck that I got for Christmas. It was a fast little thing to build! I left off the engine cover because there's a few more things that have to go on the front of this first: 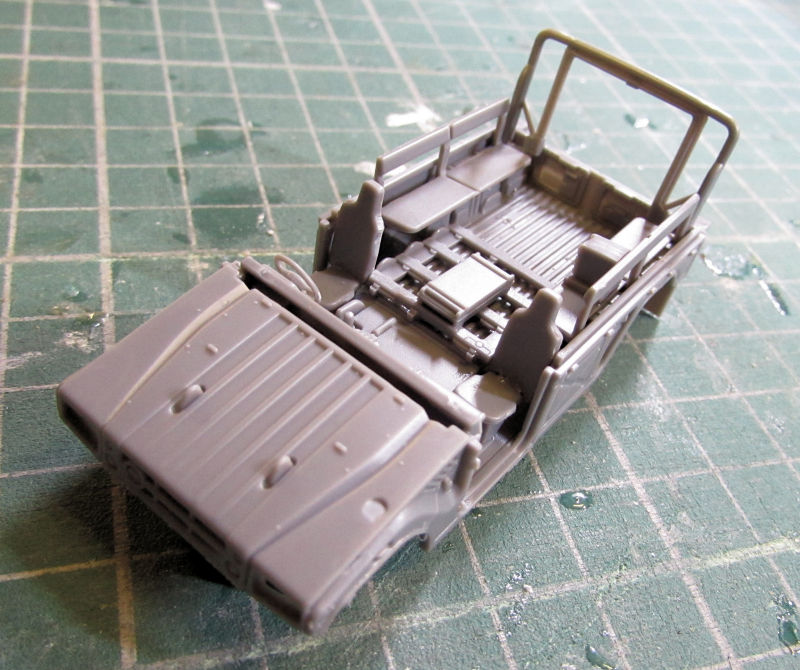 Here it is sitting next to the 120mm mortar it tows. I'll be keeping this one in the firing position. Since there's two models in this kit, I'll make the other one towed: 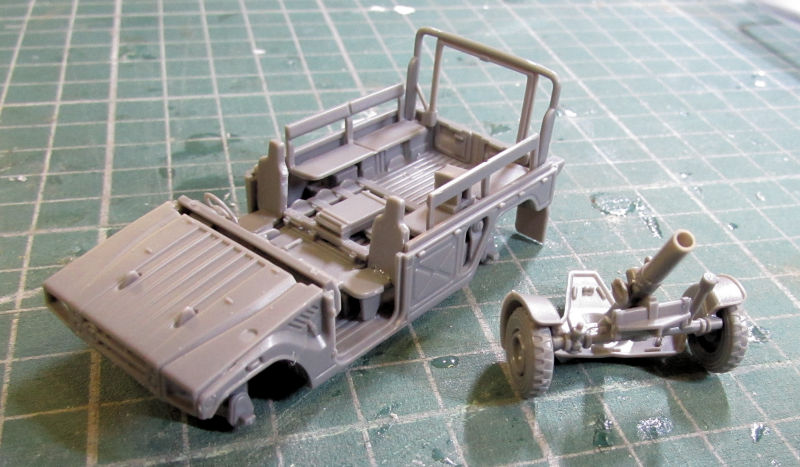 That is all I have for this week. Not much in the way of vehicles, but I have a shipload of them to paint so next time might be quite an extensive tour. until then, thanks for joining and comments are welcome. |
|
|
|
Post by Paul B on Mar 24, 2022 7:41:22 GMT
You are a darned machine Mr.D  . All looking very cool indeed, specially that pew  |
|
|
|
Post by dukemaddog on Mar 24, 2022 17:44:52 GMT
Thank you Paul! Some days I feel like this 'machine' is wheezing along without oil, but at least I can see some progress so far.
Yeah, I like the pew as well. I should place it inside the church to see how well it looks.
|
|
|
|
Post by Snipersmudge on Mar 24, 2022 19:59:01 GMT
another serious feast for the eyes!
|
|
|
|
Post by Robbo on Mar 24, 2022 20:16:05 GMT
All these lovely builds going on in here
|
|
|
|
Post by PorcoRosso on Mar 25, 2022 7:54:44 GMT
A magnificent amount of builds Duke.
|
|


 , top work Mark


 .
.